Performance, Testing & How-To’s

Gloved hand adjusting jet ski throttle lever

Why Jet Ski Throttle Response Matters for Racers

Throttle response determines how quickly your jet ski converts wrist input into usable thrust. It is not the same as peak power. Throttle response is the rate at which power output changes after a rider requests acceleration, and on a PWC that rate is shaped by every component between your thumb and the water leaving the jet pump. IPD Racing and Jet Works both build parts that directly target this system, and the two mechanical chokepoints that matter most are the jet pump assembly and the electronic throttle control (ETC) or throttle position sensor (TPS).

Three rider impacts stand out:

  • Launch and holeshot: Faster thrust delivery off the line shortens the time your hull spends in the water before it planes, directly affecting race starts and buoy turn exits.
  • Corner exit and trim control: Crisp response lets you modulate power precisely on corner exit, keeping the bow trimmed through chop instead of hunting for grip.
  • Emergency inputs: Predictable, immediate power is a safety asset. A soft or delayed response during a collision-avoidance maneuver can eliminate the reaction window you need.

Key Takeaways

Throttle response is a whole-system attribute controlled by the jet pump, throttle body, TPS, ECU mapping, and fuel delivery working together. Address pump hardware first before any ECU work.

Point Details
Response vs. peak power Throttle response is the rate of power change after input, not the maximum power the engine produces.
Pump condition comes first Worn wear rings and impeller damage cause most perceived hesitation; inspect these before chasing ECU or sensor faults.
Throttle body and TPS Cleaning the throttle body and replacing a faulty TPS restores crisp response at low cost on any fuel-injected PWC.
ECU reflash trade-offs A reflash sharpens the throttle curve and raises RPM limits but increases fuel use and may affect emissions compliance.
IPD Racing model fitment Use IPD Racing’s Shop by Model pages to match impellers, wear rings, and throttle components to your specific platform.

Table of Contents

Why jet ski throttle response matters: the system mechanics

Throttle response is defined as the time-rate change of delivered power after a throttle request, distinct from the maximum power the engine can produce. A high-horsepower engine with sluggish response still feels slow off the line.

The signal path on a modern fuel-injected PWC runs like this:

Rider input → TPS/throttle cable → ECU mapping/ETC → throttle body/fuel injectors → engine torque → impeller → water thrust
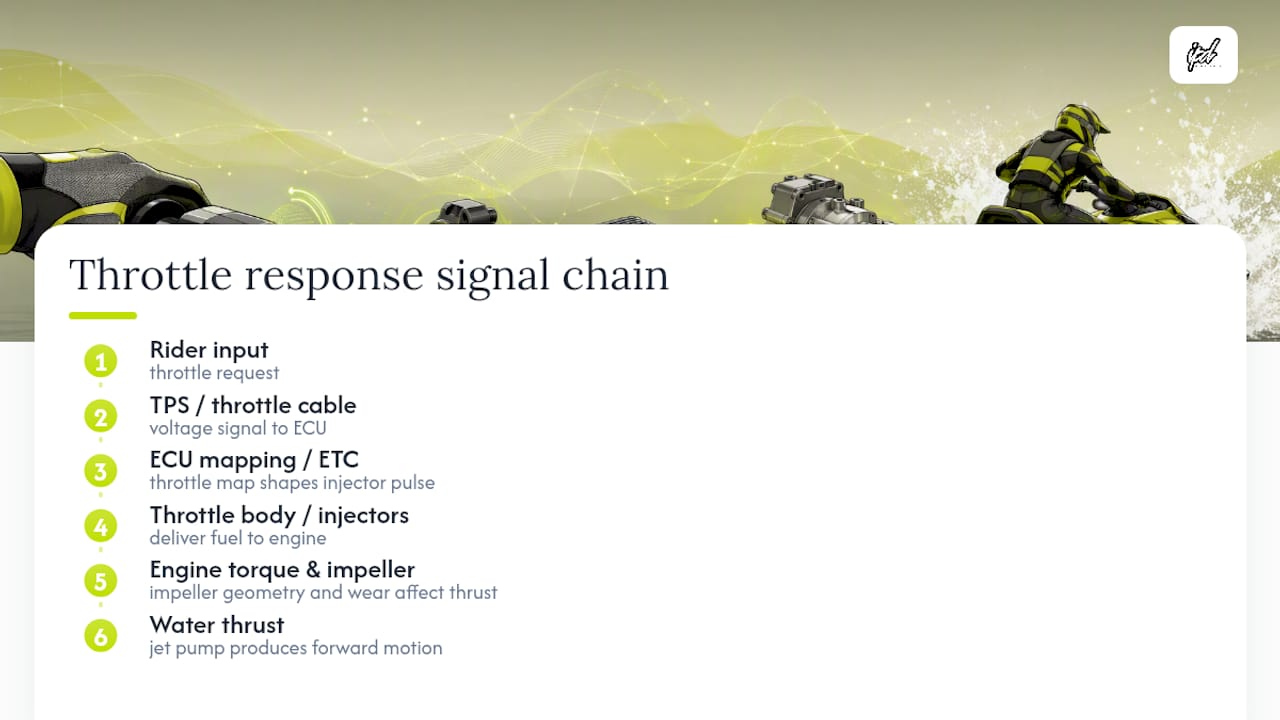
Diagram of jet ski throttle response system components

Each stage can add delay. The ECU applies a throttle table that shapes how aggressively it translates TPS voltage into injector pulse width. Factory maps often include deliberate damping for fuel economy and emissions compliance. After the engine produces torque, the jet pump translates that torque into thrust, and impeller geometry, wear ring clearances, and intake grate condition all affect how immediately that thrust reaches the water. A worn wear ring bleeds pressure before it ever becomes forward motion.

Research on adaptive throttle pedal mapping confirms that tuning throttle curve progression to rider preference measurably improves subjective performance feel, which is exactly why ECU reflash services target the throttle table first.

How throttle response changes your riding and race results

The gap between immediate and delayed response shows up most clearly at race starts. A rider with crisp response planes out faster, reaches buoy speed sooner, and carries more momentum into the first turn. A rider with soft response loses ground in the first 50 feet and spends the rest of the lap trying to recover it.

Corner exit behavior is where racing jet ski trim and throttle response intersect. A well-tuned response lets you feed power back in smoothly as the hull settles, keeping the bow from washing wide. A delayed or jumpy response forces you to either wait longer before rolling on the throttle or risk a bow-high push that loses the line.
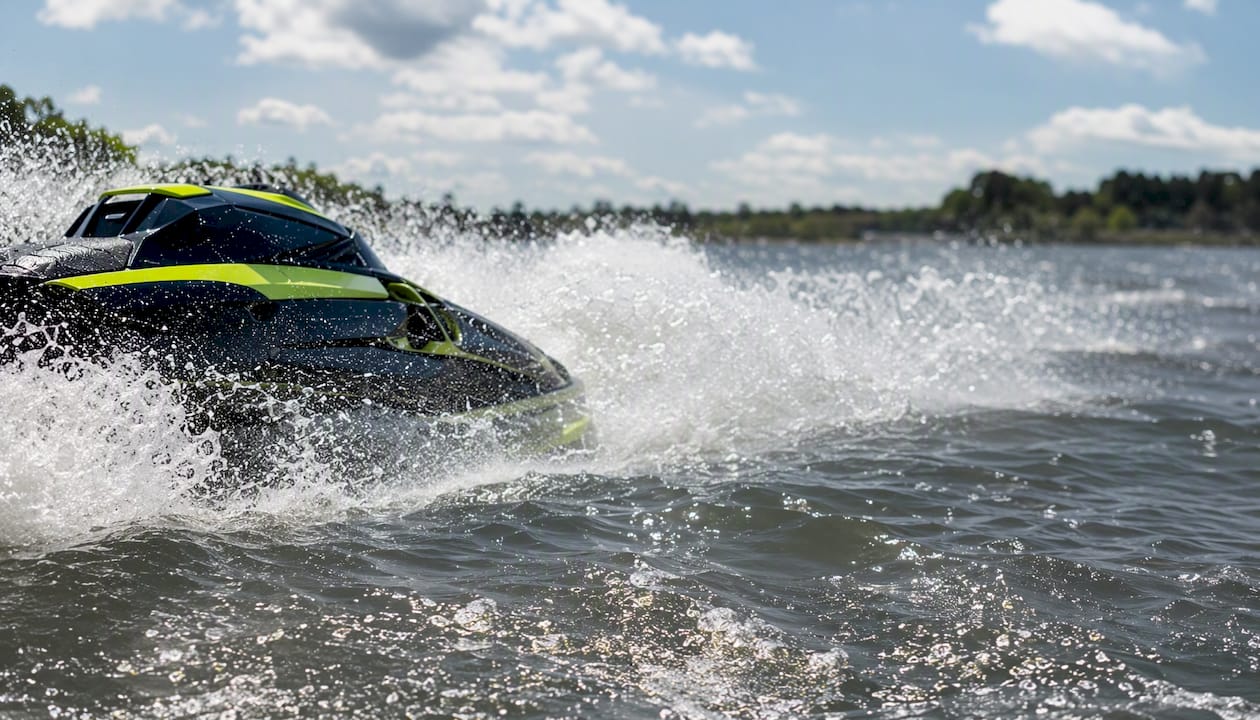
Jet ski spraying water exiting a corner turn

Riding Context Throttle Response Priority Key Concern
Racing (Watercross, offshore) Critical Holeshot, buoy turn exits, lap time
Recreational riding Moderate Comfort, fuel economy, predictability
Freestyle High Precise modulation for trick timing and recovery

Safety scenarios deserve equal weight. In choppy water or a crowded course, a predictable throttle response gives you confidence to make quick, controlled inputs. A racer running a technical wave section reported that after addressing a worn wear ring and cleaning the throttle body, the craft felt “connected” again, with no hesitation between input and thrust. That consistency is what separates a manageable situation from a close call.

Why does throttle response go soft? Common causes and quick checks

Modern fuel-injected PWCs can suffer poor response from dirty throttle bodies, carbon buildup, or faulty TPS sensors, leading to rough idle, sluggish acceleration, and higher fuel consumption. Electronic throttle control systems and fuel-economy-oriented ECU maps also introduce deliberate throttle delay, and mechanical faults compound that factory damping.

Quick physical inspection checklist:

  1. Inspect the impeller and wear ring. Look for blade nicks, erosion, and visible gap between the impeller and wear ring. Excessive clearance bleeds thrust directly.
  2. Check the intake grate. Debris, bent bars, or heavy fouling restrict water flow into the pump and starve thrust delivery.
  3. Inspect the throttle cable. A frayed, kinked, or sticky cable introduces mechanical lag before the TPS even registers input.
  4. Check the throttle body and TPS. Carbon buildup on the throttle plate or a dirty TPS connector causes erratic signal and hesitation.
  5. Review ECU fault codes. A stored code for MAF sensor, TPS voltage out of range, or fuel pressure fault points directly to the cause.
  6. Check fuel delivery. A clogged fuel filter or weak fuel pump produces a lean stumble under hard acceleration.

Quick diagnostic checks:

  • Throttle snap test (at dock): With the engine warm and in neutral, snap the throttle quickly. A healthy engine responds immediately with a clean RPM rise. Stumble or delay points to throttle body, TPS, or fuel delivery.
  • Idle-to-WOT observation: On a calm water run, note whether RPM climbs smoothly and continuously or hesitates in a mid-range band.
  • Check Engine light: Never ignore a stored fault code before a race or a long ride. Pull codes with a compatible OBD/dealer tool before diagnosing further.

Pro Tip: Always address pump-end issues before chasing ECU or sensor faults. A worn wear ring or clogged intake grate mimics engine hesitation almost perfectly, and replacing a wear ring costs far less than an ECU reflash that solves nothing.

How to test throttle response on the water

Run these steps on a calm, open stretch of water with no boat traffic.

  1. Warm the engine fully. Ride at moderate speed for 3–5 minutes before any test run. Cold engines produce inconsistent results.
  2. Establish a baseline run. From a standing start, squeeze to wide-open throttle (WOT) and note the qualitative feel: immediate, mild delay, or jumpy/sticky. Do this three times and average your impression.
  3. Time a controlled acceleration run. Use a handheld GPS unit or similar timing device to record 0–20 mph or 0–30 mph elapsed time. A stopwatch works as a secondary check. Log the water conditions, temperature, and fuel level for each session.
  4. Observe RPM rise behavior. If your craft has a tachometer or gauge display, watch how quickly RPM climbs from idle to WOT. A healthy system climbs steadily. A plateau or dip in the mid-range signals a lean condition or throttle body fault.
  5. Compare pre/post results. After any part swap or tune, repeat the same run under the same conditions. GPS data makes the difference objective.

What each response pattern likely means:

  • Immediate, linear: Pump, throttle body, and ECU mapping are all healthy.
  • Mild delay, then normal: Factory ECU damping or slight throttle cable drag. A candidate for ECU throttle table adjustment.
  • Jumpy or surging: TPS fault, dirty throttle body, or impeller cavitation from a worn wear ring.
  • Flat or stumbling: Fuel delivery restriction, fouled injectors, or a significant pump clearance issue.

When qualitative testing points to ECU mapping, ECU remapping can alter throttle tables to reduce gas delay and improve propulsion accuracy. At that stage, a wideband-backed dyno tune or a professional ECU log session gives you data to work from rather than guesswork.

Upgrade options that sharpen response — and what you trade away

Upgrade Effect on Response Trade-off Best For
Impeller swap (performance pitch) Significant improvement in thrust delivery Higher engine load, must match engine output Racers, advanced enthusiasts
Wear ring replacement Restores lost pump efficiency Low cost, no real downside All riders, first fix to try
Intake grate upgrade Improves water flow to pump Minimal, slight handling change Racers, freestyle riders
Throttle body cleaning / TPS replacement Restores crisp signal and idle quality Low cost, no trade-off All fuel-injected PWCs
ECU reflash / throttle table remap Removes factory damping, sharpens curve Higher fuel use, possible emissions impact, may void warranty Racing, performance builds
Fuel system service (filter, injectors) Eliminates lean stumble under load Routine maintenance cost All riders showing hesitation

An ECU reflash typically improves throttle response, raises RPM limits, and increases top speed, but it affects fuel consumption and emissions. For competition use, that trade-off is straightforward. For a recreational craft used daily, the fuel cost and potential warranty impact deserve consideration.

For model-specific fitment on impellers and wear rings, the Jet Works performance tuning parts lineup covers fuel, carburetor, and cooling upgrades matched to specific platforms. Aggressive engine modifications, including turbo kits, require matching pump hardware to avoid reliability problems. The jet ski turbo kit overview covers what that matching process looks like in practice.

Pro Tip: Always address pump hardware before an ECU reflash. A worn wear ring or mismatched impeller will waste the gains from any remap and can mask whether the tune is actually working.

Upgrade sequence for racers:

  • Wear ring and impeller first
  • Intake grate and throttle body service second
  • ECU reflash or throttle table remap only after mechanical issues are resolved

The scenarios where throttle response really decides the outcome

Watercross starts and buoy turns are where immediate response separates podium finishes from mid-pack results. At a Watercross event, the gap between a crisp response and a half-second delay is often the entire margin between first and third off the line. That is not an exaggeration. Factory ECU maps are calibrated for a broad range of riders and conditions, not for a competitive start gate.

Freestyle riders face a different version of the same problem. Trick timing depends on precise, repeatable power modulation. A throttle that surges or hesitates mid-maneuver disrupts the timing window for a backflip or a barrel roll entry. Recreational riders have the most tolerance for factory response, and for them, the fuel economy and reliability of a stock tune are genuine advantages worth keeping.

The practical question is whether the riding you do actually demands a sharper response. If you race or ride freestyle competitively, the answer is yes, and the pump-first upgrade sequence above is the right starting point. If you ride recreationally and your craft feels hesitant, a throttle body cleaning and wear ring inspection will likely restore the feel you expect without any ECU work. For anything beyond that, consult a professional tuner with dyno access rather than reflashing blind. The PWC tuning best practices guide covers when professional help is the right call.

IPD Racing has the parts and support to get your response dialed in

Riders who have worked through the troubleshooting steps above and know what they need will find impellers, wear rings, throttle components, and performance fuel system parts at IPD Racing. The catalog covers Sea-Doo, Yamaha, Kawasaki, and other platforms, with model-specific fitment guidance so you order the right part the first time.
IPD Racing

For racers building a competitive setup, the Hot Products performance parts lineup includes engine, exhaust, and PWC upgrade components proven in race conditions. Before ordering any pump or engine component, use the Shop by Model pages to confirm fitment for your specific hull and engine combination. Getting the right match between impeller pitch, wear ring clearance, and engine output is what makes the upgrade work. Browse by model now and build the setup your craft actually needs.

Sources

Close-up of PWC freeride wetsuit detail on dock

PWC Freeride Wetsuit Options: Rider’s Buying Guide

For freeride PWC riding, the IPD Racing ProForce and ProWatercraft ride-suit lines are top recommendations, built specifically for the mobility, wind-chill protection, and abrasion resistance that high-speed jet ski use demands. If you need a budget entry point, a PWC-specific Long John or 2-piece John-plus-ride-jacket combo under $150 covers the basics. For cold-water or extended sessions, a premium PWC fullsuit above $250 with sealed seams and thermal lining is worth the investment.

When selecting any freeride ride suit, three criteria matter most:

  • Fit: Snug across the torso and shoulders without restricting arm rotation or cutting circulation at the wrists
  • Targeted neoprene thickness: Thicker panels (3–4mm) at the torso for thermal protection; thinner, high-stretch panels (1.5–2mm) at the arms and shoulders for mobility
  • Reinforced panels: Seat, knees, and shins need abrasion-resistant material for repeated contact with the PWC seat and hull

A wetsuit designed for surfing is not a substitute for a PWC-specific ride suit. Wind chill at speed, repeated seat contact, and the need for unrestricted handlebar reach make PWC-optimized design a practical safety consideration, not just a preference.


Table of Contents

What wetsuit styles work best for freeride PWC?

PWC wetsuits differ from surf suits in one critical way: you spend most of your time seated at speed, exposed to wind, not paddling through water. That changes which style actually performs.

Style Coverage Mobility Wind Protection Best For
Long John (sleeveless) Torso + legs Excellent arm freedom Moderate Warm water, short sessions
2-piece (John + ride jacket) Full body Good High Variable temps, longer rides
Full suit Full body Moderate Highest Cold water, extended freeride
Springsuit (short arms/legs) Partial Excellent Low Hot weather, mild conditions

Long John / John: The Long John leaves arms fully free, which suits freeride riders who need unrestricted reach for steering and tricks. Core warmth is solid; arm exposure is the trade-off.

2-piece combo: Pairing a John with a ride jacket gives you layering flexibility. You can remove the jacket when temps rise and add it back for early-morning cold. This is the most versatile setup for riders who ride across seasons.

Full suit: Maximum thermal protection and the best wind-blocking coverage. Mobility is reduced compared to a John, but modern high-stretch neoprene narrows that gap considerably. The right choice for water temperatures below 60°F or sessions lasting more than two hours.

Springsuit: Fine for hot summer days in warm water, but avoid it for high-speed freeride in open water. Wind chill at 40–50 mph drops perceived temperature fast, and a springsuit offers almost no protection against it.

  • Avoid surf-only springsuits for any freeride session involving sustained high-speed exposure or repetitive falls
  • A surf suit’s panel map prioritizes paddle mobility, not seated-position wind blocking or seat-contact reinforcement

Which features matter most in a freeride wetsuit?

Neoprene thickness and placement

Neoprene traps a thin layer of water that your body warms, so thickness directly controls how much heat you retain. For PWC freeride, the standard recommendation is 2–4mm depending on conditions. The key is where that thickness sits.

Neoprene thickness samples laid out for wetsuit zones

Body Zone Recommended Thickness Reason
Torso (chest/back) 3–4mm Thermal core protection, wind blocking
Shoulders/arms 1.5–2mm Handlebar reach, trick execution
Seat/thighs 3–4mm Abrasion resistance, impact cushion
Knees/shins 3–4mm reinforced Repeated hull contact

Seam construction

Seam type determines both warmth and durability. Glued-and-blind-stitched (GBS) seams are the baseline for PWC suits. Taped or glued-and-fused seams add a layer of waterproofing and structural strength that matters when you’re falling repeatedly or riding in cold water. Advanced seam construction reduces water ingress and adds durability in exactly the conditions freeride riders encounter.

Entry systems

Back-zip suits are easy to get on and off, which matters after a long session. The trade-off is a seam running down the spine that can allow water flushing at speed. Shoulder-entry and zip-free designs improve shoulder mobility and reduce flushing risk, but they require more careful patterning to seal properly. Zip-free and shoulder-entry systems increase stretch and warmth while reducing zipper bulk, making them a strong choice for trick-focused riders.

Reinforced and drainage panels

Seat and knee panels in abrasion-resistant material extend suit life significantly in PWC use. Some suits also incorporate drainage ports or channels in the lower legs to shed water weight after a fall, keeping the suit lighter and more comfortable through a full session.

Reinforced knee and seat panels on wetsuit

Statistic callout: PWC riders commonly select suits with thicker torso panels and thinner arm panels, reflecting the practical standard for freeride conditions across U.S. water temperatures.


Which specific options should you consider?

IPD Racing ProForce and ProWatercraft ride suits

The IPD Racing ProForce and ProWatercraft ride-suit offerings are built for PWC freeride use from the ground up. The design targets mobility at the shoulders and arms while maintaining core thermal protection and reinforced seat/knee panels for repeated hull contact. These suits sit in the mid-to-premium price band and are the first option to check for riders who want a ride-ready PWC suit without adapting a surf or dive design.

Budget category: PWC John or 2-piece under $150

At this price point, expect standard neoprene (petroleum-based), GBS seams, and basic reinforcement at the seat. Brands like Jettribe and JetPilot offer PWC-specific Johns and 2-piece combos in this range with correct panel maps for seated riding. You get the right style and basic protection; premium stretch and sealed seams are the main upgrades you sacrifice.

Mid-range: PWC fullsuit $150–$250

Suits from Slippery Wetsuits (Breaker Pro) and general surf-brand alternatives like the O’Neill Reactor II fall here. The Reactor II uses FluidFlex neoprene for improved stretch, though it is not PWC-specific in its panel map. The Slippery Breaker Pro is designed for PWC use with reinforced panels and a wind-blocking exterior. At this price, expect better seam construction and more targeted stretch zones than the budget tier.

Premium category: PWC fullsuit above $250

Above $250, suits incorporate thermal linings, firewall-style insulation layers, and fused seam construction that deliver high warmth without a large mobility penalty. Quiksilver’s Syncro line and premium Jettribe fullsuits sit here. These suits extend your riding season into colder months and hold up better under repeated abrasion.

Pair any suit with PWC neoprene boots and gloves to complete your thermal protection system, especially for early-season or late-season riding.


How should a freeride wetsuit fit on a PWC rider?

The rule is snug but not constrictive. A suit that is too loose flushes cold water freely at speed; one that is too tight cuts circulation and reduces grip strength on the handlebars. Most riders size down slightly for a second-skin fit to minimize flushing, but over-tight suits cause their own problems.

Fit checklist before buying or ordering:

  • Take chest, waist, hip, and height measurements and compare to the brand’s size chart, not a generic chart
  • Perform a shoulder rotation test: raise both arms fully overhead with the suit on
  • Simulate the seated riding position: sit down and check that the suit does not pull tight across the lower back or bunch at the knees
  • Check wrist and ankle seals for snugness without numbness
  • Confirm no excess material bunches at the armpits or behind the knees, which creates pressure points at speed

Common fit red flags:

  • Suit gaps at the lower back when seated (water flushing risk)
  • Restricted arm raise above shoulder height (handlebar reach problem)
  • Numbness in fingers or toes within five minutes of putting the suit on
  • Excess neoprene folding at the crotch or behind the knees

How do you care for a PWC wetsuit between sessions?

Rinse the suit with fresh water immediately after every session, inside and out. Salt and chlorine degrade neoprene and seam adhesive faster than almost anything else. Hang it inside out in the shade to dry, then turn it right-side out once the interior is dry.

Storage and maintenance steps:

  • Store flat or on a wide padded hanger; wire hangers crease neoprene and stress seam lines over time
  • Keep away from heat sources, direct sunlight, and petroleum products
  • Lubricate zippers with a silicone-based product after every few sessions; never use petroleum-based lubricants
  • Inspect glued seams at the start of each season and apply neoprene cement to any lifting edges before they open further
  • Wash with a wetsuit-specific cleaner or very mild soap; no bleach, no standard laundry detergent

Pro Tip: If a seam starts to lift mid-season, a small tube of neoprene cement in your gear bag lets you press it back down and let it cure overnight, preventing a minor separation from becoming a full delamination by the end of the season.


Why does PWC-specific wetsuit design change safety and comfort?

Wind chill at PWC speeds is the factor most riders underestimate. At 40 mph, even 75°F air feels significantly colder on wet neoprene, and sustained exposure without wind-blocking panels accelerates heat loss from the torso. A surf suit’s smooth-skin exterior panels are placed for paddle efficiency, not seated wind exposure, which is why the panel maps differ.

Reinforced seat and knee panels address a separate problem: repeated contact with the PWC seat and hull during tricks, falls, and re-mounting. Material and reinforcement choices directly change abrasion resistance and suit longevity in these high-contact zones. A suit without reinforcement in these areas wears through in a single season of active freeride use.

PWC-specific design is not a marketing distinction. Wind panels, thickness mapping, and reinforced contact zones each address a real physical condition that a standard surf suit does not account for.

IPD Racing’s safety gear guidance positions the ride suit as part of a complete protective system alongside impact vests, helmets, and boots. A wetsuit alone is not a complete safety solution for freeride riding.


How long does a PWC wetsuit last?

A well-maintained PWC suit typically lasts three to five seasons of regular use. The failure points are predictable: seam delamination at high-flex zones (shoulders, knees), zipper failure from salt corrosion, and neoprene compression loss at the seat and torso panels.

PWC conditions accelerate wear compared to surfing because of repeated seat contact, frequent falls, and the abrasive texture of most PWC seat covers. Cover material and reinforcement choices in seat-contact zones are the single biggest factor in how long a suit survives active freeride use. A suit with standard neoprene at the seat may show visible wear within one season; a reinforced panel suit holds up considerably longer.

Zipper care is the other major lifespan factor. A corroded or stiff zipper stresses the surrounding neoprene every time you open and close it. Consistent silicone lubrication after each session extends zipper life by multiple seasons.


How do suit materials compare beyond standard neoprene?

Standard petroleum-based neoprene is the baseline. It is durable, widely available, and cost-effective, but it is heavier and less flexible than newer alternatives.

Limestone neoprene (used in suits like the O’Neill Hyperfreak Fire) is produced from calcium carbonate rather than petroleum. It is lighter, softer, and more flexible out of the box, and it retains those properties longer as the suit ages. The trade-off is a higher price point.

Thermal linings (Firewall, ThermoFlex, and similar proprietary systems) add an insulating layer inside the neoprene that traps heat more efficiently than bare neoprene alone. Thermal linings and sealed seam construction increase warmth while retaining workable flexibility, which is why premium suits can deliver 4/3mm warmth in a suit that moves closer to a 3/2mm.

For freeride riders, limestone neoprene in the shoulder and arm panels is a meaningful upgrade. It reduces the resistance you feel when reaching for the handlebars or executing tricks, and it holds its stretch properties through more compression cycles than standard neoprene.


What impact protection features matter for freeride falls?

Falls at PWC speeds involve water-surface impact, hull contact, and sometimes equipment contact. A wetsuit’s neoprene provides baseline cushioning, but the thickness and panel placement determine how much protection you actually get.

Reinforced panels at the seat, knees, and shins absorb the most common impact zones. Some PWC-specific suits add a thin foam or impact-absorbing layer in the seat panel. This is distinct from a full impact vest, which is a separate piece of gear. The IPD Racing safety gear checklist treats the wetsuit and impact vest as separate, complementary components of a complete protective system.

For freeride riders performing tricks or riding in competitive conditions, wearing an impact vest over or under the wetsuit adds meaningful protection that neoprene alone cannot provide.


Key Takeaways

For freeride PWC riders, the right wetsuit combines a PWC-specific panel map, targeted neoprene thickness (3–4mm torso, 1.5–2mm arms), reinforced seat and knee panels, and an entry system that preserves shoulder mobility.

Point Details
PWC suits differ from surf suits Wind panels, reinforced seat zones, and thickness mapping address seated riding conditions a surf suit ignores.
Thickness placement matters Use 3–4mm at the torso and seat; keep arms at 1.5–2mm to preserve handlebar reach and trick mobility.
Fit is snug, not tight Size for a second-skin fit to minimize water flushing at speed; over-tight suits reduce grip and endurance.
Maintenance extends lifespan Rinse with fresh water after every session, lubricate zippers, and repair seams early to reach three to five seasons of use.
IPD Racing ProForce/ProWatercraft IPD Racing’s ride-suit lines are built for PWC freeride use and are the recommended first stop for a ride-ready suit.

The detail most riders skip when buying a freeride suit

Most wetsuit buying guides focus on thickness and price. Those matter, but the single most overlooked spec in freeride PWC wetsuit selection is the panel cut for the seated position. A suit that passes every standing mobility test can still restrict your lower back rotation and handlebar reach the moment you sit down on the PWC. That restriction is not just uncomfortable; it affects your reaction time and control during high-speed maneuvers.

The surf industry builds suits for a paddling and standing position. PWC freeride is a seated, forward-leaning, high-speed activity. The shoulder yoke angle, the lower-back panel length, and the seat-panel reinforcement are all different requirements. Riders who buy surf suits and wonder why they feel restricted on the water are not buying the wrong thickness. They are buying the wrong pattern.

That is why PWC-specific brands and lines like IPD Racing’s ProForce and ProWatercraft exist as a separate category, not just a marketing distinction. The geometry is genuinely different, and it shows the first time you push the suit through a hard turn or a re-mount after a fall.


IPD Racing ride suits: built for freeride from the start

Riders who want a suit designed around PWC freeride conditions rather than adapted from a surf or dive pattern have a direct option at IPD Racing. The ProForce and ProWatercraft ride-suit lines are built for the seated, high-speed demands of freeride riding, with reinforced seat and knee panels, targeted neoprene thickness mapping, and shoulder mobility that holds up through a full session of tricks and turns.

IPD Racing

IPD Racing carries performance apparel and PWC gear across the full range from recreational to competitive freeride. Size guides and product specs are available directly on the product pages. Browse the IPD Racing shop to check current ProForce and ProWatercraft availability, sizing, and specs, and contact the team directly for fit questions before ordering.


Useful sources and product references

These pages cover the specs, sizing, and technical details worth reviewing before you buy:

Close-up of PWC quick-release flush adapter connection

PWC Quick Release System: What Riders Need to Know

A PWC quick release system is a category of convenience hardware that lets riders connect, disconnect, or secure components without tools. The three most common forms are universal engine-flush hose adapters (push-to-connect or threaded couplers that attach a garden hose to the flush port), quick-release buckles on PWC covers for rapid single-person removal, and accessory or tow attachment hardware that pins or clips on and off at the dock. None of these are integrated hull performance systems. Features like Sea-Doo iBR braking or off-throttle steering are separate control technologies built into the craft. Quick-release hardware is bolt-on convenience gear.

  • Flush adapters: Male/female couplers that connect a standard garden hose to the engine flush port; compatible with Sea-Doo, Yamaha, Kawasaki, and Polaris.
  • Cover buckles: Cam or side-release plastic buckles and metal snap pins that secure a cover without tying knots.
  • Accessory/tow hardware: Pin-and-clip systems for tow plates, dock lines, and launch equipment.

Pro Tip: For coastal and saltwater use, prioritize hardware rated for marine environments. Viton O-rings and 316 stainless fittings outlast standard hardware significantly in salt spray.

Table of Contents

What does a PWC quick release system actually do for you?

Quick-release hardware shows up in four main places on a PWC setup, each solving a different problem.

  1. Cover buckles and straps let one person pull a cover off or on in seconds. Reinforced stitching and quick-release buckles are now standard on purpose-built PWC covers, replacing tie-down knots that slow you down between heats.
  2. Tow and accessory attachments use pin-and-clip systems to mount or remove tow plates, safety lines, and dock hardware without tools. The NSW Personal Watercraft Handbook lists a quick-release floating tow rope among recommended safety items for every ride.
  3. Dock and launch pins speed up storm-season removal. High-end PWC launch systems use quick-release pins so the craft can be detached from the dock and stored before a storm without breaking out a toolbox.

For racers, the value is pit speed. Pre-staged flush lines and pre-fitted cover buckles cut changeover time between heats. For coastal recreational riders, the value is corrosion protection: a flush adapter that connects in five seconds means you actually use it after every ride instead of skipping the step because it takes too long.

How each type of quick-release mechanism works

Understanding the mechanics helps you pick the right hardware and spot failures before they become problems.

Flush-kit quick-disconnect adapters use a male coupler on the hose end and a female receiver at the craft’s flush port. An O-ring seated in the female coupler creates a watertight seal under the low pressure of a garden hose. Push-to-connect variants lock with a spring-loaded sleeve; threaded variants use a few turns to seat. Both release by either pressing the sleeve collar or reversing the thread. Universal kits are designed to fit the flush ports on Sea-Doo, Yamaha, Kawasaki, and Polaris craft.

Cover quick-release hardware works on load distribution. Cam buckles grip a strap under tension and release when you flip the cam lever. Side-release plastic buckles use two spring-loaded tabs that compress inward to disengage. Metal snap pins drop into a grommet and hold under lateral load. UV exposure and repeated salt spray degrade plastic buckles faster than metal alternatives, so inspect them every season.

Detail of PWC cover quick-release buckles

Accessory and tow quick-releases follow design patterns well-documented in engineering literature. UAV mechanical release devices use captured pins engaging latch arms and motor-driven actuators for reliable payload release — the same captured-pin and latch-arm logic applies to PWC tow hardware, where a pin drops into a receiver and a clip or cotter retains it until deliberately pulled. Tensile release mechanisms in patent literature show how designers set predictable break thresholds, which informs how tow-line quick-releases are rated for load.

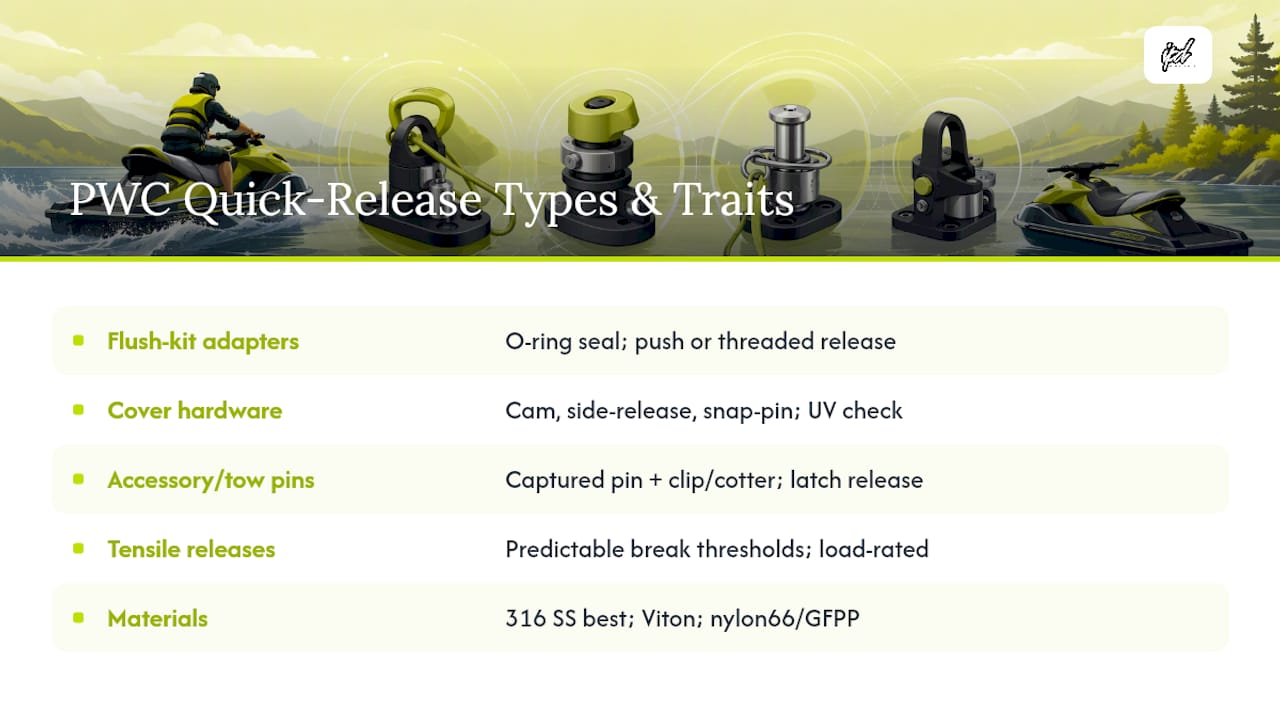
Diagram of PWC quick-release mechanism types and materials

Materials matter most in saltwater. 316 stainless steel resists chloride corrosion better than 304 stainless or zinc-plated steel. Viton O-rings handle saltwater and fuel exposure better than standard Nitrile. UV-stable polymers (nylon 66 or glass-filled polypropylene) hold up under sun exposure where standard ABS cracks.

Pro Tip: Carry a small zip-lock bag with two spare O-rings sized for your flush adapter. A $0.50 O-ring failure is the most common reason a flush adapter leaks mid-session.

How to choose the right quick-release hardware for your PWC

Category Flush Adapter Cover Buckle Tow/Accessory Pin
Primary use Engine flushing after saltwater rides Cover removal/installation Tow plate, dock line, accessory attachment
Connection method Push-to-connect or threaded coupler Cam lever or side-release tab Pin-and-clip or captive pin
Seawater suitability High (Viton O-ring, stainless body) Moderate (UV-stable polymer or stainless) High (316 stainless pin and clip)
Installation speed typically a few seconds generally fast per buckle usually quick to connect and release
Key failure mode O-ring wear, debris in seat UV cracking, stitching wear Pin corrosion, clip fatigue

Before buying, run through this checklist:

  • Fitment: Confirm your craft’s flush port diameter and thread type. Check your owner’s manual or the shop-by-model page at IPD Racing to verify compatibility before ordering.

Pro Tip: Buy a quick-connect kit that includes both male and female ends so you can standardize across multiple craft or replace either side independently.

Diagnosing and fixing common quick-release failures

Leaking flush adapter:

  • Inspect the O-ring for cuts, flattening, or debris in the seat.
  • Swap in a spare O-ring of the correct size and test under low pressure before a full flush cycle.
  • If the coupler body is cracked or the locking sleeve no longer clicks, replace the adapter entirely.

Corroded fittings:

  1. Identify the corrosion type. White powdery deposits on stainless indicate surface oxidation; pitting or black staining suggests galvanic corrosion from contact with dissimilar metals.
  2. Surface oxidation on 316 stainless can be cleaned with a marine-grade stainless cleaner. Pitting means replacement.
  3. Apply a thin coat of anti-seize compound to threaded fittings before reinstallation to prevent galling.
  4. Never use plated-steel fittings adjacent to stainless hardware in saltwater — the galvanic potential accelerates corrosion on both parts.

Worn cover buckles:

  • Inspect stitching at anchor points every season. Frayed stitching fails under load before the buckle itself does.
  • Replace brittle or cracked plastic buckles immediately. UV degradation makes them snap without warning.
  • Keep two spare buckles and a replacement strap in your maintenance kit.

Recommended spare-parts kit: two O-rings in the most common size for your flush adapter, one replacement quick-disconnect adapter, two stainless snap clips, and two spare cover buckles.

Pro Tip: Rinse all quick-release hardware with fresh water after every saltwater session, not just the engine. Salt left on buckle springs and coupler sleeves accelerates wear faster than the hardware itself.

Why racers rely on quick-release systems at the pit

Pit time is competitive time. A racer who can flush the engine, swap a cover, and re-stage gear in under three minutes between heats has a real advantage over one who spends that time wrestling with fittings and knots.

Pre-staged quick-release flush lines mean the hose is already connected to the adapter before the craft comes out of the water. The rider or technician snaps on the garden hose, runs the flush, and disconnects in one motion. Cover buckles that release with a single hand free up the other hand to hold the cover clear. For PWC watercraft tuning and pit procedures, quick-release hardware is part of the same discipline as pre-staged tools and organized toolboxes.

Pre- and post-heat checklist:

  • Visual check of adapter O-ring and coupler seat before connecting.
  • Confirm freshwater source is staged and hose pressure is adequate.
  • Inspect cover buckle tabs and stitching for any damage from the previous heat.
  • Verify tow and accessory pins are fully seated and clipped before launch.
  • Store spare O-rings and a replacement adapter in the toolbox, not the trailer.

Pro Tip: If you run multiple craft on a team, standardize on one flush adapter type across all of them. Mixed adapter types mean mixed spare-parts inventory and compatibility checks under pressure during a heat.

Race-grade quick-release parts at IPD Racing

IPD Racing

IPD Racing stocks performance and maintenance hardware for Sea-Doo, Yamaha, Kawasaki, Polaris, and other craft, including the flush adapters, cover hardware, and accessory fittings covered in this guide. When you browse the product pages, check the compatibility list for your specific model, confirm the O-ring material listed (Viton for saltwater use), and verify whether spare O-rings are included or sold separately.

For model-specific fitment, the shop-by-model tool filters parts by craft so you are not guessing at thread sizes or port diameters. If you are building out a full pit kit, the safety gear guide pairs well with the hardware choices here.

Key Takeaways

A PWC quick release system refers to convenience hardware, not an integrated performance feature. Choose seawater-rated materials, stage spare O-rings, and follow your owner’s manual installation steps to get reliable service from every component.

Point Details
Definition Quick-release systems are convenience hardware: flush adapters, cover buckles, and accessory pins, not hull performance systems.
Material priority Use 316 stainless and Viton O-rings for any saltwater application; standard Nitrile and plated fittings degrade faster.
Spare-parts kit Keep two spare O-rings, a replacement flush adapter, and two stainless clips staged in your pit bag or toolbox.
Installation sequence Attach the adapter before turning on water, start the engine per your manual, shut off water before the engine, then disconnect.
IPD Racing IPD Racing carries compatible flush adapters, cover hardware, and accessories with model-specific fitment tools at ipdracing.com.

A technician’s perspective on quick-release hardware

Most riders underestimate how much a $15 flush adapter affects long-term engine health. The hardware itself is simple. The discipline of using it after every saltwater ride is what separates craft that run clean for years from those that show corrosion damage inside the cooling passages within a single season.

The O-ring is the most overlooked part of the system. In saltwater service, Viton O-rings should be inspected every 20–30 hours of use and replaced at the first sign of flattening or surface cracking. That is a $1–2 part protecting a cooling system that costs hundreds to repair. The math is straightforward.

For racers, the bigger opportunity is standardization. Teams that run mixed adapter types across multiple craft spend more time troubleshooting compatibility than they do actually flushing. Pick one adapter, buy six of them, and put two in every pit bag. That single decision removes an entire category of pit-day problems.

Quick-release hardware is not glamorous. But it is one of the few categories where a small investment in the right parts and a consistent routine produces a measurable return in craft longevity and pit efficiency.

Useful sources and further reading

The following references were used to build this guide and are worth bookmarking for deeper reading:

Always consult your craft’s owner’s manual before performing an engine flush or installing any load-rated retrieval hardware. Manufacturer specifications for flush duration, engine-start sequence, and port thread type vary by model and year.

This article provides general maintenance and product information. For safety-critical or man-rated hardware, consult a qualified marine technician and verify current standards with the relevant regulatory authority.

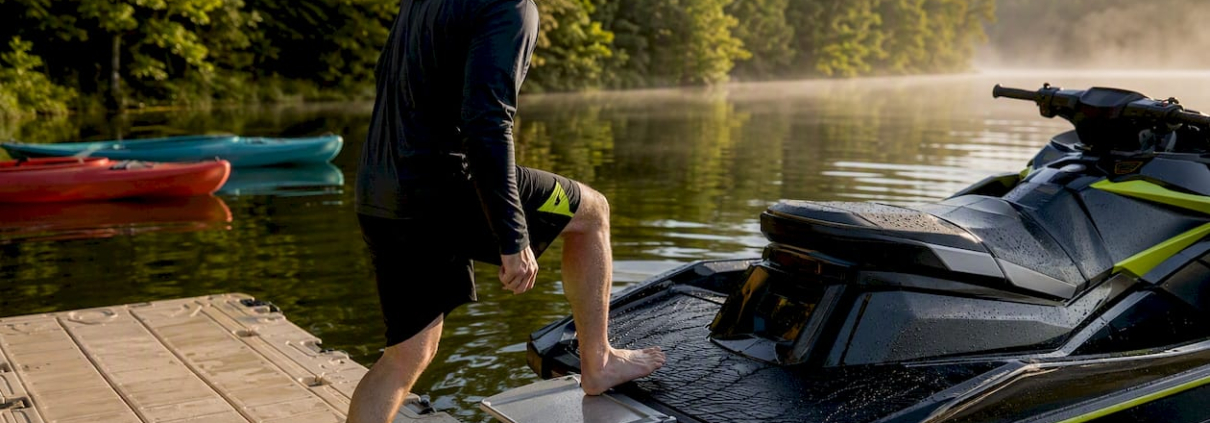
Man boarding PWC using stern step

PWC Boarding Step Explained: Types, Use, and Fit

A PWC boarding step is a purpose-built platform or ladder mounted at the stern of a personal watercraft that gives you a secure foothold for reboarding from the water. The industry term you’ll see on OEM spec sheets is “boarding ladder” or “retractable boarding step,” and both refer to the same functional category. BoatUS Foundation notes that reboarding without one requires pulling your full body weight over the stern edge from a dead float, which is physically demanding and unstable. A step shortens that vertical lift and gives you a stable surface to push from, making reboarding faster and safer for riders of all fitness levels. IPD Racing carries compatible boarding hardware for Sea-Doo, Yamaha, Kawasaki, and other major PWC platforms.

Table of Contents

What a PWC boarding step actually does

A boarding step mounts at the stern, typically on the swim platform or under-seat deck, and reduces the height you need to clear when pulling yourself out of the water. Without one, you grab the stern handle or platform edge, kick hard, and haul yourself into a kneeling position while the craft rocks. With a step, your foot finds a fixed rung or platform below the waterline, and you push up rather than pull up. That shift from a pull to a push uses larger muscle groups and keeps your center of gravity lower during the transition.

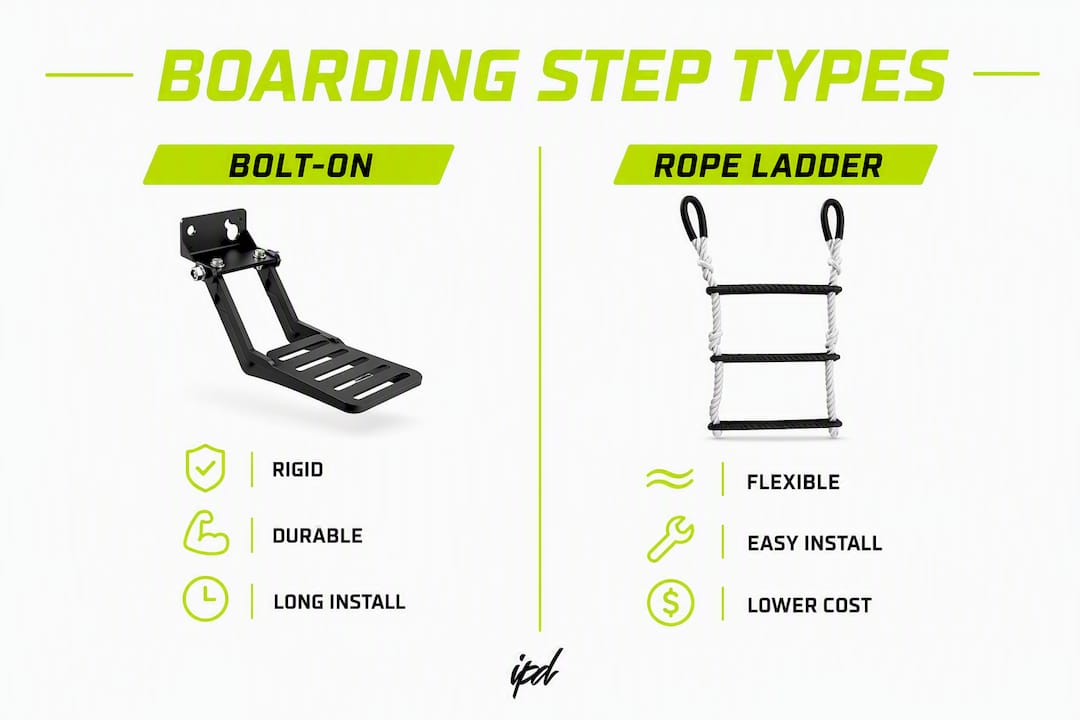
The three main form factors are:

  • Rigid bolt-on platform: A fixed step welded or bolted to the stern bracket, always deployed.
  • Flip-up/retractable step: A spring-loaded platform that stays stowed flush when not in use and drops down for reboarding. Sea-Doo’s OEM retractable boarding step (part number 295100742, replacing prior part 295100552) uses exactly this mechanism.
  • Rope ladder: A flexible nylon ladder that hangs from a cleat or tow eye when needed and stows flat when not.

Stern placement is deliberate. Boarding from the side increases capsizing risk, so every reputable boarding step design routes the rider to the rear of the craft, where the hull is widest and most stable.

Pro Tip: Visualize the step as a lever point, not just a foothold. Placing your foot on the lowest rung and pushing straight up keeps your weight centered over the centerline of the craft, which is the position that prevents roll.

Common boarding-step types and how they attach

Type Attachment Method Typical install time Durability/Maintenance
Bolt-on rigid step Deck bolts, backing plate Moderate install time High; inspect fasteners annually
Flip-up/retractable step Bolt-on to stern bracket Moderate install time High; lubricate hinge seasonally
Rope ladder (EZ Riser style) Cleat or tow-eye strap Quick install time Moderate; inspect webbing each season
Portable strap-on riser Rail hooks or strap loops Quick install time Moderate; UV degradation over time

Infographic comparing boarding step types

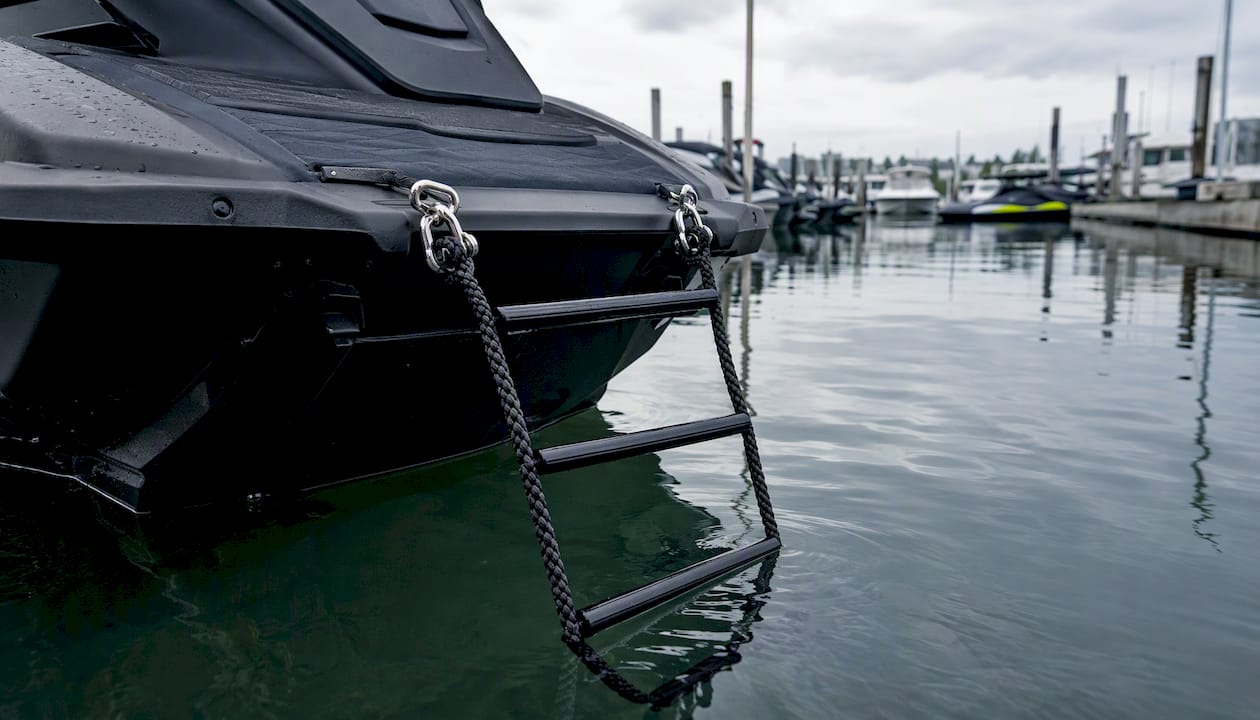
EZ Riser rope ladders from Hardline Products attach to cleats, tow eyes, or railings and fit most PWC hull forms without drilling. That makes them a practical first step for riders who want a boarding solution before committing to a permanent installation.

Rope ladder attached to PWC cleats

Bolt-on steps require drilling into the stern deck and using marine-grade fasteners with backing plates. Skipping the backing plate is a common installer error that leads to deck deformation and galvanic corrosion over time. Use stainless steel hardware and a proper bushing to isolate dissimilar metals.

Pro Tip: For bolt-on installs, dry-fit the step and check for clearance around the reverse nozzle and trim tabs before drilling. A step that contacts the nozzle during reverse operation can crack the housing.

How to reboard a PWC from the water using a boarding step

Before you approach the stern, run through these safety checks:

  1. Confirm the engine is off.
  2. Remove the safety lanyard from the craft so the engine cannot start accidentally.
  3. Verify the craft is stable and not drifting toward obstacles.

Then follow this sequence, adapted from Sea-Doo’s reboarding guidance:

  1. Approach the stern from directly behind. Never approach from the side.
  2. Deploy the step if it is a flip-up or retractable model. Rope ladders should already be hanging.
  3. Place one foot on the lowest rung or platform. Keep your body close to the hull.
  4. Grip the grab handles on either side of the seat or the stern handle. Do not grab the seat cushion.
  5. Push up with your foot while pulling with your arms, transitioning to a kneeling position on the platform.
  6. Swing one leg over the seat and sit down before reaching for the lanyard.
  7. Reattach the lanyard before restarting the engine.

If a passenger also needs to reboard, one rider boards first and stabilizes the craft from the seat before the second person uses the step.

Pro Tip: Practice reboarding in calm, shallow water until the sequence is automatic. Fatigue and adrenaline after a fall make the motion harder than it looks on a flat lake.

The BoatUS Foundation is direct on this point: if you struggle to reboard in calm conditions, avoid operating in strong currents or high waves, and treat a boarding ladder as a worthwhile safety investment rather than an optional accessory.

How to choose a boarding step that fits your PWC

Fit is not universal. A step that works on a Sea-Doo GTX will not necessarily clear the pump housing on a Yamaha FX Cruiser. Check these specs before ordering:

  • Weight capacity: Always verify the published rating on the product spec sheet. Rope ladders and bolt-on steps carry different ratings; never assume.
  • Step footprint: Width and depth of the platform or rung. Wider is more stable; deeper gives more foot support.
  • Stowage clearance: For retractable steps, confirm the folded profile clears the trailer bunks and any hull graphics.
  • Hinge/retraction clearance: Measure from the mounting surface to the reverse nozzle at full swing.
  • OEM vs. universal fit: OEM steps use model-specific deck hole spacing and bracket geometry. Aftermarket universal steps often include adapter plates but require measuring the mounting surface width.

To verify model compatibility, locate the part number in your OEM parts diagram (available through your Sea-Doo, Yamaha, or Kawasaki dealer portal) and cross-reference it against the aftermarket product’s fit list. For PWC tuning and weight distribution considerations, a step that adds weight at the stern can affect trim on performance-oriented craft.

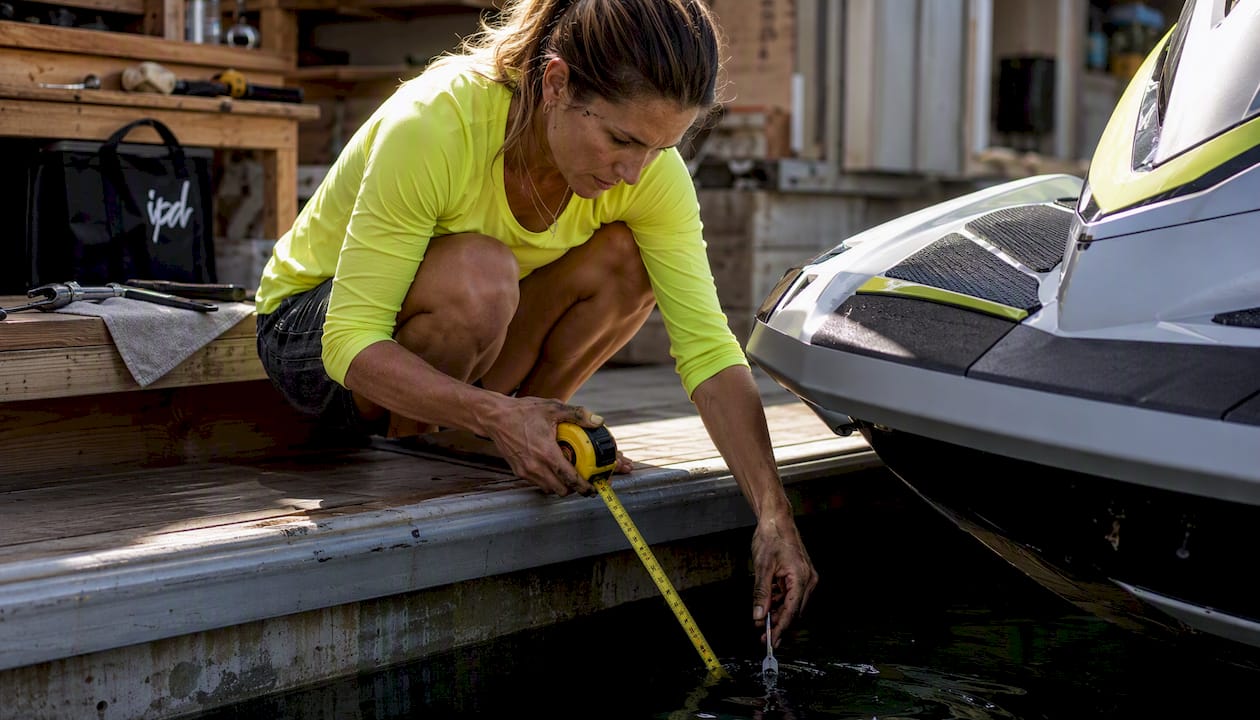
Pro Tip: Measure the distance from your platform edge to the waterline at rest with a rider seated. That number tells you the minimum step projection you need for a useful foothold.

Woman measuring PWC boarding step fit

Maintenance and safety checks for boarding steps

Routine inspection keeps a step functional and safe. After each season and before storage, check:

  • Fasteners: Tighten any loose bolts and inspect for corrosion at the deck interface.
  • Hinge smoothness: Flip-up steps should deploy and retract without binding. Apply marine-grade grease to the pivot point.
  • Non-skid surfaces: Replace worn grip tape or textured pads; a slick step surface defeats the purpose.
  • Webbing and straps: On rope ladders and strap-on risers, look for fraying, UV cracking, or stretched loops that no longer hold tension.
  • Retraction latches: Confirm the latch engages fully so the step does not deploy unexpectedly at speed.

Remove bolt-on steps before trailering if they extend beyond the hull profile, and store rope ladders dry to prevent mildew on the webbing. For broader guidance on PWC safety gear and maintenance protocols, IPD Racing’s safety gear guide covers inspection schedules alongside protective equipment. Pairing good maintenance habits with the right boat insurance coverage is also worth considering for any PWC owner who rides in open water.

Pro Tip: A quick post-ride rinse with fresh water extends the life of both the step hardware and the mounting fasteners, especially in saltwater or brackish environments.

Where to buy a boarding step and what to expect on price and install time

OEM steps from Sea-Doo (such as part 295100742), Yamaha, and Kawasaki offer guaranteed fitment and factory warranty coverage. The trade-off is price and availability; OEM parts often cost more and may require dealer ordering.

Aftermarket options from specialty retailers and accessory stores offer more variety and often lower price points. Rope ladders like the EZ Riser from Hardline Products sit at the accessible end of the price range and install in minutes. Bolt-on rigid or retractable steps sit at the higher end and require tools and moderate mechanical skill.

Option Price Range Install Time Best For
Rope ladder (strap-on) Lower price range Quick install time Riders wanting a portable, no-drill solution
OEM retractable step Mid to higher price range Moderate install time Owners who want factory fit and warranty
Aftermarket bolt-on step Mid price range Moderate install time Riders wanting a permanent, budget-flexible option

Always check the published weight capacity on the spec sheet before purchasing. IPD Racing’s watercraft accessories guide is a useful starting point for riders comparing accessory categories.

Pro Tip: Buy OEM when your craft is under warranty or when the hull has a non-standard stern profile. Aftermarket universal steps work well on standard platforms but can require adapter plates that add install time.

Key Takeaways

A boarding step is one of the highest-value safety accessories a PWC owner can add, reducing reboarding effort and instability at the stern.

Point Details
Stern is the only safe entry point Boarding from the side increases capsizing risk; all step designs route you to the rear.
Check weight capacity and fit specs Verify the step’s rated capacity, footprint, and model-year compatibility before ordering.
Practice reboarding in calm water Build muscle memory in flat conditions so the technique holds when you’re fatigued or in chop.
Inspect fasteners and non-skid annually Tighten bolts, lubricate hinges, and replace worn grip surfaces each season.
IPD Racing carries compatible boarding hardware IPD Racing stocks boarding steps and accessories for Sea-Doo, Yamaha, Kawasaki, and other platforms.

Why boarding steps belong in every PWC owner’s toolkit

The conventional wisdom treats a boarding step as a comfort accessory, something nice to have for older or less athletic riders. That framing undersells it. Reboarding fatigue is a real safety variable. A rider who has fallen in open water, swum back to the craft, and is now tired and cold faces a genuinely harder reboarding task than the same rider on a calm lake during a practice session. A step does not just make reboarding easier; it makes it more reliable under the exact conditions where reliability matters most.

There is also a skill-development argument. Riders who practice the step-assisted reboarding sequence in calm water build a consistent motor pattern. When conditions are rough, that pattern holds. Riders who rely on brute strength and improvisation do not have that consistency to fall back on.

IPD Racing’s position is straightforward: a boarding step is a safety component, not a luxury. Treat it with the same attention you give to your life jacket or your engine cut-off switch.

IPD Racing boarding accessories for PWC owners

IPD Racing stocks performance and aftermarket parts for Sea-Doo, Yamaha, Kawasaki, and other major PWC platforms, including boarding hardware and stern-mounted accessories built for riders who take their equipment seriously. The selection covers both OEM-compatible fitment options and aftermarket upgrades, with fitment support available for model-specific questions.

IPD Racing

Whether you ride recreationally, compete in watercross, or run freestyle, the right boarding solution keeps you on the water longer and safer. Browse the full IPD Racing shop to find boarding steps, ladders, and compatible accessories for your specific craft. For riders looking at race-proven hardware, the WCOT Watercross of Texas parts catalog is a strong starting point for performance-grade accessories.

Useful sources

The following resources back the guidance in this article and are worth bookmarking for further reading:

For model-specific fitment questions, consult your OEM dealer’s parts diagram or contact IPD Racing directly through the shop.

Lifeguard inspecting PWC rescue sled on beach

PWC Rescue Sled Explained: Lifeguard and Responder Guide

A PWC rescue sled is a high-buoyancy platform that attaches to the rear of a personal watercraft to recover, stabilize, and transport victims during water emergencies. The industry term you will hear most often is “rescue sled” or “PWC tow sled,” though “rescue platform” appears in some agency procurement documents. Three operational advantages drive adoption: PWCs reach victims faster than conventional boats, sleds operate in surf zones and flooded urban areas where boats cannot go, and the deck sits at water level so rescuers can load unconscious or hypothermic victims without heavy lifting.

Typical rescue scenarios where these systems prove their value include:

  • Ocean and surf rescues where wave action makes boat approach dangerous
  • Flood and swiftwater operations in debris-filled channels
  • Shallow inlets, sandbars, and tidal flats inaccessible to keeled vessels
  • Ice rescues and disaster relief evacuations
  • Dive support and equipment transport

The U.S. Coast Guard and municipal fire departments increasingly specify PWC-plus-sled systems for near-shore response. NOAA’s coastal data consistently shows that the environments where drowning incidents cluster, surf zones, tidal inlets, and flooded lowlands, are exactly the environments where a sled-equipped PWC outperforms a conventional rescue boat.


Table of Contents

What makes a rescue sled structurally different from other platforms

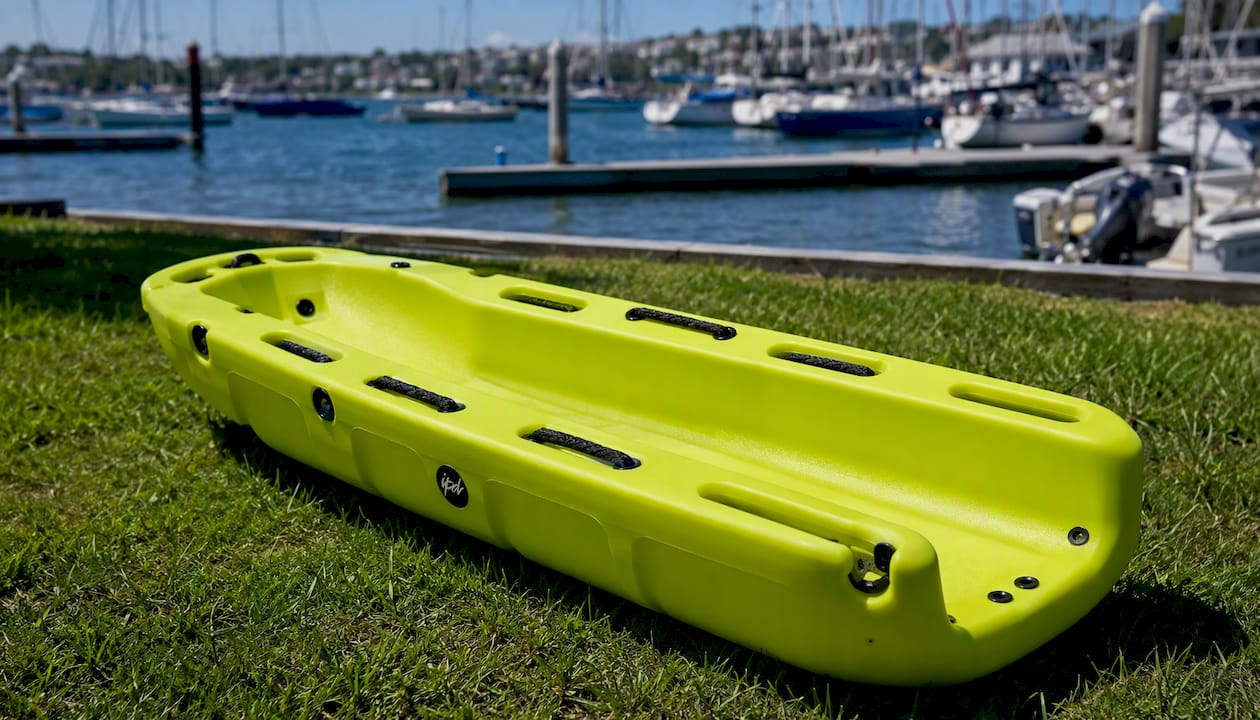
Professional rescue sleds are built around rotomolded HDPE (high-density polyethylene) hulls. HDPE resists UV degradation, saltwater corrosion, and structural warping in ways that fiberglass and laminated bodyboard-style constructions cannot match over a multi-year service life. Monolithic mold construction eliminates the delamination risk that plagues layered foam-core boards under repeated impact loads.

Close-up of HDPE hull rescue sled outdoors

The design features that matter most to patient safety are often the ones that look purely cosmetic on a spec sheet.

Feature Purpose Spec Example
HDPE hull UV/chemical resistance, no warping Rotomolded, monolithic
Tapered tail Water-level patient loading, planes at speed ~2.5 in tail thickness
Deck padding / traction Non-slip surface, patient comfort EVA foam or textured deck
Nose guard Impact protection at approach Reinforced polymer bumper
Drain ports Self-bailing under load Multiple hull ports
Attachment hardware points Secure 3-point hookup Stainless U-bolt mounts
Bright color / reflective markings Victim and sled visibility High-vis orange or yellow

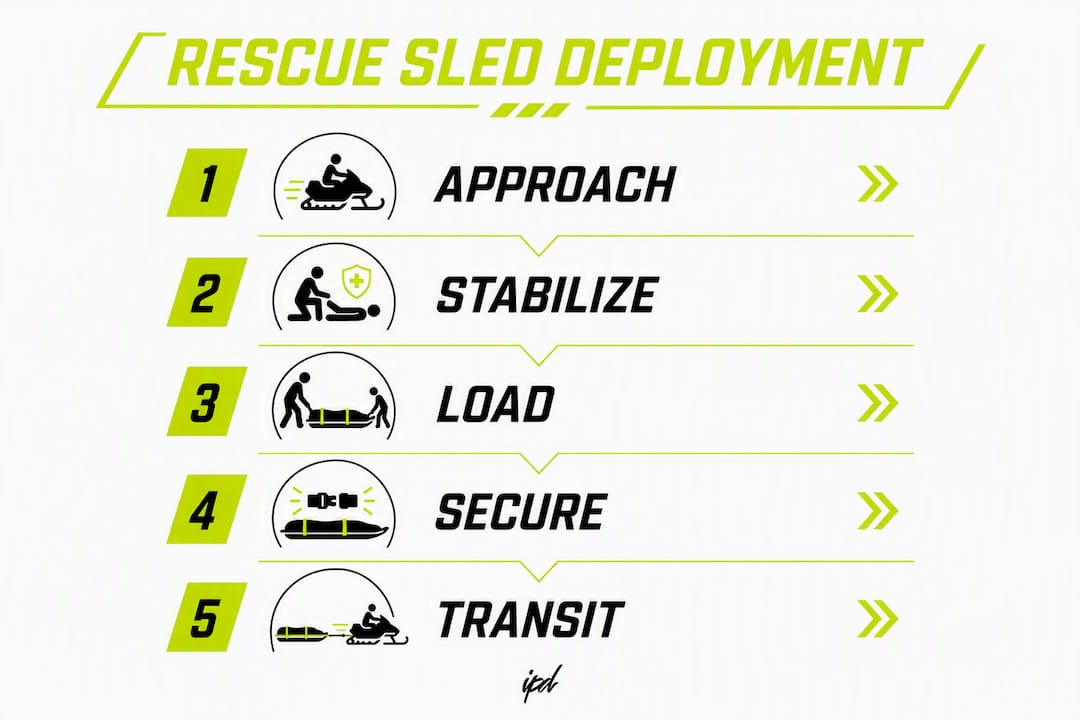
Infographic illustrating 5 rescue sled deployment steps

Typical professional sled dimensions align closely with industry standards in length and width, with a tapered tail designed for patient loading and a rated capacity suitable for single-victim scenarios with gear. Dry weight is light enough for a single operator to load onto a trailer or dock without assistance.

Grab handles, multiple drain ports, and shock-absorbing construction round out the survivability features. Bright colors and reflective markings improve victim and sled visibility in low-light or rough-water conditions.

Pro Tip: Flexible linear low-density polyethylene, urethanes, and EVA copolymers at the connection points dampen vibration transmitted from the PWC hull. That cushioning is what allows a rescuer to perform CPR on the sled while the craft is underway, a capability no rigid hard-mount system can replicate.


How rescue sleds attach to a PWC

Professional rescue sleds ship with a universal 3-point attachment system that requires no factory-installed mounting points on the PWC. The center connection uses nylon webbing with a stainless spring clip; two outboard bungee points provide lateral stability and shock absorption. A U-bolt or transom adaptor plate completes the rear anchor.

Non-invasive vs. drilled mounts

Most agencies choose non-invasive installation to preserve the PWC’s warranty and allow the sled to transfer between craft. Permanently drilled mounts offer a marginally more rigid connection but require hull penetration and are typically reserved for dedicated rescue vessels that will never return to recreational use.

Attachment hardware checklist

  1. Center nylon webbing strap with stainless spring clip
  2. Two outboard bungee cords with stainless hooks
  3. U-bolt or transom reinforcement plate
  4. Quick-release buckles for rapid sled detachment
  5. Spare strap kit (agencies should carry one in the field kit)
  6. Stainless hardware for corrosion resistance in saltwater environments
  7. Jet ski collar or bumper pad to protect the PWC transom

Compatibility notes before you purchase

  • Confirm the PWC’s transom geometry allows U-bolt or plate placement without obstructing the jet pump outlet.
  • Check hull draft: sleds are designed for sit-down PWC platforms, not stand-up models, in most configurations.
  • Verify transom access clearance, particularly on Sea-Doo models with rear storage compartments.
  • Review the PWC model specifications for your specific craft before ordering a sled or attachment kit.

Pro Tip: Operators should physically trial the attachment kit on their specific PWC before a deployment scenario. Real-world rigs often differ from vendor photos, and a loose bungee point discovered during a live rescue is a serious liability.


How to use a rescue sled: deployment and patient loading

A standard rescue sequence follows five steps: approach, stabilize, load, secure, and transit.

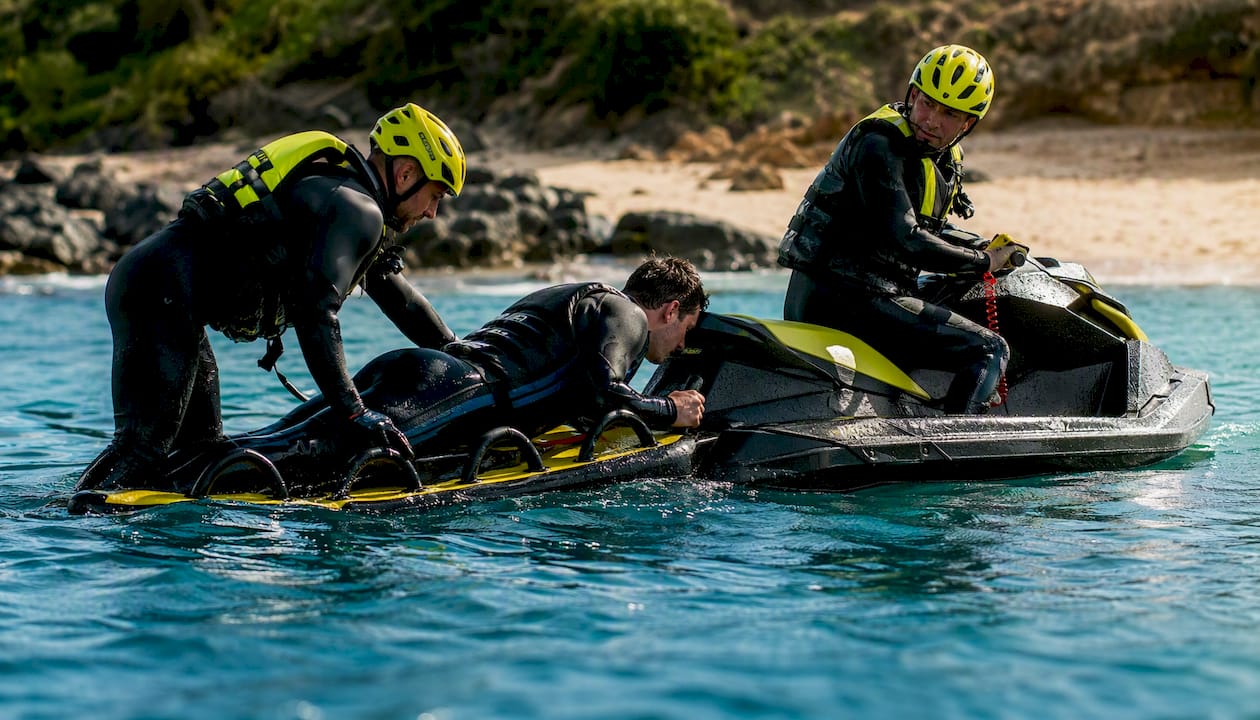
Overhead view of rescue sled patient loading at sea

Approach. The PWC operator brings the craft in at low speed, positioning the sled downwind or downcurrent of the victim to reduce drift onto the patient.

Stabilize. The operator holds idle throttle. At idle, the tapered tail sinks slightly, bringing the sled deck close to water level. This is the geometry that makes the system work: a 2.5-inch tail taper allows the deck to meet the victim rather than requiring the rescuer to lift them up and over a high freeboard.

Load. The rescue swimmer or second operator slides the victim onto the deck from the water. Unconscious and hypothermic patients can be moved this way without the spinal-load risk of a vertical lift.

Secure. Grab handles and deck straps hold the patient during transit. The non-slip traction deck prevents sliding in rough water.

Transit. Once underway, the tail planes and drag drops. The vibration-dampening connection points allow CPR to continue en route to shore or a waiting ambulance.

Rescue sleds reduce rescuer physical strain and allow critical interventions like CPR to continue during transport, two capabilities that conventional rescue boats and paddleboards cannot match simultaneously in surf or flood conditions.

Key safety callouts

  • Maintain operator-rescuer separation: the PWC driver focuses on navigation; the rescue swimmer manages the patient.
  • Keep loading speed at idle. Attempting to load a victim at any throttle above idle risks pulling the sled under or destabilizing the patient.
  • In surf, approach from the channel side, not through the break, when possible.
  • Abort the PWC approach if debris density, wave height, or victim entanglement creates a secondary drowning risk for the operator.

Sleds also handle two-person rescues, equipment transport for dive teams, and flooded urban go-downs where a flat-bottomed rescue boat would ground out.


Common rescue sled types and representative models

Three product classes appear most often in agency procurement discussions: LifeSled, P2P Rescue Sled, and JetTech (PWC Tow Sled). Each represents a distinct design philosophy.

Model / Class Primary Material Best Use Mounting Capacity Price Band
LifeSled Rotomolded HDPE Ocean / surf rescue 3-point universal ~397 lbs Professional tier
P2P Rescue Sled Reinforced polymer Inland / flood response Strap-and-clip kit Varies by model Mid-range professional
JetTech (Tow Sled) Laminated / foam core Utility / light rescue Tow rope / hitch Lower rated Entry-level

LifeSled is the class most associated with surf lifesaving organizations. Its monolithic HDPE construction and certified 3-point attachment system make it the reference point for agency procurement specs. Length and width dimensions align closely with the 63–67 inch by 37.5 inch professional standard.

P2P Rescue Sled targets inland and flood-response teams. The design prioritizes maneuverability in tight channels and compatibility with a wider range of PWC platforms, including models with non-standard transom geometry.

JetTech occupies the utility-sled category. Its laminated foam-core construction is lighter but lacks the impact resistance and vibration-damping properties of monolithic HDPE sleds. It works for equipment transport and light-duty towing but is not rated for patient transport in surf or swiftwater.

When reading vendor spec sheets, verify these four numbers: tail thickness (should be tapered, not flat), rated payload capacity, sled dry weight, and attachment hardware specification. Advertised features like “vibration damping” should be confirmed by asking whether the connection points use flexible polymer materials or rigid hardware.

  • Prioritize monolithic HDPE over laminated construction for patient-transport applications.
  • Confirm payload capacity covers the heaviest likely patient plus equipment load.
  • Ask vendors for agency reference contacts, not just testimonial copy, during procurement trials.

How professional rescue sleds differ from recreational tow sleds

The difference is not cosmetic. Professional rescue sleds and recreational tow sleds are built to different standards, and using the wrong one in a rescue operation creates measurable risk.

Construction differences:

  • Professional sleds use monolithic rotomolded HDPE; recreational tow sleds typically use laminated foam-core or injection-molded plastic that can delaminate under impact.
  • Vibration-damping flexible polymers at connection points are standard on professional models and absent on most recreational products.
  • Tapered tail geometry is engineered specifically for patient loading; recreational sleds have flat or squared tails designed for rider stability at speed.
  • Reinforced nose guards protect against collision during approach; recreational sleds prioritize hydrodynamic shape over impact resistance.
  • Certified attachment hardware (stainless spring clips, load-rated U-bolts) is specified on professional models; recreational tow sleds often use plastic clips rated for recreational loads only.

Operational risks of using a recreational sled in a rescue:

  • Delamination under repeated impact loads can cause structural failure mid-rescue.
  • Flat tail geometry makes water-level patient loading difficult or impossible for non-ambulatory victims.
  • Absence of deck padding and grab handles increases patient injury risk during transport.
  • Non-rated attachment hardware can fail under the combined dynamic load of a victim plus wave action.

For agency procurement officers: specifying a recreational tow sled as a rescue platform creates liability exposure if the equipment fails during a documented emergency response. Mission failure and patient injury in that context are foreseeable outcomes of an improper equipment decision.


What to check before buying a PWC rescue sled

A structured checklist prevents the most common procurement mistakes: buying a sled that does not fit the PWC, underestimating payload requirements, or missing accessory costs.

  1. Confirm PWC compatibility. Match the sled’s attachment system to your craft’s transom geometry. Check transom access clearance and hull draft. Review compatible PWC models before ordering.
  2. Define the operational environment. Surf and ocean operations require monolithic HDPE and certified attachment hardware. Inland flood response may allow a wider range of construction types.
  3. Calculate payload capacity. Add the heaviest likely patient weight, rescue equipment load, and a safety margin. A 397 lb rated capacity covers most single-victim scenarios with gear.
  4. Verify attachment hardware is included. Some sleds ship without a complete attachment kit. Budget for straps, bungee cords, stainless clips, and a spare strap kit.
  5. Assess durability and maintenance requirements. Ask about replaceable wear parts: nose bumpers, deck pads, and attachment hardware. HDPE hulls require minimal maintenance but hardware should be inspected after each saltwater deployment.
  6. Budget for accessories. Jet ski collar, traction pad replacement, carabiners, rope kits, and reinforcement plates add to the base sled cost.
  7. Factor in training. Most professional sled manufacturers and agencies recommend scenario-based on-water training before operational deployment. Certification programs through organizations like the United States Lifesaving Association (USLA) cover PWC rescue operations including sled deployment.
  8. Review warranty terms. Professional-grade sleds typically carry longer warranties than recreational products. Confirm coverage for hull integrity and hardware failure.

For agencies adding PWC rescue capability, marine insurance coverage should be reviewed and updated to reflect the new equipment and operational scope before the first deployment.


Why agencies are moving to PWC-plus-sled systems

The operational case is straightforward. PWC-plus-sled systems access shallow, debris-filled, and surf environments where conventional rescue boats cannot operate. Maneuverability, shallow draft, and faster response times are the three factors most cited by lifeguard units, fire departments, and swift-water rescue teams when explaining the shift.

Sleds reduce rescuer physical strain by eliminating the need to lift victims over a boat gunwale. The vibration-dampening deck allows CPR to continue during transit, which matters in cardiac arrest cases where every minute of interrupted compressions affects outcome. In flooded urban environments, a sled-equipped PWC can navigate between buildings and through debris fields that would stop any conventional vessel.

Industry experts describe PWC rescue sleds as effectively required equipment for modern water rescue teams — not an optional upgrade, but a baseline capability for any agency operating near surf, flood, or shallow-water environments.

Training and certification expectations have kept pace with adoption. The USLA and similar organizations now include PWC rescue sled deployment in their advanced lifeguard and rescue swimmer curricula. Agencies typically require operators to complete scenario-based drills covering shallow pickup, tangled debris navigation, and two-person victim recovery before authorizing operational deployment.


Key Takeaways

A PWC rescue sled is the most operationally versatile victim-recovery platform available to lifeguards and rescue professionals working in surf, flood, and shallow-water environments.

Point Details
HDPE monolithic construction Rotomolded HDPE hulls resist UV, saltwater, and impact without delamination risk.
3-point universal attachment Nylon webbing, bungee cords, and stainless U-bolt hardware mount without drilling the PWC hull.
Tapered tail patient loading A ~2.5 in tapered tail sinks at idle so non-ambulatory victims slide onto the deck at water level.
Payload and compatibility first Verify rated capacity (professional standard near 397 lbs) and PWC transom fit before purchasing.
Training before deployment USLA-aligned scenario drills covering shallow pickup and debris navigation are standard practice.

The detail most agencies overlook during procurement

The mounting hardware trial gets skipped more often than any other pre-deployment step. An agency orders a sled, confirms the model number matches the PWC brand on the spec sheet, and assumes the attachment kit will fit. In practice, transom geometry varies significantly even within the same PWC manufacturer’s lineup, and a bungee point that sits perfectly on one Sea-Doo model may foul the jet pump cover on the next year’s hull.

The fix is simple: mount the sled on the actual craft before signing off on the purchase order. Run it at idle, load a weighted dummy to the rated capacity, and verify that the tapered tail sinks as specified. That 20-minute field trial eliminates the most common post-purchase surprises.

Training frequency matters just as much as initial certification. Scenario-based drills, specifically shallow pickup in moving water and victim recovery near debris, should run at least quarterly for operational crews. Skills degrade faster than most agencies expect when the equipment sits unused between call-outs.

IPD Racing works with PWC operators across the performance and professional spectrum. The same attention to hull geometry, attachment hardware, and material quality that drives racing performance applies directly to rescue equipment selection. If you are evaluating PWC platforms or hardware for a rescue build, the ProWatercraft product line at IPD Racing covers professional-grade accessories and mounting components worth reviewing alongside your sled procurement.


Useful sources and next steps

The sources below support the specifications, operational techniques, and agency adoption evidence covered in this article. Use them for spec validation, fitting guides, and procurement research.

Rescue sled design details that appear cosmetic, tapered tails, deck padding, reinforced nose guards, are the features that most directly reduce patient injury and rescuer strain during actual operations. Verify them on the physical product, not just the spec sheet.

Rescue sled specifications and operational guidance:

  • Essential role of a PWC rescue sled — definition, construction overview, and agency use-case context
  • Extractor Pro Model specs and attachment system — tapered tail dimensions, capacity figures, vibration-damping hardware, and 3-point mounting detail
  • Why PWC rescue sleds are critical for modern water rescue teams — agency adoption drivers and HDPE material rationale
  • Why every modern water rescue agency needs a professional rescue sled — procurement rationale and operational environment evidence
  • Personal watercraft rescue sled overview — multi-scenario use cases and survivability feature list

PWC platform and compatibility resources:

Agency and insurance planning:

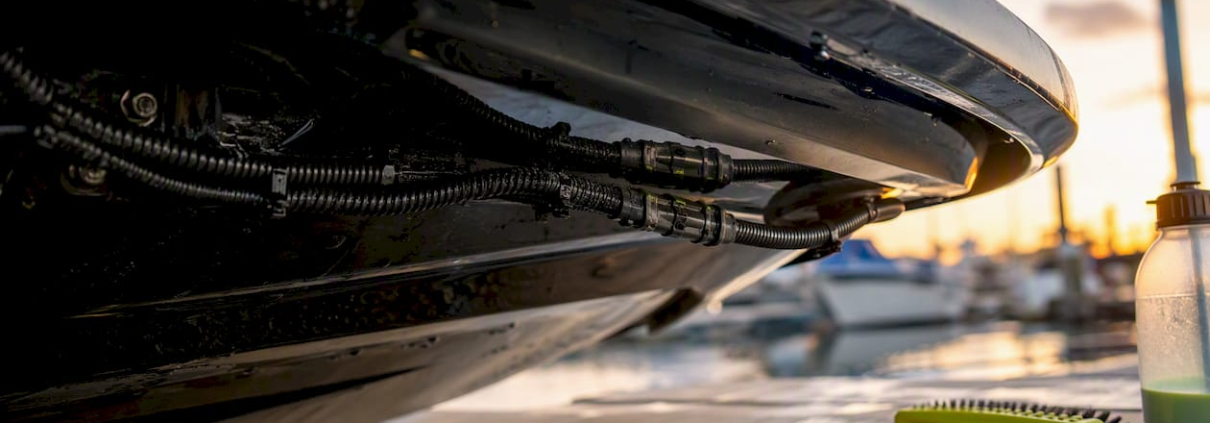
Wiring installation on jet ski hull underside

PWC Audio System Upgrade Options for Owners

For most PWC owners, the best audio system upgrade options are purpose-built marine pod speakers, factory-fit plug-and-play kits, or adhesive-mounted no-drill pods. The right choice depends on your mounting points, alternator capacity, and saltwater exposure.

Quick match by rider type:

  • Cruising/passenger: Factory-style integrated pods (RIVA/Wet Sounds, Sea-Doo OEM) for clean wiring and high output
  • Weekend rider/party: No-cut bracket systems (PWCBrackets) or adhesive pods (WaveAudia) for easy installs
  • Freestyle/racing: Lightweight bracket mounts with marine-grade wiring; skip heavy enclosures
  • Single-rider/portable: Submersible Bluetooth speakers for zero-modification simplicity

Before you buy, check these four things:

  1. Available mounting cleats or hull space for pods
  2. Whether your craft has a factory audio harness
  3. Battery and alternator capacity to support an amplifier
  4. Whether storage covers or a garage will clear the pod height
Approach Mounting Typical RMS Install Difficulty Cost Range
Adhesive pod kit (WaveAudia) Pod / adhesive Easy (DIY) a moderate price range
No-cut bracket system (PWCBrackets) Pod / bracket high power output Easy–Moderate
OEM upgrade kit (Sea-Doo 80W Platinum) Helm / integrated dual 80W speakers total output Moderate
Factory-style integrated (RIVA/Wet Sounds) Pod / plug-and-play high wattage Moderate a typical mid-range price
Custom full install Custom / tower Complex (pro) premium price range

Cost snapshot: Entry-level adhesive kits run a moderate price range. OEM and premium pod systems land at a typical mid-range price. Full custom installs with amplifier and battery upgrades can exceed $1,500–$2,000.

Brand overviews for the comparison: Wet Sounds builds marine-grade coaxial speakers and integrated amplifier pods engineered for saltwater environments. Fusion (Garmin) produces helm-mount head units with Bluetooth, AUX, and NMEA 2000 network integration suited to cruising builds. Rockford Fosgate offers marine-rated speakers and compact amplifiers with corrosion-resistant grilles for mid-range installs. JL Audio is the go-to for high-fidelity marine speakers and amplifiers where sound quality at speed is the priority. Kicker supplies weather-resistant coaxials and tower speakers popular in party and passenger configurations. Boss Marine covers the entry-level bracket with affordable, IP-rated speakers for budget-conscious first-time buyers.

The RIVA/Wet Sounds Yamaha FX system integrates a powerful amplifier directly into the speaker pods, uses marine-grade coaxial speakers with dome tweeters, and connects via a plug-and-play harness on 2022+ Yamaha FX models. It carries a limited warranty and is saltwater-rated. The Sea-Doo 80W Platinum Audio System delivers dual 80W channels (dual 80W speakers total output) with DSP processing, Bluetooth, and a fully submersible speaker design for BRP craft with an existing Premium Audio System. PWCBrackets supplies no-cut, no-drill model-specific brackets with installed pod options claiming up to high wattage output. The WaveAudia system uses 3M VHB adhesive mounting, requires a 24-hour cure before reattaching heavy components, and reviewed at approximately $441. Full Wave Marine documents amplifier placement in front storage compartments, silicone adhesive mounting, and wiring routing best practices for shop-quality installs.

Table of Contents

IPD Racing has the parts to support your install

IPD Racing

IPD Racing stocks performance hardware and accessory kits that support audio installs directly: mounting hardware, wiring kits, and battery-adjacent electrical components across Sea-Doo, Yamaha, Kawasaki, and other major PWC brands. The ProWatercraft product line covers handling and accessory hardware that pairs with bracket-mount audio builds. Compatibility resources and PWC tuning guides are available to help you confirm electrical capacity before adding an amplifier. Browse the Hot Products catalog at IPD Racing to find in-stock parts matched to your model.

Key Takeaways

The strongest PWC audio upgrades balance marine-grade durability, correct electrical capacity, and a mounting solution that fits your hull without permanent modification.

Point Details
Match upgrade to rider type Plug-and-play pods suit cruisers; adhesive kits suit weekend riders; skip heavy enclosures for racing.
Verify electrical capacity first Confirm your battery and alternator can support the amplifier’s RMS draw before purchasing.
IP rating and saltwater protection Choose components rated for saltwater immersion; rinse with fresh water after every salt-water session.
Cost scales with complexity Adhesive kits start at a moderate price range; OEM/premium systems run a typical mid-range price; custom installs exceed $1,500.
IPD Racing for parts and hardware IPD Racing stocks mounting hardware, wiring kits, and electrical components for major PWC brands.

What most guides miss about PWC audio installs

The plug-and-play marketing on pod kits is accurate for the speaker side. The electrical side is where most installs go wrong. A powerful amplifier on a stock PWC battery will drain power fast at idle or low speed, and that problem does not show up until you are on the water.

The adhesive cure step is the other overlooked detail. Waiting a full 24 hours after applying 3M VHB adhesive before reattaching heavy speaker components is not optional. Rushing it causes pods to sag or pull away from the hull under vibration.

Pro Tip: Route all wiring through split-loom conduit and use waterproof heat-shrink connectors at every junction. Standard crimp connectors corrode quickly in saltwater environments and are the most common cause of audio system failure within the first season.

For racers and freestyle riders, the calculus is different. A heavy pod system adds weight and changes the craft’s balance. A lightweight bracket with a compact, high-efficiency amplifier is the smarter build for competitive use. Weekend riders and cruisers have more flexibility, but they also spend more time at low throttle where battery drain matters most.

Racer fitting lightweight audio bracket to jet ski

Amplifier placement inside the front storage compartment, secured with silicone adhesive and proper wiring strain relief, is the standard shop approach for a reason: it keeps the amp protected, accessible, and out of the spray zone.

Technician installing Yamaha supercharger on PWC engine

Yamaha Supercharger Kits: Buyer’s Guide for PWC Owners

A Yamaha supercharger is a mechanically driven forced-induction system that compresses intake air to increase engine output, and the recommended route for most buyers is a model-appropriate bolt-on kit or shaft upgrade paired with a professional ECU tune. Before you order anything, three questions determine whether this upgrade makes sense for you:

  • PWC or outboard? Factory supercharged platforms like the SVHO 1.8L WaveRunner need shaft or internal component upgrades, not a full kit. Outboard owners (F300, F250, F225) look at bolt-on supercharger kits designed for those specific engines.
  • Performance goal? Top-speed racing and competitive freestyle justify the cost and maintenance. Casual weekend riding usually does not.
  • Maintenance tolerance? Boosted engines demand more frequent inspection, oiling checks, and belt service than naturally aspirated setups.

TL;DR: Confirm your model and year, gather your engine serial number, then contact IPD Racing for fitment help or compatible parts before purchasing any kit.

Table of Contents

What types of Yamaha supercharger upgrades are available?

Not every supercharger product fits every Yamaha platform, and mixing up categories is one of the most common and expensive mistakes buyers make.

  • Factory supercharged engines (SVHO/1.8L): Yamaha’s Super Vortex High Output 1.8L marine engine comes supercharged from the factory in high-performance WaveRunner models. Owners of these platforms typically upgrade the supercharger shaft, internal impeller, or billet rotating components rather than adding a new supercharger unit.
  • Full bolt-on kits for outboards: Platforms like the Yamaha F300, F250, and F225 four-stroke outboards can accept purpose-built bolt-on supercharger kits. Nizpro Marine’s F300 Lightning kit is a widely referenced example in the offshore performance community, claiming significant horsepower gains over the factory rating.
  • Shaft and shaft-reinforcement kits: RIVA Racing’s supercharger shaft upgrade kit is a direct-fit solution for Yamaha PWC platforms, replacing the OEM shaft with a stronger unit to reduce the risk of shaft failure under sustained high-boost operation.
  • Aftermarket impellers and billet components: Internal rotor and impeller replacements address wear and efficiency losses in the supercharger housing without replacing the entire unit. These are common in race and freestyle builds where the factory internals have reached service limits.

Choose a full bolt-on kit when you are starting from a naturally aspirated outboard and want a substantial power increase. Choose a shaft or internal upgrade when your factory supercharged PWC needs reliability reinforcement or a modest efficiency gain.

Which Yamaha models are compatible with supercharger upgrades?

Fitment is platform-specific and year-specific. Getting this wrong means returning parts or, worse, installing hardware that does not fit correctly.

Yamaha platforms most commonly upgraded:

  • SVHO 1.8L WaveRunner models (GP SVHO, FX SVHO, FZR/FZS series)
  • FX-HO and SHO 1.8L WaveRunner models (shaft and internal upgrades)
  • Yamaha F300 4.2L V6 outboard (2010–2021 model years per Nizpro Marine’s published fitment)
  • Yamaha F250 and F225 four-stroke outboards (kit availability varies by vendor and year)
  • Yamaha YXZ 1000R side-by-side (KraftWerks bolt-on centrifugal kit, 2016–2018)

Fitment checklist before you buy:

  • Model name and full model year
  • Engine serial number (stamped on the engine block or listed in your owner’s manual)
  • Hull identification number (HIN) for PWC platforms
  • OEM ECU version or software revision if known
  • Current modification list (any prior tune, exhaust, or intake changes)

Pro Tip: Bring your engine serial number and model year when you contact a vendor. Two WaveRunners that look identical on the outside can have different ECU calibrations that change which shaft or tune is compatible.

Yamaha’s 4-stroke SuperJet and VX/GP series platforms each have distinct fitment requirements. IPD Racing’s model-specific pages list compatible hardware and can confirm fitment before you commit to a purchase.

Various Yamaha WaveRunner models with superchargers

Platform Upgrade Type Notes
SVHO 1.8L WaveRunner Shaft upgrade, billet internals Factory supercharged; shaft reinforcement is the primary upgrade
F300 4.2L V6 outboard Full bolt-on supercharger kit Nizpro Marine publishes 2010–2021 fitment
F250 / F225 outboard Full bolt-on kit (vendor-dependent) Confirm year and ECU version before ordering
YXZ 1000R (2016–2018) Centrifugal bolt-on kit KraftWerks kit; includes intercooler and oil cooler

What horsepower and torque gains can you realistically expect?

Published claims and real-world results are not the same number, and understanding why protects your budget and your engine.

Technician testing Yamaha supercharged PWC on dyno

The KraftWerks Yamaha YXZ 1000R supercharger kit, for example, is dyno-proven at 150 hp at the rear wheels and 75 lb-ft of torque, tested with aftermarket headers and exhaust. That figure is measured at the wheels, which already accounts for drivetrain losses. Vendor claims measured at the crank will always read higher. Nizpro Marine’s F300 Lightning kit targets the 475 hp range for the 4.2L V6 outboard, though real-world prop-delivered thrust depends on propeller selection, hull weight, and water conditions.

Infographic showing Yamaha supercharger upgrade statistics and benefits

Aftermarket kits publish high peak HP numbers but real-world results vary by tune and supporting systems. A kit installed without a proper ECU calibration will not reach its claimed output and may run lean under boost, which risks detonation.

Pro Tip: When reviewing a dyno sheet, check the intake-air temperature and the correction factor applied. Dyno results depend on correction factors and test conditions; a sheet run on a cool morning with a SAE correction applied will show higher numbers than the same engine on a hot afternoon. Ask the vendor for the raw uncorrected trace alongside the corrected one.

The immediate throttle response of a supercharged setup is often more valuable than peak horsepower for PWC racing and freestyle. Superchargers are mechanically driven, so boost builds the moment you open the throttle with no lag.

How much does a Yamaha supercharger kit cost, and should you DIY?

Kit-only prices vary widely by platform and kit type. Shaft upgrade kits for PWC platforms typically run in the hundreds of dollars. Full bolt-on outboard kits like the Nizpro F300 Lightning sit at a significantly higher price point, and vendors frequently state bolt-on fitment and install-hour ranges of roughly 5–10 hours for experienced installers. Add ECU tuning, which is not optional, and total installed cost climbs further.

DIY vs. professional install:

  • DIY pros: Lower labor cost, direct familiarity with your own build, flexibility on timing.
  • DIY cons: ECU flash requires specialized software and hardware; incorrect torque specs on supercharger mounting hardware can cause failures; warranty on the kit may be voided without documented professional installation.
  • Pro install pros: Shop accountability, access to a dyno for post-install tuning, correct ECU calibration from the start.
  • Pro install cons: Higher upfront cost, scheduling lead times, and shop availability varies by region.
Buyer Profile Recommended Path Estimated Labor
Competitive racer Pro install with dyno tune 10–12 hours
Weekend performance rider Pro install or experienced DIY with tune 5–10 hours
Tow/offshore outboard owner Pro install (ECU flash required) 6–10 hours

What reliability trade-offs and maintenance come with a supercharger?

Superchargers increase fuel consumption and maintenance frequency compared to naturally aspirated engines. That is not a reason to avoid them, but it is a commitment you need to plan for.

Common failure modes:

  • Shaft wear or fracture under sustained high-boost loads (the primary reason RIVA Racing’s shaft upgrade kit exists)
  • Belt or drive system wear from increased rotational loads
  • Bearing seizure from inadequate lubrication or missed oil checks
  • Intercooler fouling or impeller wear reducing boost efficiency over time

Practical maintenance schedule:

  1. Pre-ride: Check supercharger oil level and belt tension visually.
  2. Every 25 hours: Inspect belt condition and supercharger mounting hardware torque.
  3. Every 50 hours or seasonally: Full shaft inspection, bearing check, intercooler cleaning, and oil change in the supercharger unit.
  4. Annually: Full rotating assembly inspection by a qualified technician.

Pro Tip: High-speed rotating assemblies require deliberate lubrication and scheduled inspection to reduce the risk of shaft failure or bearing seizure. Do not skip the 25-hour belt check just because the kit is new. Belt tension changes as components seat in.

Actions that meaningfully reduce risk: set rev limits conservatively after install, use a tune calibrated for your specific fuel grade, and replace OEM drive components with upgraded hardware if the kit vendor recommends it.

What supporting mods does a supercharger install actually require?

A supercharger kit is not a standalone upgrade. The supporting hardware is what keeps the engine safe under boost.

Must-have supporting modifications:

  • ECU flash/tune: Non-negotiable. A factory ECU calibration is not designed for boosted air-fuel ratios. Running without a tune risks lean conditions and detonation.
  • Fueling upgrades: Higher-flow injectors or a fuel pressure regulator adjustment to match increased airflow.
  • Intercooler and oil cooler: Complete kits like the KraftWerks YXZ system include a high-mount intercooler and oil cooler for a reason. Heat is the primary enemy of boosted engines.
  • Belt and drive upgrades: Heavier-duty belts rated for the increased load.
  • Shaft hardware: On PWC platforms, upgraded shaft hardware (RIVA Racing’s kit is the reference standard) before or during supercharger installation.

Nice-to-have additions:

  • High-flow air filter for the supercharger inlet
  • Aftermarket exhaust to reduce backpressure and lower intake temps
  • Datalogging capability to monitor boost pressure, intake temps, and air-fuel ratio post-install
  • Upgraded clutch or torque management hardware for side-by-side platforms

For PWC watercraft tuning best practices after a supercharger install, IPD Racing’s tuning guide covers the ECU and fueling steps in detail.

How do you choose the right Yamaha supercharger upgrade for your goals?

Work through this decision flow before contacting any vendor:

  1. Goal: Top-speed racing, competitive freestyle, offshore performance, or recreational power increase?
  2. Platform: Which exact Yamaha model, year, and engine serial number?
  3. Budget: Kit only, or full installed price including tune and supporting mods?
  4. Maintenance tolerance: Can you commit to a 25-hour inspection schedule and seasonal service?
  5. Warranty expectations: Do you need the kit vendor to offer a warranty, and does your Yamaha dealer warranty survive the modification?

Questions to ask any vendor or installer:

  1. Does this kit have documented fitment for my exact model year and engine serial number?
  2. Can you provide a dyno sheet with correction factors disclosed?
  3. What warranty do you offer on the kit, and what voids it?
  4. Is an ECU tune included, or is that a separate cost?
  5. What is your lead time for parts and tune support?
  6. What supporting mods do you require for the warranty to remain valid?

Red flags: No fitment documentation for your specific year, no ECU tune included or referenced, vague maintenance requirements, and no dyno data to support claimed horsepower figures.

How IPD Racing supports Yamaha supercharger upgrades

IPD Racing stocks and supports compatible parts for boosted Yamaha platforms, including performance impellers, billet mounting hardware, shaft-replacement components, and engine rebuild parts. The fitment check process is straightforward: provide your model name, model year, and engine serial number, and IPD Racing’s team confirms which parts are compatible before you order.

  • Performance impellers for SVHO and SHO WaveRunner platforms
  • Billet hardware and mounting components for supercharger support systems
  • Engine rebuild kits and internal components for high-output Yamaha engines
  • Referrals to qualified installation shops for ECU flash and post-install tuning

Pro Tip: If you are unsure whether your platform needs a shaft upgrade or a full internal rebuild, start with a fitment inquiry. Ordering the wrong tier of hardware is a common and avoidable mistake.

IPD Racing’s JC Racing billet hardware and Hot Products performance parts categories carry components that directly support boosted Yamaha builds.

How do Yamaha supercharger upgrades compare to alternative performance enhancements?

The main alternatives to a supercharger upgrade are turbocharger kits, naturally aspirated engine builds, and propulsion-side upgrades like high-performance impellers.

Turbocharger kits use exhaust gases to drive the compressor, which introduces lag before boost builds. Superchargers are mechanically driven, so boost is immediate, which is why they dominate PWC racing and freestyle applications where throttle response matters more than peak power. A jet ski turbo kit can produce higher peak boost at lower cost in some configurations, but the lag penalty is real in competitive conditions.

Naturally aspirated builds (porting, polishing, high-compression pistons, and aggressive cams) can add meaningful power without the maintenance demands of forced induction, but the gains are smaller and the ceiling is lower. Propulsion upgrades like high-pitch or stainless impellers improve efficiency and top speed without touching the engine, making them a lower-risk first step for riders not ready for a full supercharger project.

Does a Yamaha supercharger upgrade affect resale value?

The resale impact depends on documentation, reversibility, and the buyer pool. A professionally installed, well-documented supercharger upgrade on a popular platform like the SVHO WaveRunner can attract buyers in the performance community and support a higher asking price. Undocumented modifications, missing OEM parts, or a voided Yamaha warranty typically reduce the pool of interested buyers and push price down.

Keeping the OEM supercharger components and ECU in storage, along with all installation receipts and dyno sheets, gives a future buyer the option to return the craft to stock. That documentation is the single most important factor in preserving resale value after a forced-induction upgrade.

What are the long-term cost implications beyond the initial purchase?

The purchase price of a supercharger kit is the smallest line item in the total cost of ownership. Factor in these ongoing expenses:

  • ECU tune: One-time cost at install, but re-tuning is needed if you change fuel grade, exhaust, or other supporting mods.
  • Scheduled service: Belt replacements, shaft inspections, and bearing checks add cost every season.
  • Fuel: Superchargers increase fuel consumption compared to naturally aspirated operation. High-output engines typically require premium fuel.
  • Potential repairs: Shaft failure on a PWC supercharger is a known failure mode. A shaft replacement, if not caught early, can escalate to housing damage and a significantly higher repair bill.
  • Supporting mod refresh: Belts, intercooler cores, and high-flow injectors all have finite service lives and will need replacement over time.

Budget for annual service costs in addition to the initial kit and installation. Riders who treat the maintenance schedule as optional tend to face the largest repair bills.

What warranty and manufacturer support should you expect?

Yamaha’s factory warranty does not cover damage caused by aftermarket modifications, including supercharger kits. This is standard across the industry. Aftermarket kit vendors offer their own warranties, which vary significantly: some cover the kit hardware only, some require professional installation for the warranty to be valid, and some exclude damage caused by improper tuning.

Key points to confirm with any vendor:

  • What the kit warranty covers (hardware defects vs. installation damage vs. tuning-related failures)
  • Whether professional installation is required to maintain warranty coverage
  • What documentation the vendor needs to process a warranty claim
  • Whether the vendor offers tune support if the initial calibration needs adjustment

RIVA Racing’s shaft upgrade kit is a reference example of a product with documented fitment and published installation instructions, which simplifies warranty claims. For any kit, request the warranty terms in writing before purchase.

Key Takeaways

A Yamaha supercharger upgrade delivers immediate throttle response and significant power gains, but only when paired with a professional ECU tune, correct supporting mods, and a committed maintenance schedule.

Point Details
Platform determines upgrade type SVHO/SHO WaveRunners need shaft or internal upgrades; outboards like the F300 use full bolt-on kits.
ECU tune is mandatory Running a boosted engine on a factory calibration risks lean conditions and detonation.
Maintenance schedule is non-negotiable Belt, shaft, and bearing inspections every 25–50 hours are required to avoid catastrophic failure.
Long-term costs exceed kit price Fuel, scheduled service, and potential repairs add up significantly over the life of the build.
IPD Racing fitment support Contact IPD Racing with your model, year, and engine serial number before ordering any supercharger hardware.

When does a supercharger actually make sense?

The riders who get the most out of a Yamaha supercharger upgrade are competitive racers, serious freestyle athletes, and offshore performance enthusiasts who ride hard, ride often, and treat maintenance as part of the sport. These are owners who track their service hours, keep receipts, and understand that a boosted engine is a higher-maintenance machine by design.

The upgrade makes less sense for low-use recreational riders, budget-limited owners who cannot absorb a potential repair bill, or anyone unwilling to commit to a seasonal inspection schedule. The performance gains are real, but so are the trade-offs. A boosted platform rewards disciplined ownership and punishes neglect faster than any naturally aspirated setup.

The mindset required is simple: treat the supercharger as a precision component, not a set-and-forget bolt-on.

Get the right parts and fitment help from IPD Racing

IPD Racing carries performance impellers, billet hardware, engine rebuild components, and shaft-replacement parts for boosted Yamaha platforms, all backed by a team that knows PWC performance from recreation to racing.

IPD Racing

Whether you need a fitment confirmation before ordering or you are ready to spec out a full supercharger support build, IPD Racing makes it straightforward. Provide your model, year, and engine serial number, and the team will confirm compatibility and point you to the right parts. Browse race-proven PWC performance upgrades or shop the Hot Products performance parts catalog for components that support boosted Yamaha builds. Contact IPD Racing directly at ipdracing.com to request a fitment check or parts quote today.

Where to read more about Yamaha supercharger systems

  • Yamaha GP SVHO WaveRunner: Official Yamaha page for the factory SVHO platform; use this to confirm factory horsepower specs and standard equipment before evaluating aftermarket gains.
  • RIVA Racing Supercharger Shaft Upgrade Kit: Product page for the RIVA shaft upgrade; best used for fitment details, installation instructions, and understanding what the shaft upgrade addresses.
  • Nizpro Marine F300 Lightning Supercharger Kit: Vendor page for the F300 bolt-on kit; use for claimed horsepower figures, fitment year range, and install-hour estimates.
  • KraftWerks YXZ 1000R Supercharger Kit: Detailed kit contents, dyno data, and component specifications for the YXZ side-by-side platform.
  • SBT: Pros and Cons of Supercharged Jet Ski Engines: Technical overview of supercharger trade-offs for PWC applications; useful for understanding maintenance demands and reliability expectations.
  • Valve Control Exhaust: Forced Induction Performance Guide: Explains how exhaust and airflow interact with forced induction; relevant for understanding supporting mod requirements and reading dyno sheets accurately.
Woman examining jet ski neoprene boots outdoors

Jet Ski Neoprene Boots Compared: Top PWC Picks 2026

For most PWC riders, the best all-around choice is a moderate-thickness neoprene boot with a stiff, non-marking rubber sole and a secure zipper-plus-gusset closure. That single spec covers the majority of US riding conditions and riding styles from recreational touring to competitive racing.

Who this fits:

  • Racing and aggressive freestyle riders: moderately thick construction with a pre-curved, stiff sole and dedicated drainage panels
  • Recreational touring and mixed-use riders: thin to moderate neoprene with balanced sole stiffness and good drainage
  • Warm-weather and casual riders: thin neoprene or synthetic quick-dry footwear where breathability outweighs insulation

The core trade-off: More neoprene thickness means better cold-water insulation and impact protection, but also more bulk in the footwell and a longer break-in period. Match your thickness to water temperature first, then dial in sole stiffness for your riding style. Check the temperature guidance in the section below and confirm fit with the socks you plan to wear before ordering.


Table of Contents

How do different riding styles change which neoprene boot you need?

The right boot depends almost entirely on how you ride and where you ride. Racing demands stiff soles and locked-down ankle support. Touring rewards drainage and comfort. Warm-weather casual riding can get by with lightweight synthetic footwear. Cold-water commuting needs maximum insulation.

Rider Use Case Neoprene Thickness Sole Type Closure Primary Priority
Racing / aggressive freestyle 5mm Stiff, pre-curved TPR or rubber Marine-grade zipper + gusset Ankle support, sole stiffness, drainage
Mixed touring / all-around 3–4mm Moderate stiffness, non-marking Zipper + Velcro or gusset Balance of comfort, drainage, durability
Warm-weather casual 1.5–3mm or synthetic Flexible rubber, heel-to-toe grip Drawcord or lace Breathability, quick-dry, light weight
Cold-water commuting thickest neoprene Firm, non-marking outsole Heavy-duty zipper + gusset Insulation, seam quality, waterproofing

Racers and freestyle riders should prioritize sole stiffness above all else. Repeated toe-and-heel pivoting on a tray puts real load on the forefoot, and a soft bootie compresses under that load, creating fatigue and instability. Touring riders can trade some stiffness for a softer, more comfortable ride. Casual riders in warm water often do fine with a lightweight synthetic shoe, though they sacrifice ankle protection.

Infographic showing key neoprene boot performance features


Key features to compare in neoprene jet-ski boots

Not every spec on a product page matters equally. These are the features that actually separate a good boot from a poor one on the water.

Close-up of neoprene jet ski boot and hands measuring

Sole type and traction
The outsole is the most performance-critical component. Look for a TPR (thermoplastic rubber) or vulcanized rubber compound with a non-marking tread pattern. A wrap-up sole that extends slightly up the toe and heel adds abrasion protection during entry and exit. Stiff soles reduce foot fatigue during aggressive pivoting; softer soles suit casual cruising. Non-marking soles are standard practice on US boat decks and docks.

Neoprene thickness and insulation
3mm–5mm neoprene covers the vast majority of PWC use cases. Thinner neoprene (3mm) works well in warmer water and keeps bulk low. 5mm provides meaningful insulation in cooler conditions and adds impact protection. Going above 5mm is rarely necessary unless you ride in genuinely cold water below 50°F, and it noticeably reduces barefoot feel and mobility in tight footwells.

Closure systems

  • Front zipper with neoprene gusset: Most common on purpose-built PWC boots; keeps water out and holds the boot securely during aggressive riding
  • Zipper plus Velcro strap: Adds a secondary lock at the ankle; useful for riders who find standard zippers shift under load
  • Drawcord or lace systems: Common on casual water shoes; easier entry but less ankle lock

Drainage and ventilation
Air-mesh side panels and flow-through sole channels outperform simple pin-drain designs significantly. Boots with only small pin drains trap water and promote mildew on long riding days. If you ride for more than a couple of hours at a stretch, drainage engineering matters as much as insulation.

Construction quality
Double-glued and blind-stitched seams are the benchmark for quality neoprene construction. They resist water infiltration and hold up under repeated flexing. Reinforced toe and heel caps protect against impact and abrasion during boarding and dismounting. Check for non-corrosive zippers, especially if you ride in saltwater.


How do you choose the right thickness and style for your water temperature?

Start with water temperature, then adjust for riding style. This two-step process eliminates most of the confusion in a top jet ski neoprene boots comparison.

Temperature bands and thickness guidance:

  • Above 75°F (warm): 1.5–3mm neoprene or a synthetic quick-dry shoe. Breathability and drainage matter more than insulation.
  • 65–75°F (temperate): 3mm neoprene is the standard choice. Enough insulation for comfort without excess bulk.
  • 50–65°F (cool): 4–5mm neoprene. You want real thermal protection here, and seam quality becomes critical.
  • Below 50°F (cold): 5mm or thicker, with double-glued blind-stitched seams and a heavy-duty zipper. Consider pairing with neoprene socks for added warmth.

How riding style modifies the choice:
Racing and freestyle riding push toward stiffer soles regardless of temperature. A 3mm race boot with a stiff pre-curved sole is a better choice for a warm-water racer than a 5mm soft bootie. Touring riders in temperate water can prioritize drainage and comfort over sole stiffness. Casual riders in warm water often get more value from a lightweight synthetic shoe with good grip than from a full neoprene boot.

Thickness alone does not determine warmth. Seam construction matters equally. A poorly sealed 5mm boot leaks cold water continuously, negating the insulation entirely.

Sizing with socks: If you plan to wear neoprene or Lycra socks, size up to accommodate them. Sizing down to compensate for liners creates pressure points and discomfort, particularly across the forefoot and at the ankle.


Practical sizing tips and how to break in new boots correctly

Sizing mistakes are the most common reason riders return neoprene boots. A few straightforward rules prevent most of them.

Sizing rules:

  • Measure foot length and width; do not rely on your street shoe size alone, as neoprene boots often run differently from athletic footwear
  • If you plan to wear neoprene socks, put them on before measuring and size accordingly
  • Wide-foot riders should check width specs before ordering; many standard neoprene boots run narrow
  • Avoid sizing down to “force” a snug fit; initial snugness in a well-made boot is intentional and will ease with break-in

Common mistakes to avoid:

  • Ignoring arch support needs, especially for riders with high arches who spend hours on the water
  • Assuming EU sizing converts directly; always check the brand’s own US size chart
  • Ordering without confirming the retailer’s return policy, particularly for online purchases

Break-in tips:
Start with short rides of 30–45 minutes before committing to a full day on the water. Wet the boots thoroughly before your first session; neoprene softens and conforms when wet. After each session, rinse and allow to air-dry naturally. Avoid using heat sources to accelerate drying, as direct heat degrades neoprene and adhesive bonds. Flex the boots by hand during drying to maintain pliability.

Pro Tip: Stand on a flat, dry surface and check that your ankle feels locked without pinching, and that your toes can flex freely. If the ankle shifts laterally or the toe box compresses your toes, the fit is wrong regardless of how the boot feels on the shelf.

Hands-on reviews consistently note that race boots feel snug initially but provide the right support once wet and under load. That initial tightness is a design feature, not a defect.


Representative in-market models and which riders they suit

These are well-known, US-available models that illustrate the main categories in any neoprene boot comparison. Each one represents a different set of priorities.

Model Best For Neoprene Thickness Sole Type Closure Drainage US Availability
Sea-Doo Neoprene PWC Boots Cold-water protection, general PWC use 5mm Molded non-slip outsole Heavy-duty non-corrosive zipper Standard Yes — major US retailers and Sea-Doo dealers
Jettribe GRB 3.0 Racing, aggressive freestyle Not publicly listed Pre-curved, stiff; wrap-around abrasion shell Marine-grade zipper Mesh flow-through panels Yes — specialty PWC retailers
Jobe Neoprene Boots Touring, all-around PWC riding Not publicly listed Stiff rubber outsole Zipper Extra water drain panels Yes — water sports retailers
O’Neill Wetsuit Boots General water sports, touring 3mm–5mm options Flexible rubber Zipper Standard Yes — surf and water sports retailers
Body Glove Neoprene Boots Recreational, warm-weather use 3mm Flexible rubber Zipper or pull-on Standard Yes — major US sporting goods retailers
Columbia Drainmaker III Casual warm-weather, dock use None (synthetic) Flexible rubber, multi-directional drain ports Lace Drain ports throughout Yes — major US retailers

Sea-Doo neoprene boots are built from 90% neoprene and 10% nylon with double-glued, blind-stitched seams, a molded non-slip outsole, and flexible rubber toe and heel protection caps. The non-corrosive zipper makes them a solid choice for saltwater riders. Available through Sea-Doo dealers and the Aqua Sport section at IPD Racing.

Jettribe GRB 3.0 is the go-to for racers who need pre-curved soles, arch support, wrap-around abrasion protection, and mesh flow-through drainage panels. The marine-grade zipper holds under aggressive riding loads.

Jobe neoprene boots include an inner neoprene sock for added warmth, a reinforced heel, extra drain panels, and a stiff rubber outsole. They sit in the touring and all-around category, balancing grip and drainage without the race-boot stiffness penalty.

O’Neill and Body Glove both offer neoprene boots widely available across US surf and sporting goods retailers. O’Neill’s wetsuit boot lineup covers 3mm–5mm options suited to general water sports and PWC touring. Body Glove’s 3mm recreational boots work well for warm-weather riding where insulation is secondary to comfort.

Columbia Drainmaker III is not a neoprene boot. It is a synthetic water shoe with multi-directional drain ports and a flexible rubber sole, included here as the representative casual/warm-weather option. It lacks ankle support and neoprene insulation, but for flat-water summer riding in warm conditions, it performs well and dries fast.

US buying tip: For correct sizing and returns, purchase from retailers with clear US return policies. Specialty PWC retailers often carry a wider range of sizes and can advise on fit with liners.


What do neoprene boots typically cost, and how long do they last?

Price and durability track closely with construction quality and intended use.

Typical price bands:

  • Budget ($20–$50): Thin neoprene or synthetic water shoes, basic rubber soles, minimal drainage engineering. Fine for light casual use in warm water. Body Glove and Columbia Drainmaker III sit in this range.
  • Mid-range ($50–$120): Purpose-built PWC boots with better seam construction, non-marking soles, and improved drainage. O’Neill and Jobe neoprene boots typically fall here.
  • Premium ($120–$200+): Race-grade boots with pre-curved soles, marine-grade zippers, mesh flow-through panels, and reinforced abrasion shells. Jettribe GRB series and Sea-Doo’s premium neoprene boots occupy this tier.

Durability by use case:
Recreational touring boots used a few times per season can last several years with proper care. Race boots take significantly more abuse from repeated pivoting and footwell contact, so expect a shorter lifespan even though they are built more durably. The construction quality in premium boots is designed to handle that load; budget boots used for racing will fail faster.

Signs it is time to replace your boots:

  • Sole delamination or separation from the neoprene upper
  • Seam failures, particularly at the toe box or heel
  • Persistent mildew odor that does not clear after thorough cleaning and drying
  • Loss of insulation or noticeable water infiltration through the neoprene body
  • Zipper failure or corrosion that prevents a secure closure

Value tip: buy the best sole and seam construction you can afford if you ride aggressively. For light casual use, a budget water shoe is a reasonable choice. The grip, fit, drainage, and durability combination that reviewers consistently prioritize is most reliably delivered in the mid-range and premium tiers.


How to clean, dry, and store neoprene boots so they last

Proper care after each session extends boot life significantly and prevents the mildew and seam failures that end boots prematurely.

After every saltwater session: Rinse boots thoroughly with fresh water immediately after use. Salt crystals accelerate neoprene degradation and corrode zippers. Flush the interior as well as the exterior.

Drying correctly: Turn boots upside down or prop them open to allow airflow through the interior. Avoid direct sunlight for extended periods; UV exposure degrades neoprene over time. Never use a clothes dryer, heat gun, or place boots near a heater. Air-dry in a shaded, ventilated area.

Storage: Store boots flat or supported in their natural shape. Folding or compressing them for storage causes permanent creasing in the neoprene and can deform the sole. Keep them away from petroleum products, which degrade rubber compounds.

Cleaning: A mild soap solution works for routine interior cleaning. For persistent odor, an antimicrobial spray designed for neoprene or wetsuits is effective. Check manufacturer guidance before machine washing; some boots tolerate a gentle cold cycle, others do not.

Pro Tip: For minor sole separation at the toe or heel, a neoprene contact cement applied to both surfaces and clamped for 24 hours is a reliable field fix. For significant delamination or seam failure, a wetsuit repair specialist can extend boot life considerably at a fraction of replacement cost.


What experienced PWC racers actually prioritize in a boot

The gap between what looks good in a spec sheet and what racers actually care about is worth understanding before you spend money on premium footwear.

Sole stiffness is the feature racers cite most consistently. Aggressive riding requires a stiffer, thicker sole; softer booties lack the stability for repeated toe-and-heel pivoting and wear out faster under race-style loads. A pre-curved arch that matches the natural foot position reduces fatigue over a full race day. Racers also prioritize a dedicated liner system: many premium race boots are designed to be used with thin neoprene or Lycra socks, and without those liners the shell may not provide the snugness needed for precise footwork.

“Drainage efficiency is a top comfort driver on long active days. Boots with only pin drains trap water and promote mildew, while designs with air-mesh side panels and flow-through channels keep feet noticeably drier.” — Watercraft Journal, Jobe neoprene boot review

The sizing nuance that catches many racers off guard: premium race boots assume liner use, so a boot that feels slightly large without socks is often correctly sized for use with a thin neoprene sock. Buying without accounting for the liner and then sizing down is one of the most common and avoidable mistakes in this category.

Thicker neoprene increases warmth but reduces barefoot feel and can add bulk in tight footwells. Racers in warm water often prefer a 3mm race boot over a 5mm touring boot precisely because the thinner shell gives better feedback through the tray. That trade-off is worth understanding: warmth and protection come at a cost in sensitivity and footwell clearance.


Key Takeaways

The best neoprene boot for PWC riding matches neoprene thickness to water temperature, sole stiffness to riding intensity, and fit to the socks you plan to wear.

Point Details
Match thickness to temperature Use 3mm for water above 65°F, 4–5mm for 50–65°F, and thickest neoprene below 50°F.
Sole stiffness drives racer performance Aggressive riding and pivoting require a stiff, pre-curved sole; soft booties compress under load.
Size for your liner Premium race boots are designed for use with neoprene or Lycra socks; size accordingly to avoid pressure points.
Drainage design matters Air-mesh panels and flow-through channels outperform pin-drain designs on long riding days.
IPD Racing for traction upgrades IPD Racing carries foothold and traction products that complement boot grip for racers and freestyle riders.

The feature most riders underestimate when buying boots

Most riders shopping for neoprene boots spend the most time comparing thickness and price. Those matter, but sole construction is the spec that actually separates a boot that holds up through a season of aggressive riding from one that fails at the toe box after a few months.

The reason is mechanical. Every time a rider pivots on the tray, the forefoot flexes against a stiff rubber outsole. A sole that is bonded well and built with wrap-around abrasion protection distributes that load across a larger surface area. A sole that is only glued at the perimeter peels from the inside out, and by the time the separation is visible, the structural integrity is already gone. Double-glued, blind-stitched seams at the sole junction are not a luxury spec; they are the difference between a boot that lasts one season and one that lasts three.

The same logic applies to zipper selection. Non-corrosive marine-grade zippers cost more to manufacture, and that cost shows up in the price tier. A corroded zipper on a saltwater boot is not a minor inconvenience; it means the boot cannot close securely, which defeats the entire purpose of the closure system.

For riders buying online, the return policy deserves as much attention as the spec sheet. Neoprene boots fit differently from athletic shoes, and the only reliable fit test is standing on a flat surface and checking ankle lock and toe mobility. Buy from US retailers with clear return windows.


IPD Racing traction and foothold upgrades pair well with your boots

Neoprene boots handle foot protection and insulation. What they cannot do is compensate for a slick tray or poorly positioned footholds. That is where aftermarket traction and foothold upgrades from IPD Racing come in.

IPD Racing

IPD Racing carries footholds, hull traction parts, and handling upgrades that work alongside your boots to give racers and freestyle riders a more controlled platform. Better foothold positioning reduces the lateral movement that even a well-fitted boot cannot prevent on its own. Grip tape and traction pads add surface friction that complements the non-marking sole on your boots rather than replacing it. These are not substitutes for proper footwear; they are the next layer of the performance setup. For riders building out a complete race-ready gear list, IPD Racing’s race-proven PWC performance upgrades cover the hardware side of that equation. IPD Racing ships to US customers and stocks parts for Sea-Doo, Yamaha, Kawasaki, and other major PWC platforms. Browse the full catalog at ipdracing.com to find traction and foothold options matched to your specific watercraft.


Sources and further reading

These are the primary sources used in this guide, selected for hands-on credibility and technical specificity.

  • Sea-Doo Neoprene Boots — Seadoogear.com: Official product spec sheet; the authoritative source for construction details including seam type, neoprene blend, and zipper spec.
  • Jettribe GRB 3.0 Race Boots — Engine Elite Pro: Product listing with detailed spec breakdown for a leading race boot; useful for sole and drainage feature comparison.
  • Real Review: Slippery Wetsuits’ Liquid Race Boot — Watercraft Journal: Hands-on PWC-specific boot review covering ankle stability, drainage, and reinforcement trade-offs between casual and race footwear.
  • Real Review: Jettribe GRB 2.0 Race Boots — Watercraft Journal: Detailed review covering liner/sock sizing nuance and break-in behavior for premium race boots.
  • Real Review: Jobe Neoprene Boots — Watercraft Journal: Hands-on review with specific commentary on drainage design and long-day comfort.
  • Best Shoes for Jet Ski — ShoesFeast: Practical neoprene thickness guidance and climate-based selection advice.
  • 7 Best Water Shoes for Jet Ski — Footwind: Roundup with real-world testing criteria including grip, drainage, and durability rankings.
  • Works H2O PWC Riding Boots — IPD Racing: IPD Racing’s coverage of advanced boot features including engineered drainage and anti-slip soles.
  • Jet Ski Racing Safety Gear List — IPD Racing: IPD Racing’s complete race-ready gear reference; useful context for where boots fit in a full safety setup.