Performance, Testing & How-To’s

Woman reviewing PWC sponsorship application at desk

PWC Racing Sponsorship Application Guide for 2026

A PWC racing sponsorship application is a formal business proposal that demonstrates measurable marketing value to a potential sponsor in exchange for financial or product support. Securing sponsorship in personal watercraft racing requires more than podium finishes. Programs like Papa Willy’s Traxion Tonic and PWC Sprint Racing evaluate racers on professionalism, promotional reach, and marketing fit. This pwc racing sponsorship application guide covers every stage of the process, from eligibility requirements through proposal structuring and sponsor outreach, so you can submit a competitive application in 2026.

What are the eligibility requirements for PWC sponsorship applications?

Meeting baseline eligibility is the first filter every sponsor applies before reviewing your proposal. Brand-managed programs like Papa Willy’s Traxion Tonic require a minimum of one year of racing experience, a completed racing resume or sponsorship proposal, at least three references, and an active social media presence. Applications are accepted between October 1 and December 20 for new applicants, while current sponsors reapply during a separate window from September 1 through October 31. Missing these windows disqualifies your submission regardless of how strong your proposal is.

The IJSBA Competition Rule Book governs racing eligibility and class rules but does not publish sponsorship application guidelines. That means racers must pursue sponsorship directly through event promoters and brand programs rather than through the governing body. Understanding this distinction saves time and directs your effort to the right channels.

Below is a comparison of typical application requirements across known PWC sponsorship programs:

Requirement Papa Willy’s Traxion Tonic PWC Sprint Racing Events
Racing experience 1+ year minimum Varies by event tier
Application format Resume or proposal with promo plan Contact event promoter directly
References required 3 references Not formally specified
Social media presence Required Strongly recommended
Application window Oct 1–Dec 20 (new); Sept 1–Oct 31 (returning) Per-event basis

Key documents to prepare before submitting any application:

  • Racing resume with competition history and class results
  • Sponsorship proposal with a clear value proposition and promotional plan
  • Social media profile links with engagement metrics
  • Three professional references who can speak to your brand representation
  • A brief media kit with photos, video links, and press coverage

How to structure an effective PWC racing sponsorship proposal

A winning motorsport sponsorship proposal is a business case, not a race biography. Effective proposals include an executive summary, an asset inventory, credible valuations, activation ideas, and tiered pricing options. Sponsors read dozens of proposals. Yours must lead with a clear ask and a specific return on investment, not a list of race wins.

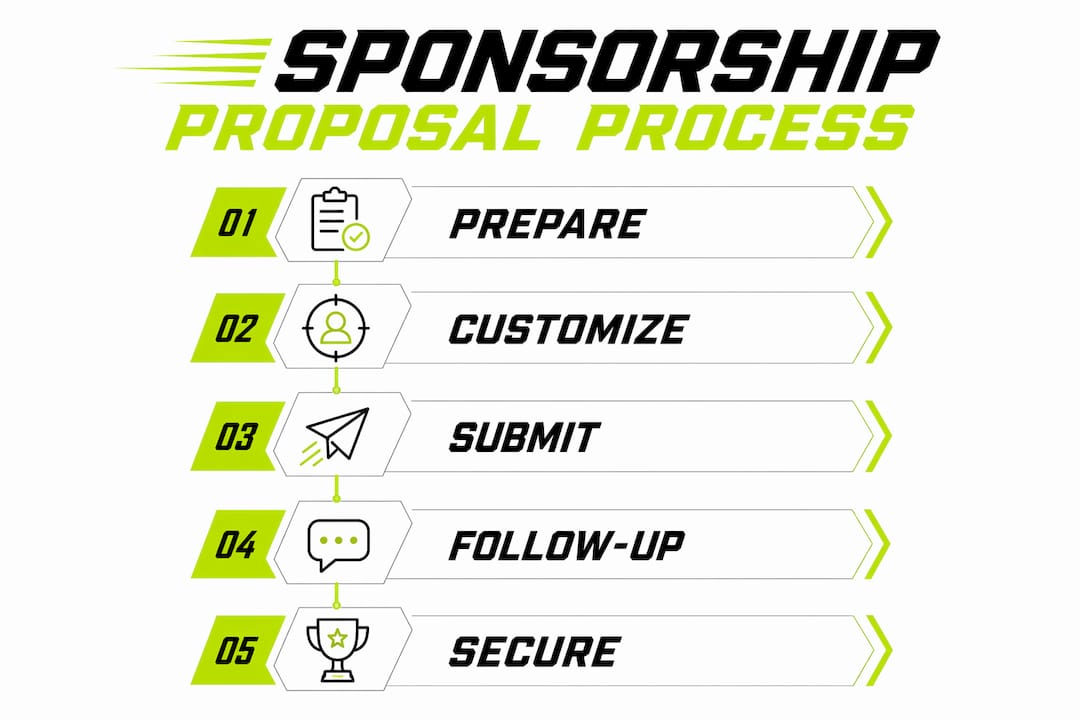
Structure your proposal in this order:

  1. Executive summary. State what you are asking for, what the sponsor receives, and why the partnership makes business sense. Keep this to one page.
  2. Racer or team profile. Include competition history, class standings, and geographic reach of your events.
  3. Asset inventory. List every branding opportunity you control: hull graphics, trailer wraps, helmet decals, race apparel, social media posts, event banners, and announcer mentions.
  4. Asset valuation. Use CPM benchmarking to assign dollar values to digital impressions and on-site visibility. Compare your social media reach to industry advertising rates.
  5. Tiered sponsorship packages. Offer at least three tiers (title sponsor, associate sponsor, product sponsor) with distinct deliverables and price points.
  6. Activation ideas. Propose specific campaigns tied to the sponsor’s marketing calendar, such as product demos at race events or co-branded social content.
  7. Appendix. Include media kit, references, and sample social posts.

Sponsors expect proposals that show a clear understanding of their audience, channels, and marketing objectives. A proposal tailored to a marine accessories brand looks different from one targeting an energy drink company. Research each sponsor’s current campaigns before writing your deliverables section.

Pro Tip: Before sending your proposal, replace every generic deliverable with a sponsor-specific activation. If the sponsor runs Instagram campaigns, include a co-branded reel concept. If they exhibit at trade shows, offer to appear at their booth during race season.

Infographic showing PWC sponsorship proposal steps

Team collaborating on sponsorship proposal documents

Sponsorship tier Typical deliverables Price range
Title sponsor Hull graphics, all social posts, event banners, announcer mentions $5,000+
Associate sponsor Logo on apparel and trailer, select social posts $1,000–$4,999
Product sponsor Logo on hull, product use and review content Product value exchange

What does the PWC sprint racing sponsorship format look like?

PWC Sprint Racing structures sponsorship around specific, trackable event segments. Sponsorship covers individual Show rounds and Hot Laps segments, with sponsors receiving on-site banner placement, announcer mentions during their sponsored segment, and social media exposure tied to that event moment. Fifty percent of sponsorship fees go directly to racer payouts, with the remainder covering series expenses. This structure makes each sponsorship highly accountable and easy to report on.

For racers building proposals around PWC Sprint Racing events, the granular format is a selling point. Each sponsored segment is a discrete, trackable asset. Sponsors can verify their banner was displayed, their name was announced, and their brand appeared in post-event social media content. That level of accountability is rare in grassroots motorsport and should be highlighted in your outreach.

Key visibility assets sponsors receive in a typical PWC sprint event sponsorship:

  • On-site banner placement during the sponsored Show or Hot Laps segment
  • Announcer mentions at the start and conclusion of the sponsored segment
  • Photo and video capture of the sponsored event for social media distribution
  • Brand inclusion in post-event recaps published by the series

“Sponsorship in PWC sprint racing is framed around clear, measurable deliverables tied to event moments for sponsor visibility and ROI.” — PWC Sprint Racing event analysis

When writing your proposal, document each of these assets with estimated audience reach. Include the number of spectators at a typical event, the social media following of the series, and the average engagement rate on post-event content. Concrete numbers convert skeptical marketing managers into committed sponsors.

What are the best practices for approaching sponsors and managing the application process?

Identifying the right contact inside a company is the single most important step in the sponsorship application process. Marketing managers and brand partnership coordinators make sponsorship decisions, not sales teams or customer service departments. Research LinkedIn to find the correct title, then send a direct, concise outreach email.

Your initial email should be three paragraphs or fewer. Introduce yourself and your racing program, state the specific opportunity you are offering, and request a brief call or meeting. Do not attach the full proposal in the first email. Successful sponsorship promotion requires teams to present as structured and business-like to justify sponsorship income and build sponsor confidence. A polished first email signals that professionalism before the proposal is ever reviewed.

Follow-up is where most racers lose momentum. Send a follow-up email seven to ten days after your initial outreach if you receive no response. Reference your original message, add one new piece of value (a recent race result, a media mention, or an upcoming event), and keep it brief. Three follow-ups over 30 days is a professional standard. After that, move to the next prospect.

Common mistakes to avoid during the application process:

  • Sending a generic proposal without customizing deliverables to the sponsor’s brand
  • Attaching large files to a cold outreach email
  • Applying outside the published application window for brand programs
  • Listing race results without connecting them to marketing value
  • Failing to include social media metrics or audience demographics

Pro Tip: Build your social media presence before you apply. Sponsors check your profiles immediately after reading your proposal. A consistent posting schedule with race content, product features, and event coverage tells sponsors you are already doing the promotional work they are paying for.

Powersports sponsorship trends in 2026 show increasing sponsor interest in digital content creators within racing communities. Reviewing 2026 powersports trends confirms that brands are prioritizing racers who generate authentic content across YouTube, Instagram, and TikTok alongside their competition results. Building that content library now strengthens every future application.

Key takeaways

A successful PWC racing sponsorship application combines verified racing eligibility, a business-case proposal with clear ROI, and professional outreach to the right marketing decision-makers.

Point Details
Meet eligibility first Programs like Papa Willy’s require 1+ year experience, references, and social media presence before reviewing proposals.
Lead with ROI in proposals Structure every proposal around sponsor return on investment using asset valuation and tiered packages.
Use PWC sprint format as a selling point Granular per-segment sponsorship in PWC Sprint Racing gives sponsors trackable, verifiable deliverables.
Target marketing decision-makers Contact brand partnership managers directly, not sales or customer service teams.
Build social media before applying Sponsors verify your digital presence immediately. A consistent content record strengthens every application.

Why most PWC sponsorship applications fail before they are read

Most applications I see fail at the first filter, not because the racer lacks talent, but because the submission reads like a fan letter instead of a business proposal. Racers spend months perfecting their craft on the water and then spend 20 minutes writing a proposal that lists trophies and asks for money. That approach does not work in 2026.

The programs that actually convert, like Papa Willy’s Traxion Tonic, are explicit about what they want: a promotion plan, references, and evidence of social media activity. They are not buying race results. They are buying marketing reach and brand representation reliability. The racers who understand that distinction and build their applications around it are the ones who get callbacks.

What I find most underused is the tiered package structure. Offering a single sponsorship ask puts the entire decision on the sponsor. Offering three tiers at different price points gives them a choice, and people who are given a choice are far more likely to say yes to something. The associate tier alone has secured more sponsorships for racers I have worked with than any title package pitch.

The other factor that separates successful applicants is timing. Applying within the correct window for brand programs is non-negotiable. Applying early within that window, with a polished submission, signals organizational discipline. Sponsors notice. You can explore sponsored athlete profiles at Ipdracing to see what a professional racing identity looks like in practice.

Persistence matters, but professionalism matters more. Follow up, stay consistent, and treat every sponsor interaction as a business relationship from the first email forward.

— Casey

How Ipdracing supports your racing and sponsorship goals
https://ipdracing.com

Ipdracing delivers the performance products and technical resources PWC racers need to compete at the level sponsors expect. From engine rebuild kits and handling and control parts to full performance upgrades, the Ipdracing shop stocks gear for every class and skill level. A well-maintained, professionally presented watercraft is part of your sponsorship pitch. Sponsors notice the condition and branding of your equipment at events. Ipdracing also offers the PWC Doctor service for racers who need expert maintenance support to keep their equipment race-ready. Explore the full catalog and get your program dialed in before your next sponsorship submission.

FAQ

What is the minimum experience required for PWC sponsorship?

Papa Willy’s Traxion Tonic requires a minimum of one year of racing experience before a racer is eligible to apply. Most brand-managed programs use similar thresholds to filter for racers with proven competition history.

When should I submit a PWC racing sponsorship application?

Papa Willy’s accepts new applicant submissions between October 1 and December 20, with returning sponsors reapplying from September 1 through October 31. Event-based programs like PWC Sprint Racing operate on a per-event contact basis.

Does the IJSBA publish a sponsorship application guide?

The IJSBA Competition Rule Book covers racing eligibility and class rules but does not govern sponsorship applications. Racers should pursue sponsorship directly through event promoters and brand programs.

What deliverables do sponsors receive in PWC sprint racing?

PWC Sprint Racing sponsors receive on-site banner placement, announcer mentions during their sponsored segment, and social media exposure tied to the event. Fifty percent of sponsorship fees are distributed to racers as payouts.

How many follow-up emails should I send after submitting a proposal?

Three follow-up emails over 30 days is a professional standard. Space them seven to ten days apart, add a new piece of value in each message, and move to the next prospect if there is no response after the third contact.

Jet ski rider adjusting surf fin on watercraft

Jet Ski Surf Fin Role: What Every Rider Must Know

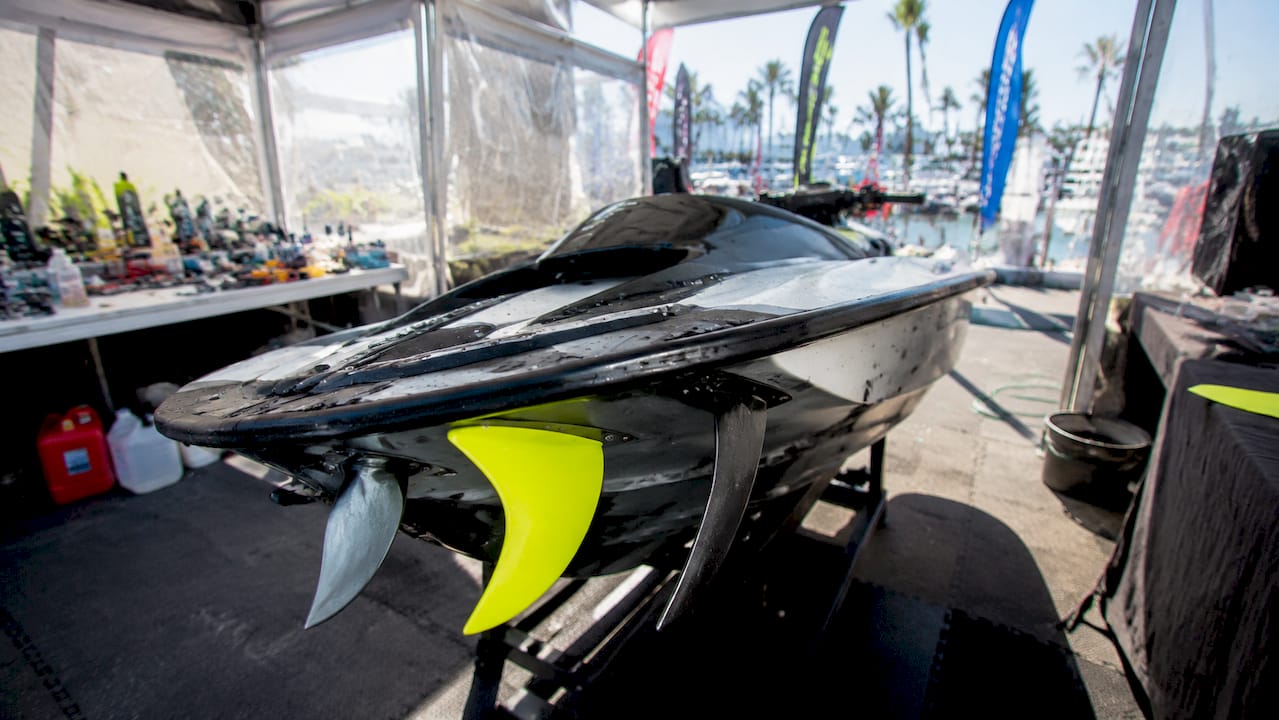
Surf fins on a motorized watercraft are the primary mechanism for directional control, stability, and handling responsiveness. The jet ski surf fin role is to interact with hydrodynamic forces beneath the board, directing water flow to prevent tail slide and maintain tracking through turns. Without fins, a motorized surfboard loses grip on the water surface and becomes unpredictable at speed. Understanding how fin design, type, and position affect your ride is the difference between a controlled session and a frustrating one.

How does surf fin design influence jet ski performance?

Fin geometry directly determines how a jet ski board holds through turns, accelerates down the line, and responds to rider input. Three dimensions define that geometry: depth, base length, and rake. Each one produces a distinct effect on handling.

Close-up of jet ski surf fin geometry and hull

Fin depth is the measurement from the board’s hull to the fin tip. Deeper fins increase hold and stability by reducing tail slide when leaning into turns or riding powerful waves. This means a rider pushing hard through a carve on a motorized surfboard gets more grip and less washout. Shallow fins release faster, which suits riders who want a looser, more reactive feel.

Base length controls how much surface area contacts the water along the rail line. Longer bases distribute hold across a wider footprint, producing smoother, more drawn-out turns. Shorter bases concentrate pressure at a single pivot point, enabling sharper direction changes. For jet ski applications where speed is constant and wave conditions vary, base length selection directly shapes how the board transitions from one turn to the next.

Rake, also called sweep, describes the angle at which the fin curves back from its base. High rake produces flowing, arcing turns because the fin flexes and releases gradually. Low rake creates a more upright fin that pivots quickly. Riders who prioritize tight, technical maneuvers favor low rake. Those who prefer speed and flow choose higher rake profiles.

Hydrodynamic lift and drag operate on fins the same way they operate on aircraft wings. The fin generates lateral lift that resists sideways movement, keeping the board tracking forward. Drag is the cost of that lift. Fin designers balance these two forces by adjusting foil shape, thickness, and surface area. A thicker foil generates more lift but also more drag. A thinner foil reduces drag but sacrifices grip at high lean angles.

  • Fin depth: controls hold and tail stability
  • Base length: determines turn radius and smoothness
  • Rake: sets the balance between pivot and flow
  • Foil thickness: trades lift for drag

Pro Tip: When testing a new fin setup, change only one variable at a time. Swapping depth, rake, and position simultaneously makes it impossible to identify which change produced the handling difference you felt.

What jet ski surf fin types exist and how do they compare?

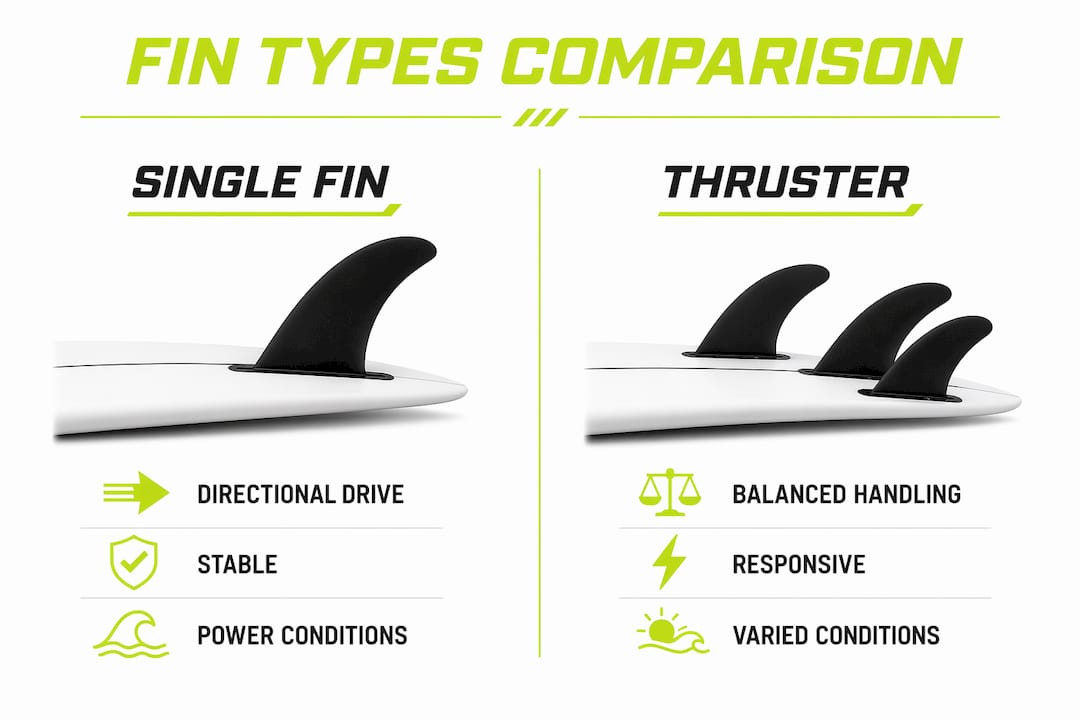
Fin type refers to the configuration of fins installed on the board, not just the shape of a single fin. Each configuration produces a distinct ride character suited to specific conditions and riding styles.

Infographic comparing jet ski fin types single vs thruster

Fin type Primary strength Best conditions Riding style
Single fin Directional drive and control Clean, lined-up waves Long, flowing lines
Twin keel Speed and rail engagement Small to medium waves Drawn-out, fast turns
Thruster (3-fin) Balance of response and stability Variable conditions Aggressive, technical
Quad Speed with added hold Hollow, fast waves Power surfing

Single fins deliver maximum directional drive. The single fin channels water flow directly off the tail, producing strong forward projection. This setup suits riders who want predictable tracking and minimal lateral drift. On a motorized surfboard, a single fin works well when the goal is straight-line speed with controlled, wide-radius turns.

Twin keel fins generate speed and drive by maximizing surface area along the rail line, favoring smooth, drawn-out turns. Typical twin keel bases range from 130 to 170 mm long, producing strong forward projection and a flow-oriented surfing style. Keel-style fins focus control on rail surface area rather than fin height, which explains why they feel stable and smooth rather than snappy. For jet ski riders who prioritize speed and carving rhythm, twin keels are a strong default choice.

Thruster configurations place two side fins and one center fin to balance responsiveness with stability. The center fin adds hold and drive while the side fins allow the tail to release and pivot. This three-fin setup is the most versatile option for variable water conditions, which makes it the most common configuration on motorized surfboards used in mixed sessions.

  • Single fin: best for predictable tracking and speed
  • Twin keel: best for smooth, fast carving
  • Thruster: best for all-around versatility
  • Quad: best for hollow, high-speed waves

How do modern fin adjustment systems enhance ride customization?

Fixed fin setups force riders to choose one configuration before a session and commit to it regardless of how conditions change. Modern adjustment systems eliminate that constraint entirely.

JetSurf’s FCS click-on fin system enables quick tool-free fin installation with a click on/click off mechanism. This eliminates the need for a screwdriver and makes fin setup changes between sessions faster. A rider who starts a session in flat water and moves to choppier conditions can swap fin configurations in under a minute without leaving the water’s edge. That speed matters when conditions shift quickly.

The Fins Adjuster Base from JetSurf goes further by letting riders precisely adjust fin convergence and position for customized ride characteristics. This system allows changing performance and handling beyond what fin swapping alone achieves. Convergence refers to the angle at which paired fins point toward each other. Tightening convergence increases tracking speed and directional stability. Opening convergence loosens the tail and makes the board more responsive to quick direction changes.

Small geometry shifts in convergence and position tune the board’s bite and tracking speed versus looseness, influencing ride aggression and control precision. Advanced riders use adjuster bases to dial in handling traits that match their technique rather than adapting their technique to a fixed setup. This is a meaningful shift in how riders interact with their equipment.

  • FCS click-on systems: tool-free swaps between sessions
  • Adjuster bases: fine-tune convergence and fin position
  • Convergence tuning: tighter equals more tracking, looser equals more pivot
  • Position shifts: move fins forward for drive, back for release

Pro Tip: Start with fins positioned slightly forward of center for more drive and stability. Move them back incrementally only after you have a baseline feel for the board’s default behavior.

The FCS fin system treats fin swaps as an integrated session workflow rather than a pre-session ritual. Riders who use this approach adapt to varied water conditions dynamically rather than guessing the right setup before launching. For jet ski enthusiasts who ride in locations where conditions change between morning and afternoon, this adaptability translates directly into better sessions.

What practical tips optimize your surf fin setup?

Getting the most from your fin setup requires matching fin selection to conditions, making incremental adjustments, and avoiding the most common setup mistakes.

  1. Match fin depth to wave power. Deeper fins hold better in powerful, fast-moving water. Fin hold is closely linked to fin depth rather than fin count or overall size. In small, weak waves, a shallower fin releases more freely and keeps the ride lively. In overhead surf or fast motorized conditions, deeper fins prevent the tail from washing out under load.

  2. Adjust convergence before changing fin type. Many riders swap fins when a simple convergence adjustment would solve the handling issue. Tighten convergence if the board feels loose and unpredictable. Open it if the board feels stiff and resistant to direction changes. This takes less time than a full fin swap and often produces the exact result needed.

  3. Account for safety gear in tow-in conditions. Tow-in surfing with jet skis requires additional safety gear including dive fins, a knife, and tow ropes as regulated by Hawaii’s Division of Boating and Ocean Recreation. Surf fin setup in tow-in scenarios must account for the forces generated at higher tow speeds, which typically favor deeper, more stable fin configurations over loose, pivot-oriented setups.

  4. Test one variable per session. Change fin depth, or rake, or position. Never all three at once. This discipline builds a reliable mental database of how each variable affects your specific board and riding style.

  5. Check fin condition before every session. Nicks, cracks, or delamination on fin edges disrupt water flow and reduce hold unpredictably. A damaged fin can feel like a handling problem when it is actually a maintenance issue. Inspect fins as part of your pre-launch routine.

  6. Use jet dynamics resources to cross-reference fin compatibility with your specific board model before purchasing. Not all fin systems fit all boards, and an incompatible fin base creates play that undermines the precision adjustments described above.

Key takeaways

Surf fin depth, type, and position are the three variables that determine jet ski board handling, and adjustable fin systems make it possible to tune all three without tools between sessions.

Point Details
Fin depth drives hold Deeper fins reduce tail slide and increase stability in powerful or fast conditions.
Fin type sets ride character Twin keels favor speed and flow; thrusters balance response and stability for varied conditions.
Convergence tuning matters Adjusting fin convergence changes tracking precision without requiring a full fin swap.
Tool-free systems save time FCS click-on systems allow mid-session fin changes that adapt to shifting water conditions.
Safety gear pairs with fin choice Tow-in surfing at jet ski speeds requires deeper, stable fin setups alongside required safety equipment.

Why fin geometry deserves more attention than most riders give it

Most riders I talk to focus on engine output and hull shape when they think about performance upgrades. Fins are treated as an afterthought, something that came with the board and probably works fine. That assumption costs real performance.

The shift that changed my perspective was watching how differently the same board handled after a convergence adjustment of just a few degrees. No new fins, no hardware changes. The board went from feeling vague in turns to tracking with real precision. That experience made it clear that fin geometry is not a fixed property of the board. It is a tunable variable, and riders who ignore it are leaving performance on the table.

For new riders, my recommendation is to start with a thruster setup at the manufacturer’s default position. Get comfortable with how the board responds before making any changes. Once you have a baseline, experiment with convergence first. It produces noticeable results with minimal risk of making the board feel unfamiliar. Fin depth changes come next, matched to the conditions you ride most often.

The powersports industry in 2026 is moving toward more rider-adjustable systems across all watercraft categories. Fin technology is part of that trend. Riders who understand how to use these systems will get more out of their equipment than those who treat fins as fixed hardware.

The most underrated aspect of fin setup is consistency. Riders who document their adjustments and the conditions they rode in build a personal reference that makes future tuning faster and more accurate. A simple note on your phone after each session is enough.

— Casey

Upgrade your jet ski fin setup with Ipdracing

Ipdracing carries performance parts for riders at every level, from recreational sessions to competitive racing. Whether you ride a Sea-Doo, Yamaha, or a dedicated motorized surfboard, the right fin setup starts with quality components.

https://ipdracing.com

Browse the Ipdracing shop for fin systems, adjuster bases, and handling control parts matched to your watercraft. The catalog covers everything from entry-level fin upgrades to advanced FCS-compatible systems used by competitive riders. If you need guidance on which components fit your specific model, the PWC Doctor service connects you with technical support to get the right parts the first time.

FAQ

What is the primary role of a surf fin on a jet ski?

A surf fin stabilizes the board and provides directional control by interacting with water flow beneath the hull. It prevents tail slide and keeps the board tracking through turns at speed.

How does fin depth affect jet ski handling?

Fin depth controls hold more than fin count or overall size. Deeper fins grip harder and reduce tail slide in powerful conditions, while shallower fins release more freely for a looser ride.

What fin type works best for variable water conditions?

A thruster configuration, which uses two side fins and one center fin, delivers the best balance of responsiveness and stability across changing conditions. It is the most versatile setup for riders who encounter varied water on a single session.

Can I adjust fins without removing the board from the water?

Yes. Systems like JetSurf’s FCS click-on mechanism allow tool-free fin swaps at the water’s edge in under a minute. Adjuster bases also allow convergence and position tuning without full fin removal.

Hawaii’s Division of Boating and Ocean Recreation requires specific safety gear for jet ski tow-in surfing, including dive fins, a knife, and tow ropes. Fin setup in tow-in conditions should favor deeper, more stable configurations to handle the higher speeds involved.

Jet ski rider navigating moderate ocean surf waves

Jet Ski Surf Conditions Explained for Riders

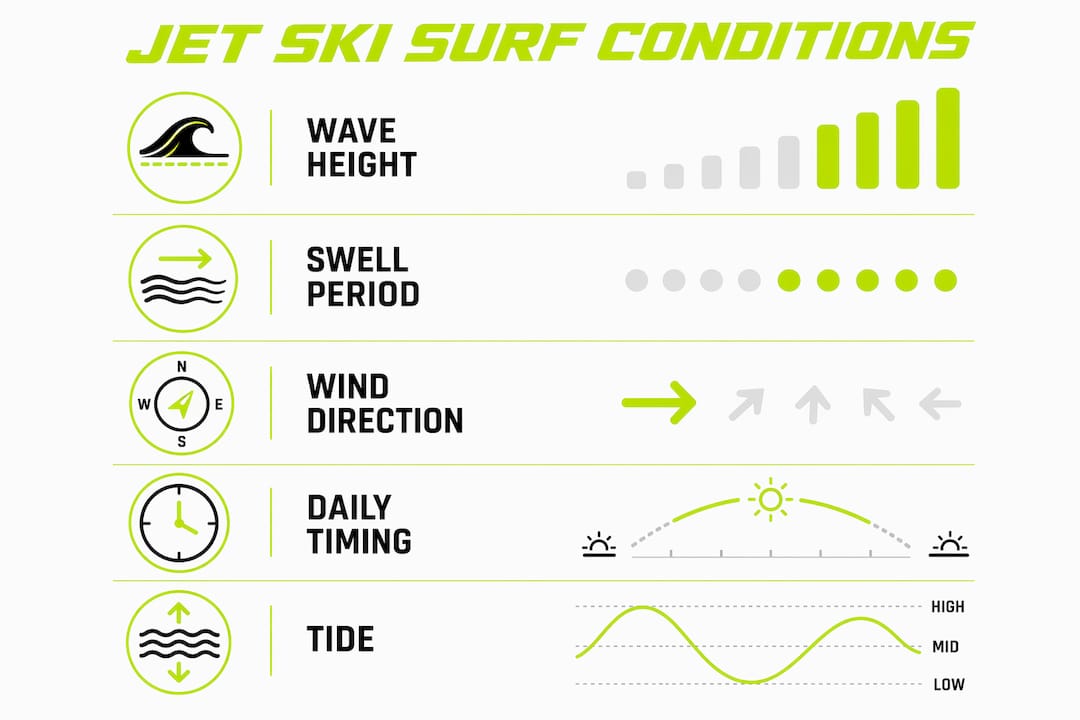
Jet ski surf conditions are defined by four measurable variables: wave height, swell period, wind direction, and daily timing. Together, these factors determine whether a session will be smooth and controlled or rough and dangerous. Most recreational riders focus only on wave height, which is the least reliable indicator on its own. Riders who understand swell period and wind direction make better decisions, avoid preventable capsizing, and get more out of every session. The difference between a great morning ride and a punishing afternoon grind often comes down to knowing what to look for before you launch.

Jet ski surf conditions explained: the key variables

Wave height, swell period, wind speed, wind direction, and tide are the five core variables that define surf conditions for jet skis. Each one affects your ride differently, and reading them together gives you a complete picture.

Wave height measures the vertical distance from trough to crest. For jet skis, waves under 2 feet are generally manageable for most skill levels. Waves above 4 feet require experience and deliberate throttle management. Height alone, however, does not tell you how organized or rideable those waves are.

Swell period is the single most important factor for wave quality. Swell periods above 12 seconds indicate clean, organized waves produced by distant storm energy. Periods below 9 seconds mean short, choppy, wind-driven waves that are unpredictable and physically demanding. A forecast showing 4-foot waves at 12 seconds is far more manageable than 6-foot waves at 6 seconds. Riders who skip this number are misreading the forecast.

Wind direction shapes the surface texture of the water. Offshore winds blow from land to sea, holding wave faces clean and smooth. Onshore winds blow from sea to land, creating choppy, confused surfaces that make steering harder and fatigue riders faster. Wind direction impacts jet ski handling dynamics more than wind speed does, which surprises most recreational riders.

Offshore wind shaping clean, organized ocean waves

Wind speed matters for a different reason. Small craft advisories are issued when sustained winds reach 25 to 33 knots or wave heights exceed 7 feet. These warnings apply directly to personal watercraft under 33 feet. Riding under an active advisory is a serious safety risk.

Tide affects water depth in nearshore zones and around sandbars. Low tide can expose shallow areas that are navigable at high tide, increasing the risk of hull damage or grounding. Check tide tables alongside your marine forecast before every session.

  • Wave height: manageable under 2 feet, demanding above 4 feet
  • Swell period: 12+ seconds means clean waves; below 9 seconds means chop
  • Wind direction: offshore is favorable; onshore creates surface confusion
  • Wind speed: small craft advisory threshold is 25 to 33 knots
  • Tide: affects depth in nearshore zones and around sandbars

Pro Tip: Check the National Weather Service marine forecast alongside a surf report app like Surfline or Magic Seaweed. Marine forecasts include wind and swell data specific to coastal zones, while surf reports add local break knowledge.

How daily timing and weather patterns shift conditions

The time of day you ride has a direct effect on water surface quality. Morning windows between 8 and 10 AM consistently offer the calmest conditions, with glassy water, lower boat traffic, and better visibility. Ocean City, MD locals describe the early morning slot as the most predictable and enjoyable window of the day. Late afternoon between 4 and 6 PM is the second-best window, after the peak sea breeze has begun to ease.

Infographic illustrating key variables of jet ski surf conditions

The reason for this pattern is the sea breeze cycle. Sea breezes peak mid-afternoon as land heats faster than water, generating onshore wind that builds chop and increases surface turbulence. By mid-morning, land and sea temperatures are still close enough that wind remains light. By early afternoon, that gap widens and conditions deteriorate quickly.

Here is how a typical coastal day progresses for jet ski riders:

  1. Pre-dawn to 8 AM: Calm, glassy water. Light or no wind. Best visibility and lowest traffic.
  2. 8 to 10 AM: Optimal window. Conditions remain stable. Ideal for longer runs or technical riding.
  3. 10 AM to noon: Sea breeze begins building. Surface chop increases gradually.
  4. Noon to 3 PM: Peak sea breeze. Chop is at its worst. Avoid open water runs if possible.
  5. 3 to 5 PM: Sea breeze starts to ease. Conditions improve slightly but remain variable.
  6. Late afternoon: Second usable window, though conditions are less predictable than morning.

Thunderstorms represent the most serious timing risk. Thunderstorms create extreme danger through lightning, gusty winds, and rapidly building seas. If a storm is forecast within 30 miles of your riding area, do not launch. If a storm develops while you are on the water, return to shore immediately before the storm cuts off your return path.

“The biggest mistake riders make is launching based on how the water looks at the dock. Conditions 2 miles offshore can be completely different. Check the marine forecast, not just the sky.”

What riding techniques keep you safe in surf conditions

Throttle control is the most critical skill for riding in surf. Releasing the throttle in rough water removes steering ability entirely, because jet skis only steer when the impeller is pushing water. Letting off the gas at the wrong moment in a wave zone means you lose directional control precisely when you need it most. Maintain steady throttle through wave faces and only reduce speed in flat water between sets.

Spacing is equally important. Staying at least 100 feet from other riders and watercraft gives you room to react to unexpected wave behavior. Surf zones are dynamic, and a wave that looks manageable from a distance can break differently than expected. Crowding other riders in surf conditions creates collision risk.

Timing your runs through breaking waves is a skill that rescue professionals train specifically. The Bethany Beach Fire Company, for example, trains crews to coordinate launches with surf rhythm rather than rushing in on the first lull. Sneaker waves and unpredictable sets can catch riders who do not observe the pattern before committing. Watch the break for at least two full sets before entering.

  • Maintain throttle through wave faces to preserve steering control
  • Keep 100 feet of spacing from other riders in surf zones
  • Observe at least two full wave sets before launching through a break
  • Approach waves at a slight angle rather than head-on to reduce impact force
  • Reduce speed before crests, not on the face, to avoid launching airborne

Pro Tip: For handling in rough water, shift your weight back slightly when climbing a wave face and forward when descending. This keeps the hull tracking rather than skipping sideways.

How to read marine and surf forecasts for jet ski sessions

Marine forecasts and land weather reports are not the same thing. Land forecasts measure conditions at weather stations, which are often miles from the water and do not capture coastal wind patterns, swell data, or wave period. Marine forecasts from the National Weather Service cover specific coastal zones and include wind speed, wind direction, wave height, swell period, and small craft advisory status. Always use a marine forecast for any coastal or open-water session.

The table below shows how to interpret common forecast values for jet ski riding:

Forecast Value What It Means for Jet Skis
Swell period 12+ seconds Clean, organized waves. Favorable for most skill levels.
Swell period under 9 seconds Short, choppy wind waves. Physically demanding and unpredictable.
Wind speed under 15 knots Manageable surface conditions for recreational riding.
Wind speed 25 to 33 knots Small craft advisory threshold. Avoid open water.
Wave height 2 feet or under Low impact. Good for beginners and casual sessions.
Wave height 4 feet or above Requires experience and deliberate throttle management.
Onshore wind direction Choppy surface. Harder steering and faster fatigue.
Offshore wind direction Cleaner surface. More predictable wave faces.

Reading a forecast correctly means combining these values rather than checking them in isolation. A 4-foot swell at 12 seconds with offshore winds is a very different session than a 4-foot swell at 6 seconds with onshore winds. The first is organized and manageable. The second is chaotic and tiring.

Check your marine forecast the night before and again one hour before launching. Conditions can shift faster than daily forecasts update, especially in coastal areas with strong sea breeze cycles. Apps like Windy, PredictWind, and the NOAA marine forecast portal all provide the swell period and wind direction data you need for accurate planning.

Key takeaways

Jet ski surf conditions require reading swell period, wind direction, wave height, and daily timing together, because no single variable tells the full story.

Point Details
Swell period over wave height Periods above 12 seconds indicate clean, organized waves regardless of height.
Wind direction matters most Offshore winds create cleaner surfaces; onshore winds produce punishing chop.
Morning is the optimal window The 8 to 10 AM slot offers the calmest water and lowest traffic for most coastal locations.
Throttle control is non-negotiable Releasing throttle in surf removes steering ability and increases hazard exposure.
Use marine forecasts, not land forecasts Marine forecasts include swell period, wind direction, and small craft advisory data that land reports omit.

Why most riders are still reading conditions wrong

Most recreational riders I have observed check wave height and wind speed, then make a go or no-go call. That approach works fine on flat inland lakes. On coastal water, it misses the two variables that actually determine ride quality: swell period and wind direction.

I have watched riders launch into what looked like moderate 3-foot surf, only to get worked by short-period chop that was more exhausting than 5-foot organized swell would have been. The water surface looked similar from the shore. The forecast data told a completely different story. Swell period below 8 seconds with onshore wind is one of the most punishing combinations a jet ski rider can encounter, and it rarely looks dramatic from the dock.

The other habit I see consistently undervalued is set timing. Rescue operators coordinate launches with surf rhythm because static conditions do not exist in a surf zone. Recreational riders who watch the break for two full sets before committing have a measurably better experience than those who launch on the first calm moment. That patience is not hesitation. It is the correct technique.

My consistent advice: be conservative with your go decision, especially when swell period is low or wind direction is onshore. The water will be there tomorrow. A PWC performance setup that handles surf well still requires the rider to make sound timing and forecast decisions. Gear does not substitute for judgment.

— Casey

Gear built for the conditions you ride in

Ipdracing builds performance products for riders who take surf conditions seriously. Whether you are running recreational sessions in coastal chop or pushing performance in competitive environments, the right equipment changes how your watercraft responds to wave height, swell energy, and surface texture.

https://ipdracing.com

From handling and control parts designed for rough water to performance upgrades that improve throttle response in surf zones, Ipdracing stocks gear tested across real riding conditions. The PWC Doctor service at ipdracing.com/pwc-doctor provides specialized support for watercraft tuning and maintenance, so your machine is ready before conditions demand it. Visit the Ipdracing shop to find equipment matched to your riding style and the surf environments you face.

FAQ

What are ideal jet ski conditions for recreational riders?

Ideal conditions include wave heights under 2 feet, swell periods above 12 seconds, offshore or light winds under 15 knots, and no active small craft advisories. Morning sessions between 8 and 10 AM typically offer the most stable water surface.

How does swell period affect jet ski riding?

Swell period above 12 seconds produces clean, organized waves that are predictable and manageable. Periods below 9 seconds mean short, choppy wind waves that are physically demanding and harder to navigate safely.

What is a small craft advisory and does it apply to jet skis?

A small craft advisory is issued when sustained winds reach 25 to 33 knots or wave heights exceed 7 feet. Jet skis fall under the vessel category covered by these warnings, and riding under an active advisory carries serious safety risk.

Why should I maintain throttle in surf conditions?

Releasing throttle on a jet ski removes steering ability because the craft only steers when the impeller is engaged. Letting off the gas during a wave encounter reduces control at the moment you need it most.

What is the best time of day to ride a jet ski in coastal conditions?

The 8 to 10 AM window consistently delivers the calmest water, lowest boat traffic, and most predictable conditions. Sea breezes build through the afternoon and peak around midday, making morning the most reliable window for coastal riding.

Marine enthusiast reviewing performance parts catalogs

Top 5 pjs-usa.com Performance Parts Alternatives 2026

Finding personal watercraft performance parts that truly fit your model and deliver race-level upgrades often means choosing between incomplete catalogs or vendors with limited technical support. Many parts suppliers either ignore model-specific install guidance, skip bundled tuning options, or leave international buyers confused about shipping and warranty details. This comparison lines up five top PWC performance parts sources so you can match your craft, upgrade goals, and support needs to the right vendor on your first order.

Table of Contents

IPD Racing

https://ipdracing.com

At a Glance

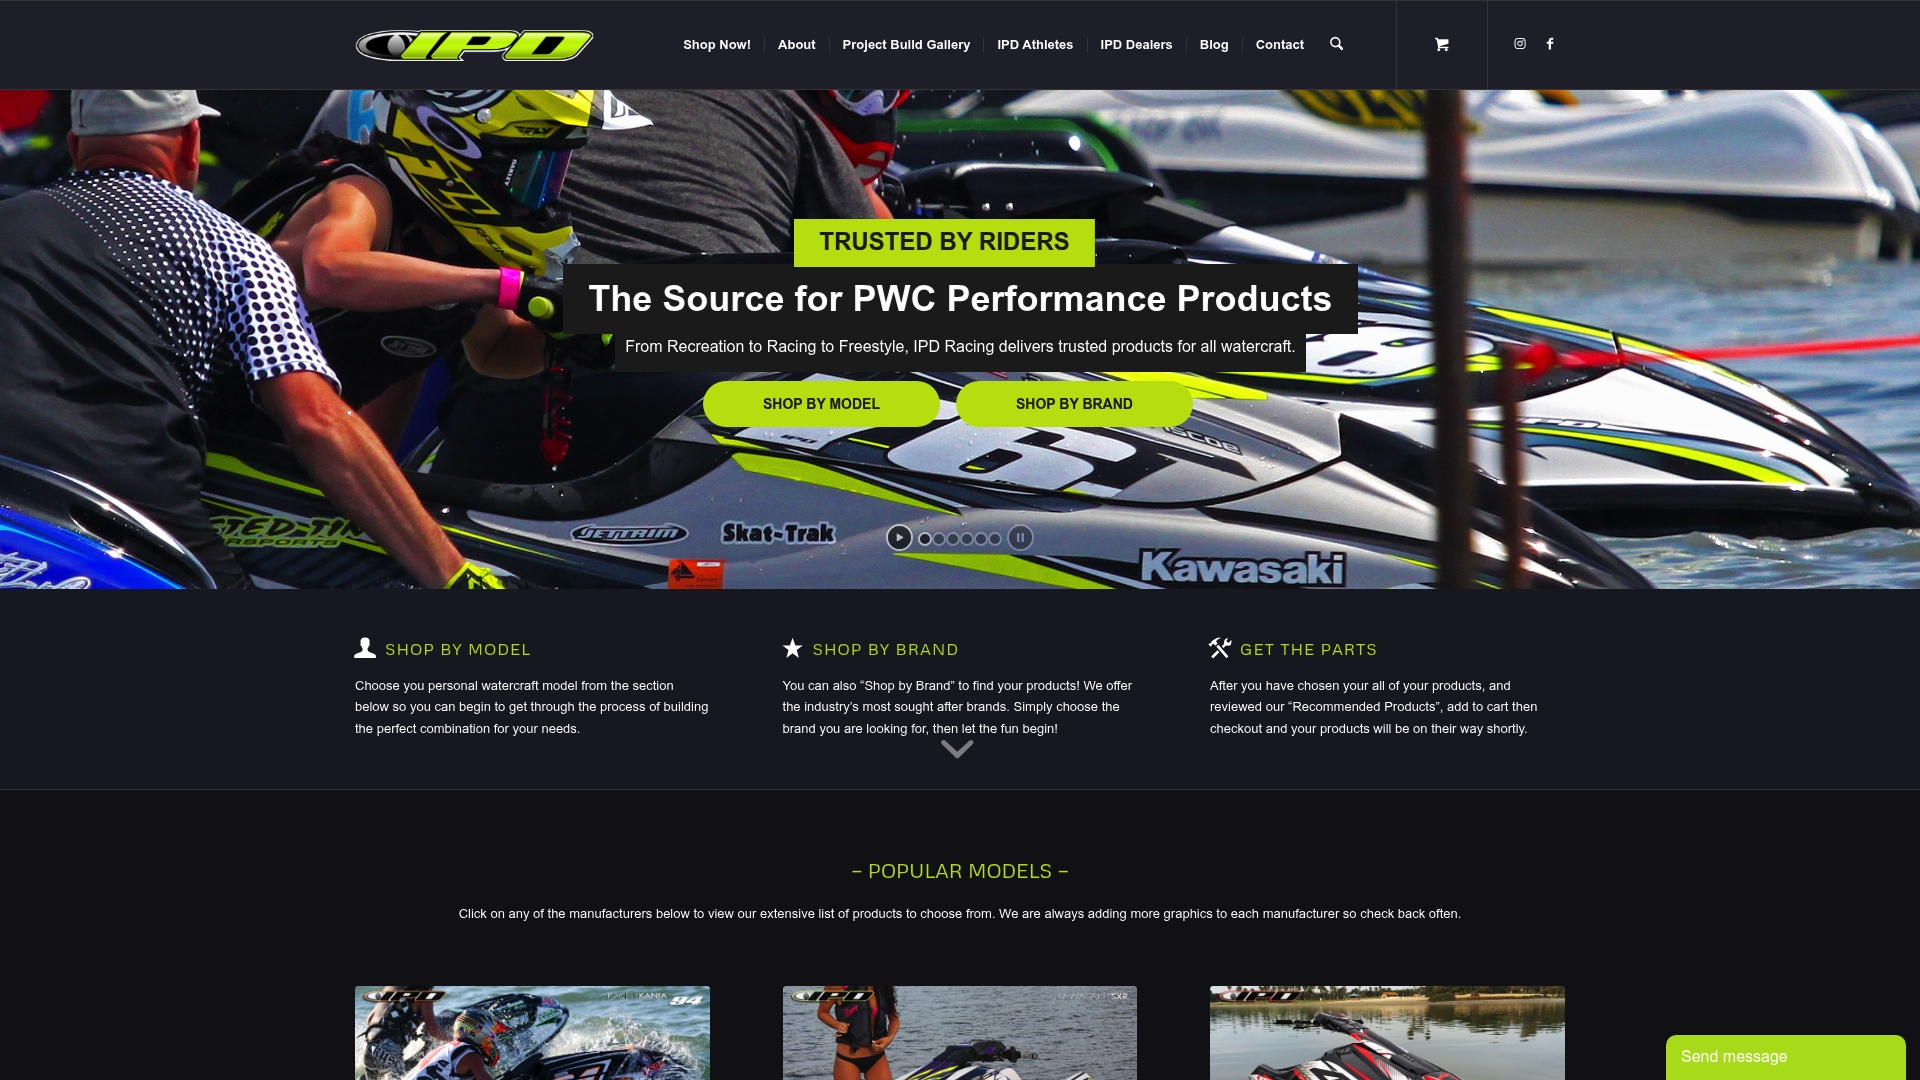
The company cites over two decades of racing experience and pairs that history with a global dealer network and model-specific build guides that aim to get parts installed and track-ready faster than guessing on fitment.

The storefront emphasizes race-validated parts, custom graphics, and how-to galleries that help racers and builders confirm compatibility before they buy.

Core Features

  • Wide selection of race-proven parts and accessories for Sea-Doo, Kawasaki, Yamaha, Polaris, and Zapata models, including high-performance engine and intake components.

  • Comprehensive build guides and galleries that document fitment, installation steps, and race setups for common models.

  • Full graphics and customization services with model templates and bespoke wraps for team branding and sponsor layouts.

  • Dedicated dealer network for technical support, parts sourcing, and service across multiple regions.

Key Differentiator

IPD Racing’s main edge is the combination of that heritage claim above with an online catalog tied to real build documentation and dealer backup. The listing of parts is not just a catalog; it is curated around race use, with visual build references and local service options to close the loop from purchase to installation.

Pros

  • Longstanding racing heritage translates to deep parts knowledge and practical fitment notes so you spend less time guessing what works for your model and more time on setup.

  • Extensive brand coverage means you can source parts across Sea-Doo, Kawasaki, Yamaha, Polaris, and Zapata without hopping between multiple specialty shops.

  • Global delivery capability helps international racers and dealers get parts shipped where they need them, with dealer support available for diagnostics and service.

  • High-quality graphics and custom design services let teams apply consistent branding at race events without sourcing a separate signage vendor.

  • Strong community presence and racer endorsements give you quick, experience-based feedback on which parts survive race conditions and which are fit-for-purpose.

Cons

  • The catalog is heavily race and performance focused, so casual riders seeking inexpensive maintenance parts or basic recreational accessories may find the selection and pricing oriented away from their needs.

Who It’s For

Racing enthusiasts, professional builders, and serious hobbyists who want race-validated parts, model-specific installation guidance, and access to a dealer network for service and tuning support.

Also useful for dealers and shops looking to source performance components with reference materials and branding options.

Unique Value Proposition

Model-specific build guides paired with dealer-level support let you move from ordering to a race-ready craft with fewer unknowns. For teams that need repeatable setups, the combination of documented installs and local service reduces teardown guesswork and shortens prep time between events.

Real World Use Case

A jet ski racer selects performance intake and cooling components, orders custom graphics, and coordinates a nearby dealer for installation and tuning. The build guides confirm fitment, the dealer performs the install, and the rider shows up at the next event with parts that match the documented setup.

Pricing

Prices vary by item from about $20 for basic accessories to several hundred dollars for specialized performance components. The site advertises free shipping thresholds and occasional bundle discounts and promotions that reduce per-item cost on larger orders.

Website: https://ipdracing.com

Riva Racing

https://rivaracing.com

At a Glance

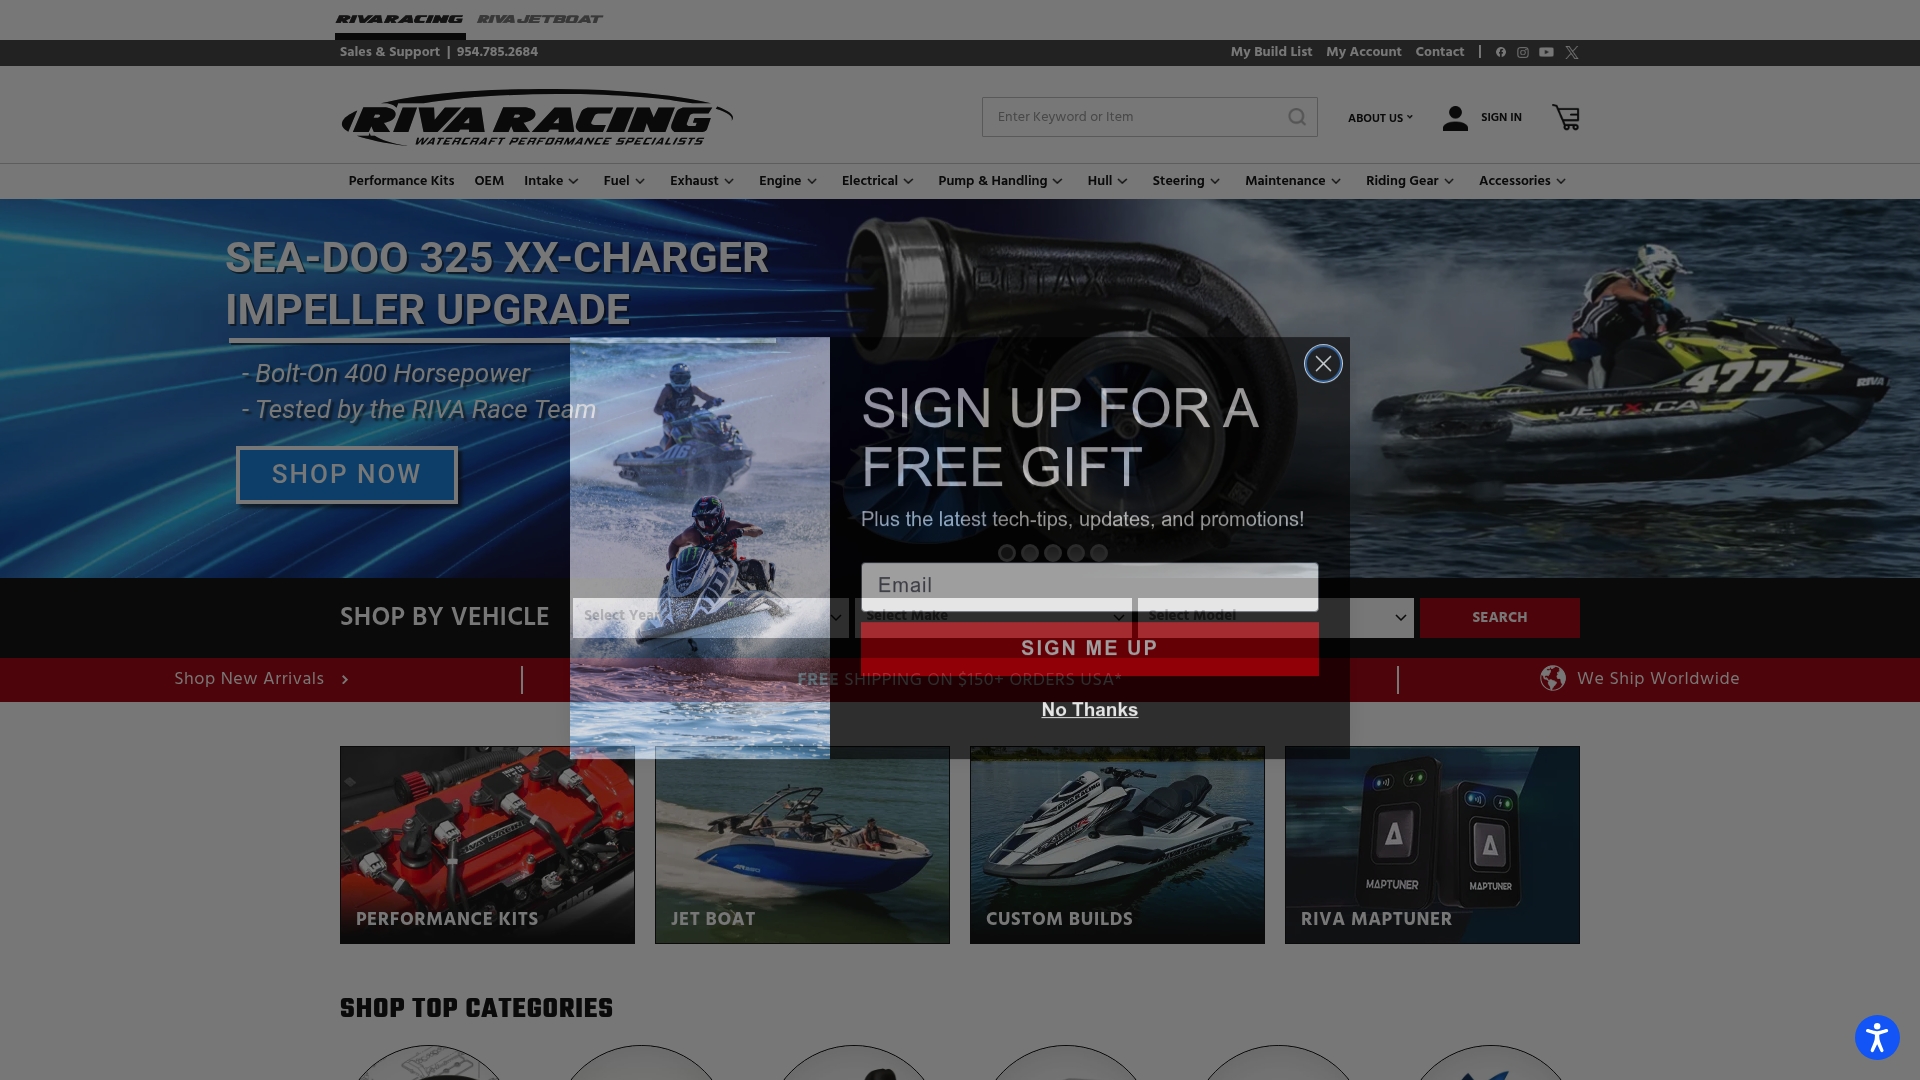
Riva Racing highlights industry-grade packaging for fragile components and advertises fast shipping for in-stock items, which matters when you need a part before a weekend on the water. The vendor positions itself around high-performance PWC parts and custom tuning for serious riders and racers.

Core Features

Riva Racing maintains an extensive aftermarket parts catalog that covers engines, exhausts, impellers, and trim components. The shop offers high-performance tuning services for race and recreational setups. Fast shipping for in-stock items, technical support focused on performance upgrades, and careful packaging for delicate parts complete the core offering.

Key Differentiator

The company leans hard on technical expertise and custom tuning work that targets PWC performance gains rather than generic marine accessories. That focus means their parts selection and tuning guidance aim at measurable speed and handling improvements for riders who prioritize lap times or aggressive recreational performance.

Pros

  • Recognized for its parts selection and tuning advice, which many buyers report delivers noticeable performance improvements after installation.
  • Technical support staff who speak tuning and part compatibility, useful when swapping engine components across model years.
  • Fast shipping for commonly stocked items gets you back on the water quicker than lower-tier retailers.
  • Packaging rated above average for fragile items reduces arrival damage risk when ordering costly components.
  • Broad compatibility across popular PWC models makes this a one-stop source for many upgrade paths.

Cons

  • Shipping policies and thresholds are not always transparent, which makes final cost estimates tricky before checkout.
  • Customer service quality appears inconsistent based on reviews, so response and resolution times can vary.
  • International shipping options are limited or unclear, which restricts accessibility for non domestic buyers.
  • Focused niche offering means this shop is not useful if you need general marine or outdoor gear beyond PWC performance items.

When It May Not Fit

If you need clear, fixed shipping fees up front or predictable international logistics, Riva Racing may frustrate you. If your needs are general boating supplies or leisure accessories rather than performance upgrades, another retailer will likely have broader inventory and simpler shipping rules.

Who It’s For

Dedicated PWC enthusiasts, club racers, and custom builders who want targeted performance parts and a tuner who understands PWC engines. If you chase lap time improvements or plan custom builds, this vendor speaks your language. Casual boaters looking for basic maintenance items will find the selection narrower than mainstream marine retailers.

Real World Use Case

A racer orders a high-flow exhaust and a matched impeller, then books a tune. Parts ship quickly from stock, arrive well packed, and the shop’s tuning calibrates throttle response and top end. The rider reports measurably sharper acceleration and cleaner high RPM behavior on the next track day.

Pricing

Prices vary by component and tuning package. Expect routine performance parts to cost a few hundred dollars and major engine or exhaust upgrades to run into the low thousands. The vendor does not advertise subscription or standard bulk discounts and shipping thresholds require a review at checkout.

Website: https://rivaracing.com

SBT

https://shopsbt.com

At a Glance

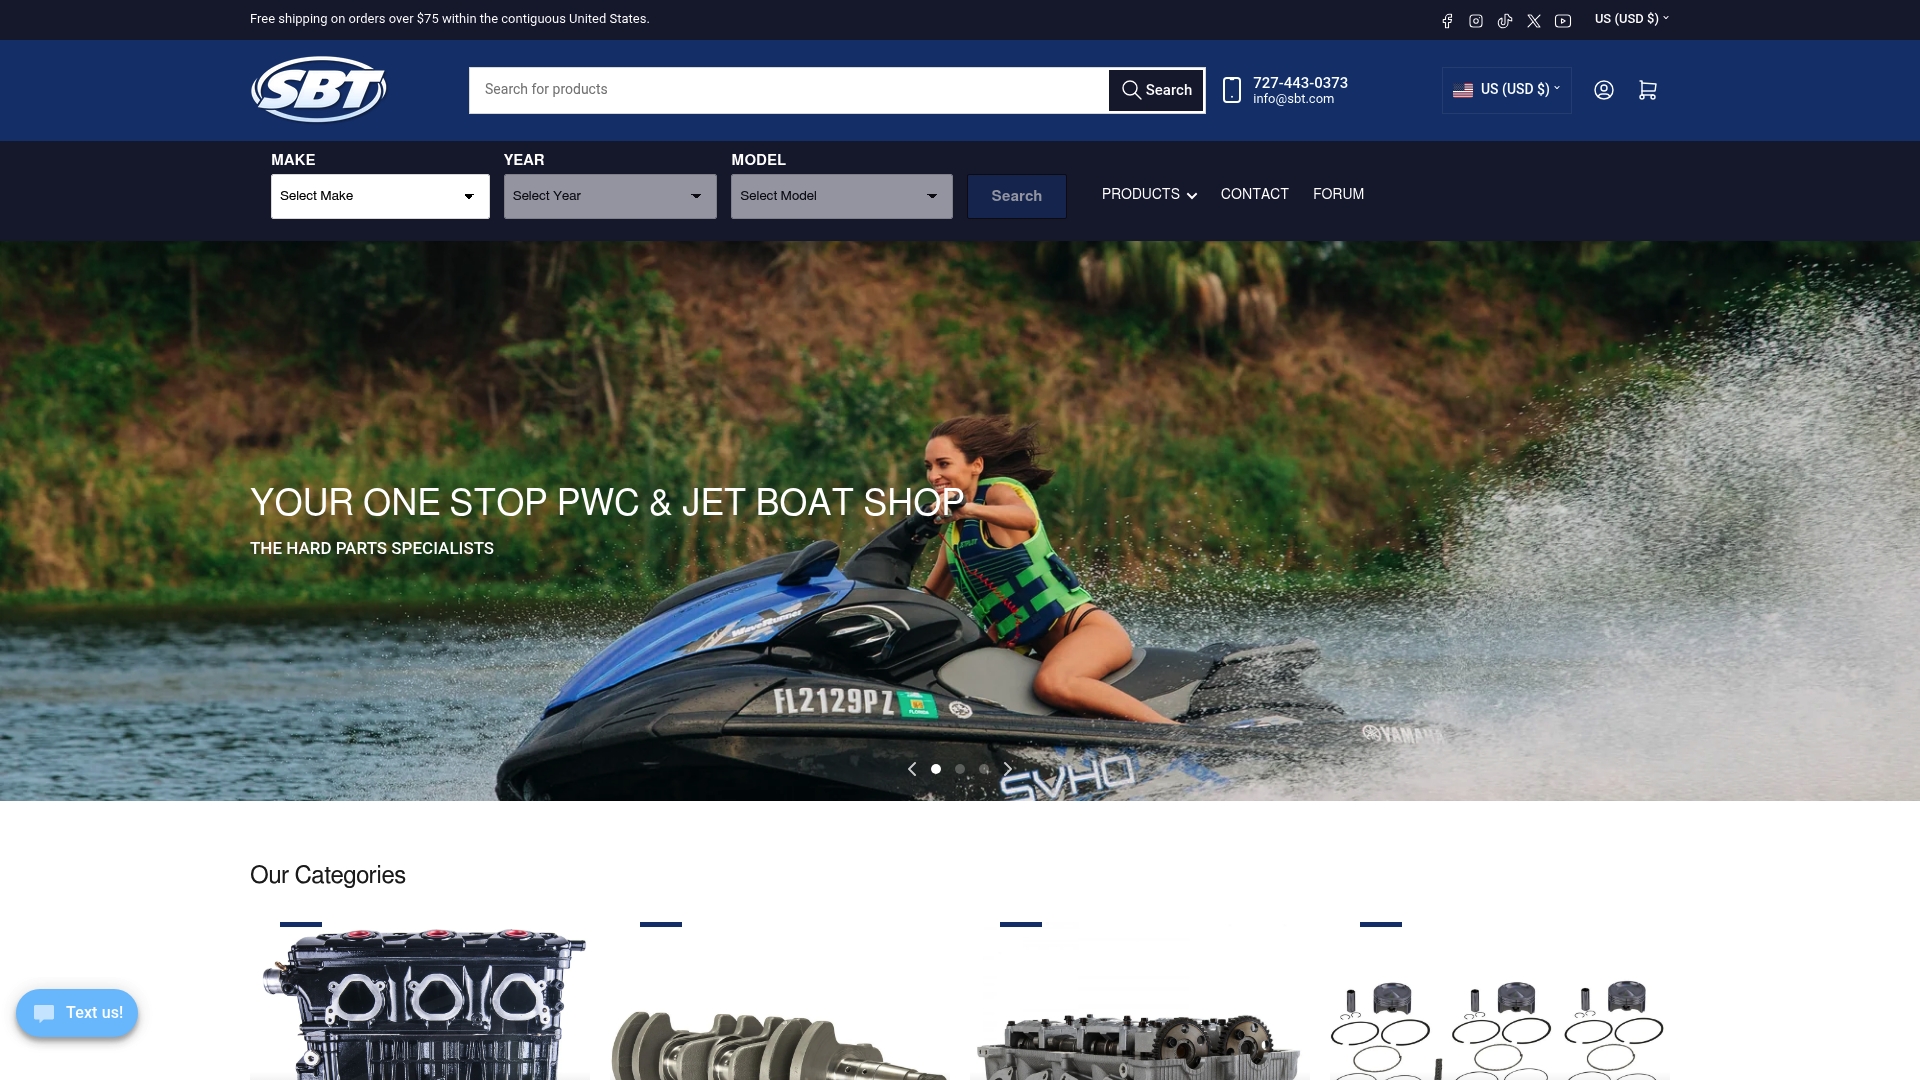
SBT reports a catalog of over 15,000 parts, a detail that explains why many shops turn to them when an uncommon engine component is needed. The company operates from Clearwater, Florida, and emphasizes remanufactured engines, OEM-compatible parts, and global shipping options.

Core Features

  • No-core-required engines for shops that want ready-to-run replacements without chasing cores.
  • Large inventory of aftermarket and remanufactured PWC parts covering engines, crankshafts, cylinders, heads, and electronics.
  • Global shipping with free US shipping on orders over $75 and a network that supports international deliveries.
  • Dedicated research and development aimed at remanufacturing engines to meet or exceed OEM standards.
  • Warranty-backed reman engines and detailed product pages for installers and technicians.

Key Differentiator

SBT’s marketing claims that their remanufactured engines perform better than new OEM units, and that R&D commitment is the company’s central angle. That claim pairs with warranties and no-core options to reduce install risk for shops and racers who need reliable, repeatable performance.

Pros

  • High parts depth helps when you need a rare Sea-Doo or Yamaha component that mass-market suppliers do not stock.

  • Specialization in both 2-stroke and 4-stroke remanufacturing gives shops consistent rebuild quality and longer service life for rebuilt engines.

  • Warranty coverage on reman engines reduces post-installation exposure, which matters for professional repair shops and customer-facing work.

  • Fast order fulfillment and global reach mean shorter bench time for popular assemblies and quicker turnarounds for racers on a schedule.

  • No-core-required options simplify logistics for one-off repairs and prevent downtime while sourcing old cores.

Cons

  • Focused almost entirely on personal watercraft parts, so owners of other small watercraft will find the selection limited.

  • Some new engine assemblies sit at a relatively premium price point versus generic alternatives, raising upfront cost for budget builds.

  • Limited retail presence means mostly online shopping; hands-on inspection before purchase is rarely possible.

When It May Not Fit

If you service boats, wakeboards, or non-PWC craft, SBT’s catalog will feel narrow. International buyers should check shipping terms and duties closely because stock and delivery speed can vary outside the US. If you need a walk-in store to inspect parts, this is not the best match.

Who It’s For

SBT fits water sports enthusiasts, professional repair shops, and racers who prioritize durable, OEM-matching engine components and documented remanufacturing practices. Choose SBT when you value warranty-backed reman engines and broad parts depth for Sea-Doo, Yamaha, Kawasaki, Polaris, Tigershark, or Honda models.

Real World Use Case

A professional repair shop orders a no-core-required Sea-Doo engine after a catastrophic failure. The shop receives detailed specs, installs the unit the same week, and the customer reports the craft runs like new. Warranty paperwork and quick parts support made the repair straightforward.

Pricing

Most engine assemblies range from $845 to $3,995 depending on model and whether the unit is remanufactured or new. SBT advertises no-core-required engines and free US shipping for orders over $75, which reduces total cost for many repairs.

Website: https://shopsbt.com

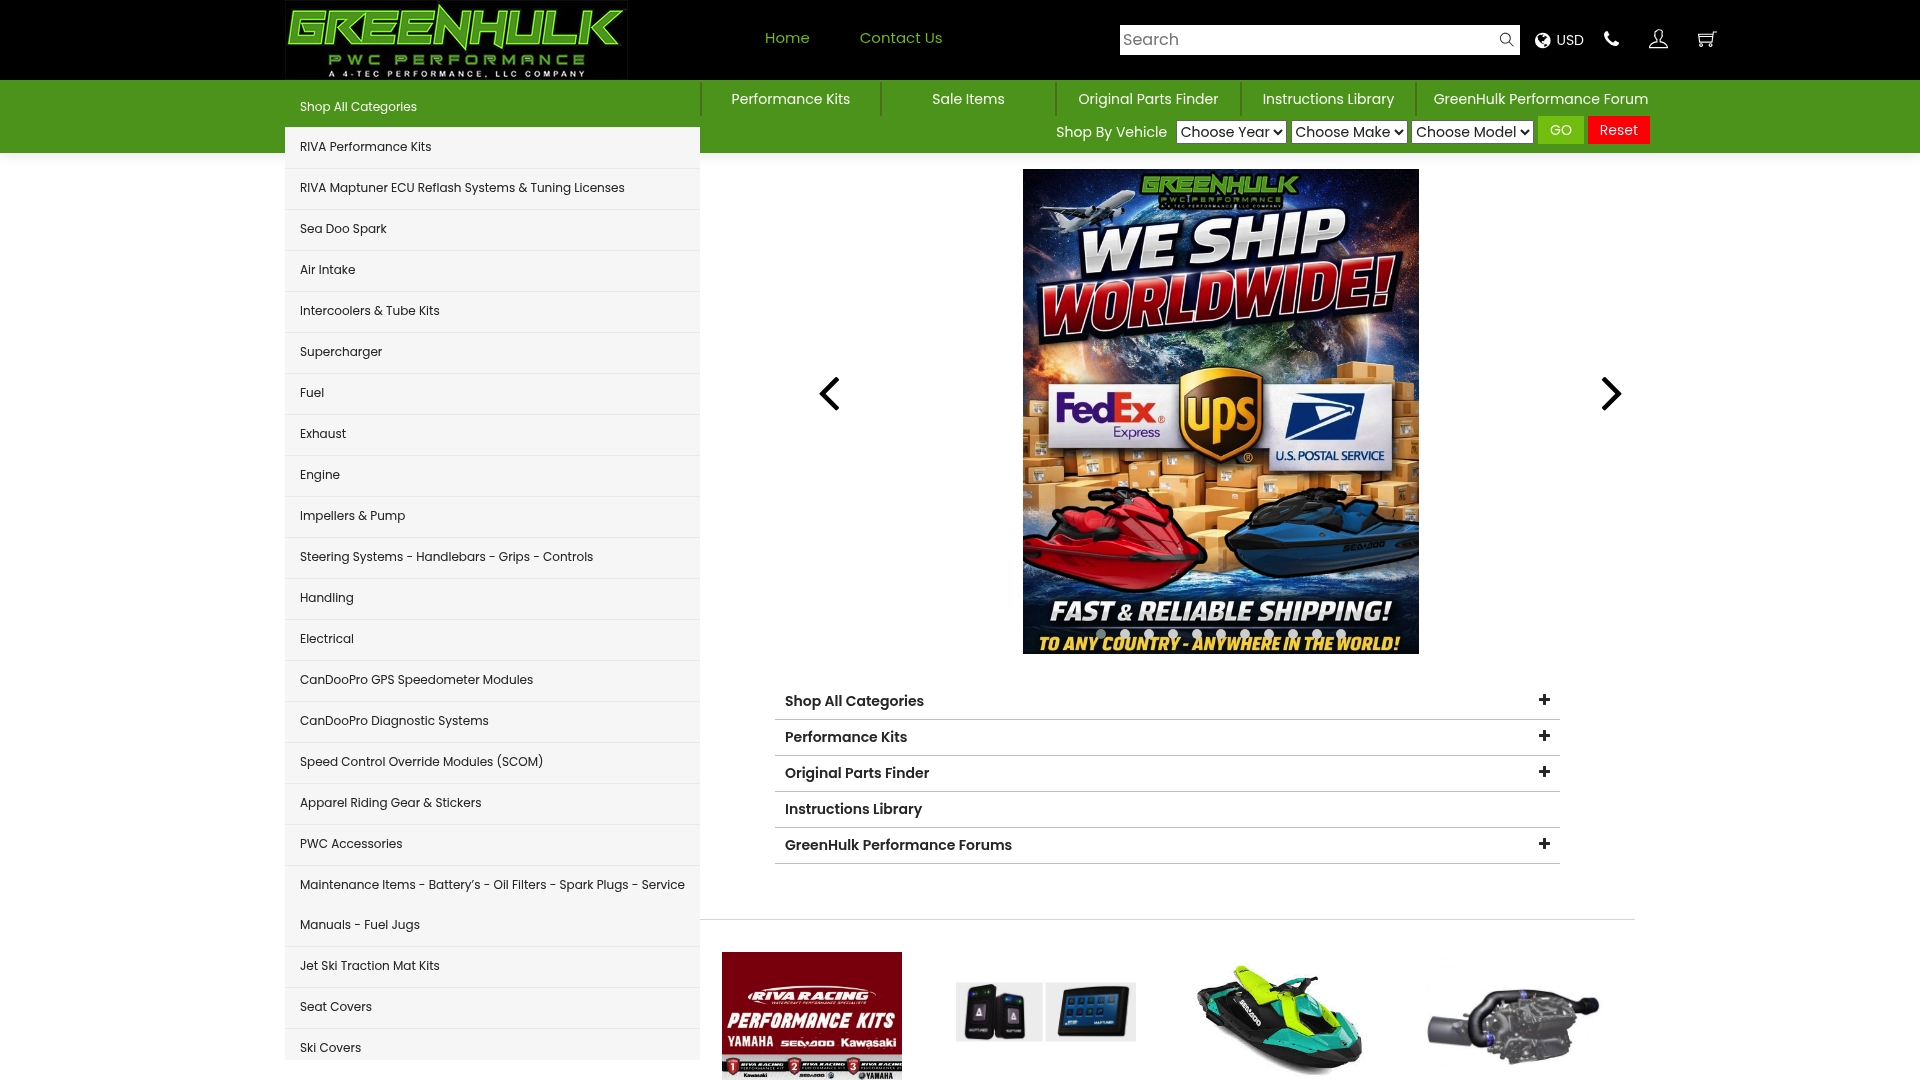
4 Tecperformance

https://4-tecperformance.com

At a Glance

Sells model-specific performance kits and MaptunerX-compatible ECU reflashes for Sea Doo, Yamaha, Kawasaki, and Honda models. The catalog mixes engine upgrades, handling components, and accessories so you can pair a tune with new impellers or drivetrain parts from a single supplier.

Core Features

  • Wide selection of performance parts across engine, handling, and drivetrain categories including impellers, pumps, and supercharger kits.
  • ECU reflash and tuning system offerings that let you apply model-specific maps and adjustments.
  • Accessories and maintenance items from seat covers to gauges plus technical advice and active online forums to troubleshoot installs.

Key Differentiator

A focused inventory for high-performance PWC work that combines hardware with tuning tools. The strength here is the ability to source a performance kit, matching ECU tune, and supporting components in one place rather than piecing parts together from multiple vendors.

Pros

  • Extensive catalog saves time when building a complete upgrade package, from intake and exhaust mods to handling tweaks and hardware.
  • Competitive pricing and routine discount codes lower upgrade costs for hobbyists and shops buying multiple items.
  • Active forums and technical advice make project decisions easier, especially for DIY installers who need setup tips and model-specific guidance.
  • Offers dedicated diagnostic and tuning systems, so you can buy both the mechanical parts and the tuning tools required to extract real gains.

Cons

  • Customer feedback is polarised; some buyers report smooth purchases while others report order and communication problems that interrupt urgent projects.
  • Reported delays in processing and refunds make tight build schedules risky if you need parts quickly for an event or service turnaround.
  • Contact information is not always obvious on the site, which can slow down troubleshooting when a part arrives wrong or is out of stock.

When It May Not Fit

If you need guaranteed next-day fulfillment for race prep or operate outside their supported regions, this provider can be a poor match. Also avoid if your procurement model depends on fixed bulk discounts or standardized tier pricing across many SKUs.

Who It’s For

Experienced watercraft enthusiasts, amateur racers, and professional tuners who want a single supplier for both parts and ECU tuning hardware. Ideal when you want to match software tunes to aftermarket components for measurable speed and handling gains.

Real World Use Case

A Yamaha Waverunner owner buys a performance kit plus an ECU tuning interface, uses the forums to confirm the correct impeller and map, installs the hardware, and reflashes the ECU to tune for higher top speed and crisper throttle response for local club races.

Pricing

Prices vary by category with mid to premium tiers depending on the brand and kit complexity. The site runs discounts and shipping thresholds such as free shipping above set order values, so total cost depends on parts chosen and promo timing.

Website: https://4-tecperformance.com

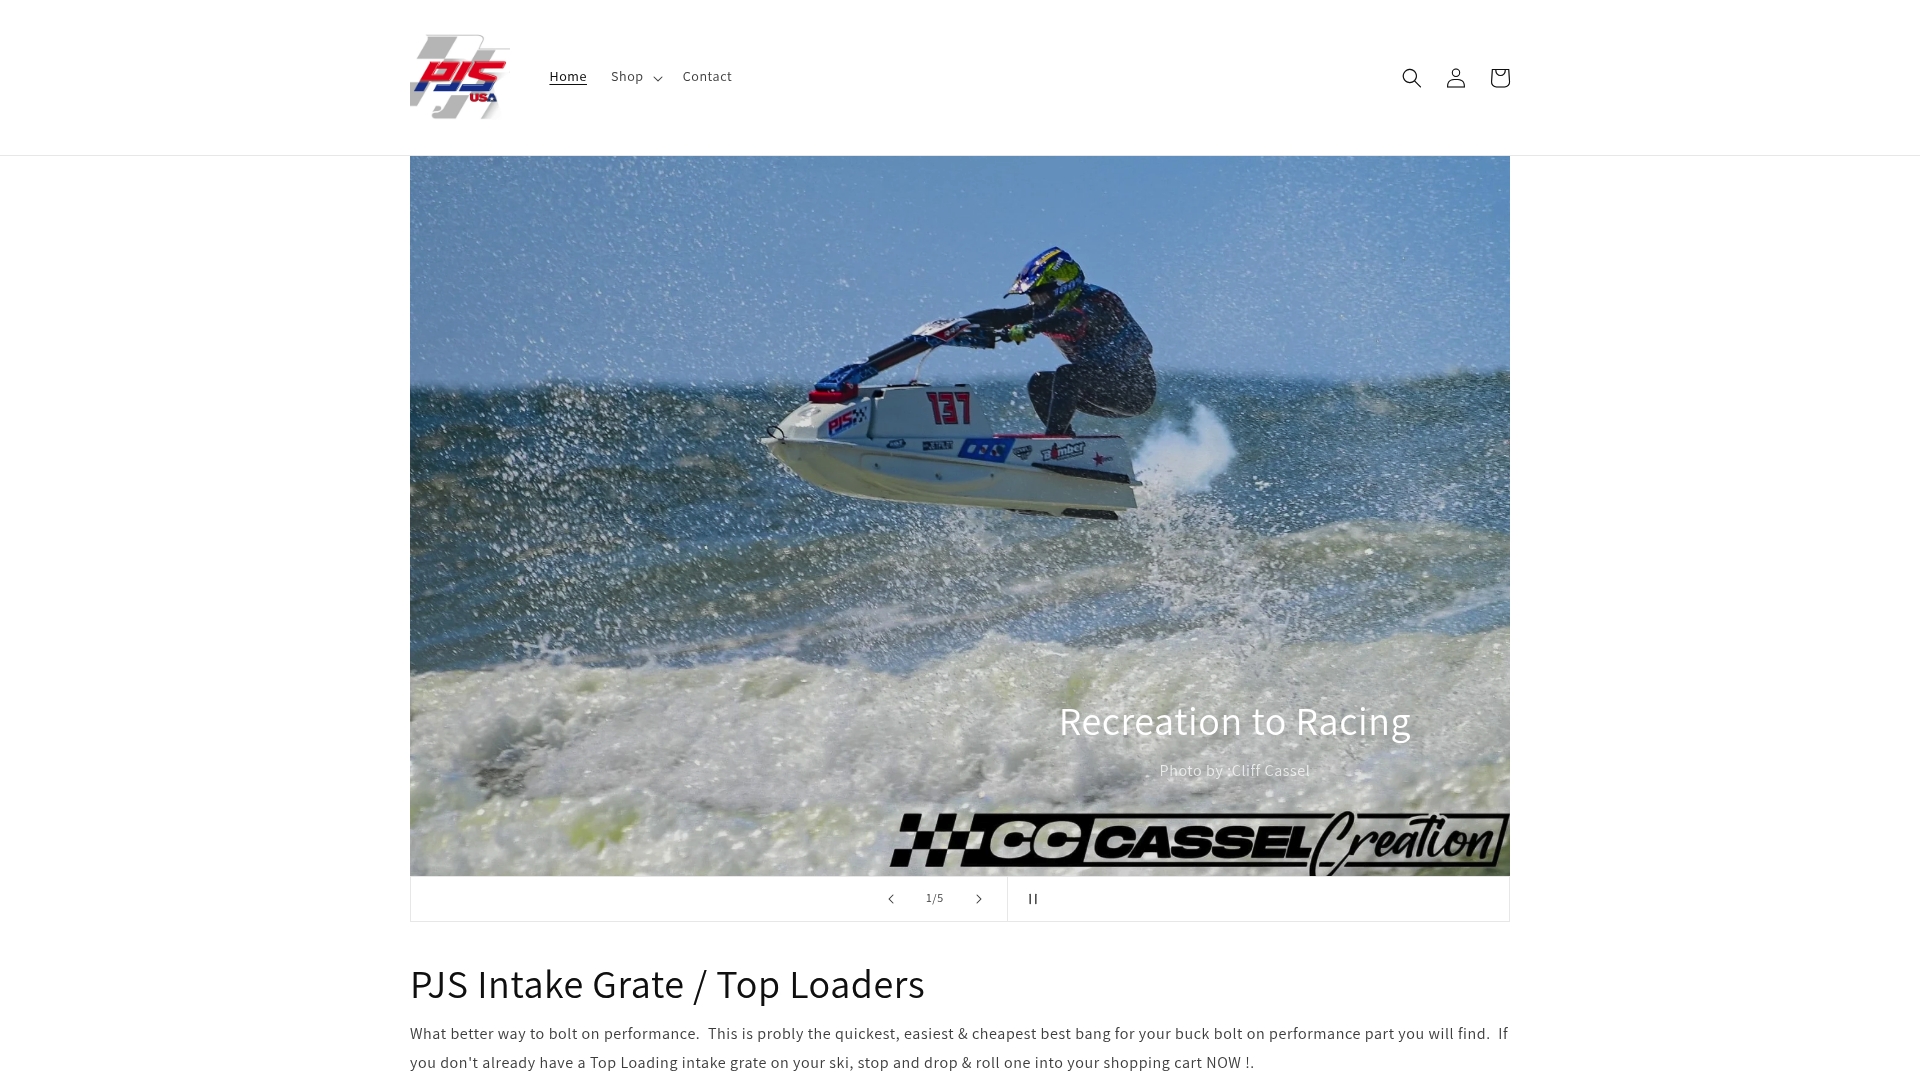
PJS USA

https://pjs-usa.com

At a Glance

PJS USA’s marketing states it manufactures all performance parts in the USA using original molds and tooling from the PJS brand, a claim that ties its catalog to vintage authenticity and race-ready geometry.

That tooling underpins bolt-on upgrades for Kawasaki Jetskis aimed at racers, restorers, and serious DIY tuners who want proven fitment and factory-like profiles.

Core Features

  • In-house manufacturing of performance watercraft parts made in the USA, with an emphasis on preserving original molds.
  • Wide range of bolt-on upgrades: ride plates, intake grates, steering nozzles, intake manifolds, cylinder heads, and exhaust pieces.
  • Detailed product pages and step-by-step instructions for DIY installation plus dedicated online store categories for fast browsing.

Key Differentiator

PJS USA leans on the brand’s original molds and tooling to reproduce parts that match vintage PJS geometry while adapting designs for modern performance. That combination of authenticity and race intention is the single angle most competitors don’t offer.

Pros

  • Manufactures domestically. The Made in the USA claim supports local craftsmanship and simplifies replacement or remanufacture when molds exist.

  • Strong Kawasaki focus. If you own a Kawasaki Jetski, the parts list is specific and deep, including items targeted at handling and top-end speed.

  • Vintage restoration plus performance. Keeping original tooling means restorers can maintain period-correct looks while adding performance upgrades.

  • DIY-friendly documentation. Clear categorization and step-by-step install notes reduce mechanic hours and lower the risk of fitment errors.

  • Race-ready items like ride plates and steering nozzles are prioritized, which shortens the path from purchase to track testing.

Cons

  • Independent feedback is scarce. There are limited third-party reviews, so much of the quality signal relies on the vendor’s own materials.

  • Shipping details are unclear. The site does not specify international shipping options, which may complicate orders outside the USA.

  • Narrow brand focus. The catalog is specialized for Kawasaki Jetskis and may not serve owners of other watercraft brands.

  • No visible warranty language. The site does not prominently display satisfaction guarantees or explicit warranty terms for parts.

When It May Not Fit

If you race or own a non-Kawasaki PWC, PJS USA’s niche catalog will feel restrictive. Also, international racers or shops that need clear global shipping and warranty policies may prefer vendors with explicit logistics and support statements.

Who It’s For

Kawasaki Jetski owners, professional racers, and vintage restorers who value authentic fitment and race-oriented upgrades. Typical buyers are comfortable with mechanical installation or have a trusted mechanic who can apply bolt-on performance parts.

Real World Use Case

A Jetski owner restoring a vintage Kawasaki buys an intake grate, ride plate, and steering nozzle from PJS USA. The parts match the bike’s original geometry, install with the vendor’s instructions, and yield crisper handling the owner tests on local flats and turns.

Pricing

Most products range from $144.98 to $479.98 USD depending on the upgrade and part complexity. The site does not explicitly advertise free shipping or bundled promotional discounts.

Website: https://pjs-usa.com

Comparing PWC Performance Parts Providers

When considering performance parts providers for your personal watercraft (PWC), the choice often revolves around balancing product range, specialty, and after-sales support to match your precise needs.

Product Specialization and Range

IPD Racing excels with its race-validated parts selection, extensive compatibility across major PWC brands, and detailed fitment guides. In contrast, SBT offers a vast inventory featuring over 15,000 parts and specialized in remanufactured engines, which appeals to repair shops needing rare components. Meanwhile, PJS USA attracts vintage and Kawasaki enthusiasts with its USA-made, tooling-authentic performance pieces; however, its narrower catalog may not support diverse brand needs.

Support Infrastructure and Guidance

The build guidance and dealer network backing provided by IPD Racing simplify installation and tuning for racers and professional shops alike. Riva Racing presents a strong appeal for PWC race enthusiasts through technical consultations and tuning solutions but falls short on reliable global delivery compared to alternatives like SBT. Additionally, forums and setup advice from platforms such as 4 TecPerformance offer advantages to DIY tuners, though inconsistent order processing may create friction for time-sensitive projects.

Best Fit Recommendations

  • Choose IPD Racing for its race-proven components, how-to galleries, and global delivery convenience, particularly suited to professionals seeking reliable preparation within international contexts.
  • Select SBT if you require a vast array of parts, including remanufactured engines backed by warranties and no-core-required formats, ideal for repair professionals and rebuild projects.
  • Opt for PJS USA when restoring or upgrading vintage Kawasaki Jetskis due to its focus on authentic, race-oriented equipment manufactured locally in the USA.
  • Use Riva Racing for custom tuning and performance parts delivered promptly within supported regions to maximize gains on lap times or aggressive recreation.

Our Pick

For most racing enthusiasts and professional tuners, IPD Racing offers an package of model-specific parts integration, global reach, and documented setup guidance for a experience. However, individuals prioritizing either highly specialized equipment or support for rare components may find their specific needs better served by alternative providers.

PWC Performance Parts Providers Comparison

When selecting the right provider for PWC performance parts, consider features like catalog breadth, customization capabilities, and pricing clarity.

Provider Key Feature Unique Differentiator Best for Pricing Notable Limitation
IPD Racing Wide selection of race-proven parts and graphics Model-specific build guides with dealer support Racers and professional builders Approximately $20–$800 Focused on performance; less oriented to casual users
Riva Racing Engine, exhaust, and impeller performance tuning Technical expertise for measurable speed gains PWC enthusiasts prioritizing performance upgrades Not disclosed International shipping options are limited
SBT Broad inventory of OEM and remanufactured parts Warranty-backed no-core-required reman engines Shops seeking durable and precise replacements $845–$3,995 Limited selection outside of PWC-specific parts
4 Tecperformance Kits combining hardware with tuning systems Integrated parts and ECU tuning hardware supply Tuners looking for paired software and hardware Mid to premium tiers Polarity in customer feedback on order processing
PJS USA In-house manufacturing for Kawasaki Jetskis Authentic vintage molds paired with performance upgrades Vintage restorers and Kawasaki race enthusiasts $144.98–$479.98 Narrow focus, limited to Kawasaki Jetskis

Explore Reliable Alternatives to PJS-USA with Ipdracing

If you are searching for trusted pjs-usa.com alternatives that combine racing heritage with performance-driven parts, Ipdracing offers a compelling option. Designed specifically for PWC enthusiasts who demand race-validated fitment and dealer-backed support, Ipdracing provides model-specific build guides and a broad selection of parts for brands like Kawasaki with proven track records.

https://ipdracing.com

Don’t settle for limited brand focus or unclear shipping when upgrading your watercraft. Visit Ipdracing to access high-quality performance products tailored just for you. Take the next step — leverage detailed build guides and dealer network support to move from order to race-ready setup with confidence and less guesswork.

Frequently Asked Questions

How does Ipdracing’s build guides compare to those of other performance parts alternatives?

Ipdracing offers detailed model-specific build guides that help racers confirm fitment and installation before purchase. Comprehensive build guides and galleries document fitment, installation steps, and race setups for various models, ensuring you know exactly how to proceed with your parts. This level of support can significantly reduce installation uncertainty, making it easier to prepare for race day.

What is the difference between Riva Racing and Ipdracing when it comes to performance parts?

Riva Racing is well-known for its extensive aftermarket parts catalog and fast shipping for in-stock items, which is beneficial for urgent needs. In contrast, Ipdracing’s emphasis on race-validated parts and a dedicated dealer network provides unparalleled technical support, helping you with installation and service that aligns with your racing goals.

Can I expect the same level of performance with alternatives like SBT instead of Ipdracing?

Alternatives like SBT specialize in remanufactured engines and OEM-compatible parts, which can be suitable for those looking specifically for engine replacements. However, Ipdracing is renowned for its comprehensive build documentation and performance tuning specifics that cater to immediate racing needs, which may not be as detailed in SBT’s offerings.

Does PJS USA provide the same warranty coverage on parts as Ipdracing?

PJS USA does not prominently display warranty details for their parts, which could leave you uncertain about post-purchase support. In contrast, Ipdracing provides clear installation documentation and dealer support that can address fitment concerns directly, ensuring a more reliable buying experience for performance parts.

How do pricing tiers of Ipdracing compare with those of 4 Tecperformance?

4 Tecperformance runs competitive pricing with routine discount codes on parts, making it appealing for budget-conscious buyers. Ipdracing, on the other hand, focuses on high-performance parts that may have higher upfront costs, but these generally come with detailed build guidance and localized support, ensuring better overall value for racing specifics.

Freestyle jet ski rider jumping over waves

Jet Ski Nozzle Modifications for Freestyle Riders

Jet ski nozzle modifications for freestyle are defined as aftermarket changes to the jet pump’s nozzle assembly that increase upward trim range, improve bow lift, and sharpen maneuverability for trick-focused riding. The two most recognized upgrade tiers are the TrimX Stage 1 and Stage 1+ nozzles, each targeting a different level of mechanical and electronic commitment. Riders on Sea-Doo models with iBR systems face a specific challenge: physical nozzle changes must sync with ECU limits or the system throws fault codes and locks into neutral. Understanding that distinction before you buy a single part saves time, money, and a ruined session on the water.

1. What are the top jet ski nozzle modifications for freestyle?

Freestyle-specific nozzle mods fall into two broad categories: bolt-on replacements and modification-level upgrades that alter iBR travel limits. The bolt-on versus mod-level distinction is the most important concept in nozzle tuning. Only upgrades that change iBR travel limits require electronic recalibration, making proper diagnosis before installation non-negotiable.

Here are the top nozzle modifications used by freestyle riders today:

  • TrimX Stage 1 nozzle. A direct bolt-on replacement that doubles upward trim range using factory iBR limits. No ECU work required. Installs in roughly 20 minutes using stock mounting points. This is the starting point for most Sea-Doo freestyle riders.
  • TrimX Stage 1+ nozzle. Extends nozzle travel beyond factory limits by requiring physical filing of the iBR reverse bucket bump stops. This mod unlocks a more aggressive rooster tail and higher bow lift than Stage 1 alone, but it demands ECU recalibration to function safely.
  • Nozzle extensions and reducers. These alter the effective nozzle exit area, changing thrust pressure and acceleration characteristics. Smaller exit areas increase water pressure but can reduce top-end speed. Larger areas favor acceleration and control at lower speeds.
  • 14-vane stainless steel nozzles. Products like those from GreenHulk use higher vane counts to improve water flow consistency and reduce cavitation. Less cavitation means more predictable throttle response, which matters when you are mid-trick and need the ski to behave exactly as expected.
  • Billet aluminum hardware kits. The TrimX Spark Trixx kit replaces factory plastic bushings with billet aluminum components for more stable, longer-lasting freestyle operation. Plastic bushings wear quickly under the stress of repeated wheelies and aggressive trim cycling.
  • Interchangeable nozzle rings. These allow riders to swap nozzle diameters between sessions to tune for different conditions or trick sets without committing to a permanent change.

Pro Tip: Start with a Stage 1 bolt-on before committing to Stage 1+ work. Most riders find the doubled trim range alone transforms their rooster tail height and bow lift without touching the ECU.

2. How do iBR system modifications affect freestyle nozzle upgrades?

Close-up of jet ski nozzle modification parts

The iBR (Intelligent Brake and Reverse) system on Sea-Doo models is a computer-controlled actuator that governs nozzle position. Factory settings define hard limits on how far the nozzle can travel upward. When a physical nozzle modification pushes beyond those limits, the ECU detects a position mismatch and responds with fault codes, forced neutral, or actuator motor burnout.

The Stage 1 nozzle works within factory iBR limits, so no recalibration is needed. The Stage 1+ is different. Filing the iBR bump stops allows the nozzle to physically travel further, but the ECU still thinks the old limit is the maximum. That mismatch is what causes the system to fault.

The correct workflow for Stage 1+ installation follows three steps:

  1. Install the TrimX Stage 1+ nozzle and file the iBR reverse bucket bump stops to allow extended travel.
  2. Connect a dealer-level diagnostic scan tool and reset ECU position limits to match the new mechanical range.
  3. Perform test rides and validate with fault code checks to confirm the actuator is operating within safe parameters.

Skipping ECU recalibration after filing bump stops does not just risk a fault code. It can burn out the iBR actuator motor entirely, turning a $300 nozzle upgrade into a $1,000+ repair bill.

Riders without access to dealer-level scan tools should not attempt Stage 1+ installation independently. Professional installation from a shop equipped with BRP diagnostic software is the correct path. The ECU recalibration requirement is mandatory, not optional.

3. What nozzle tuning options beyond TrimX improve freestyle performance?

TrimX products dominate the Sea-Doo freestyle segment, but nozzle tuning extends well beyond a single brand. Vane count, nozzle ring size, and material quality each affect how the pump delivers thrust during freestyle maneuvers.

Tuning Variable Effect on Freestyle Performance Trade-off
Higher vane count (14-vane) Reduces cavitation, improves throttle response Higher cost, requires compatible pump housing
Smaller nozzle exit area Increases water pressure and acceleration Reduces top speed
Larger nozzle exit area Improves control at lower speeds Less aggressive thrust
Billet aluminum bushings Increases durability under repeated trim cycling Requires proper fitting and torque specs
Stainless steel nozzle body Resists wear and corrosion longer than plastic Heavier than OEM plastic components

RIVA Racing and SOLAS both produce 14-vane stainless stators compatible with high-power Sea-Doo PWCs. These reduce cavitation compared to lower-vane OEM designs, which translates directly to more consistent hookup when you crack the throttle during a trick. Inconsistent hookup mid-maneuver is one of the most common causes of failed freestyle attempts on modified skis.

Nozzle ring swaps are an underused tuning tool. Riders on the Yamaha SuperJet platform, for example, can run interchangeable rings to test different exit diameters between sessions. This iterative approach lets you dial in thrust characteristics for specific trick sets without permanent hardware changes.

Pro Tip: If you are chasing higher rooster tails specifically, prioritize upward trim range over nozzle pressure. A wider exit area with maximum upward travel produces taller, more dramatic rooster tails than a tight nozzle with limited trim.

4. How to select the best nozzle modification for your freestyle riding style

Choosing the right nozzle mod starts with identifying your primary freestyle goal. Riders focused on rooster tail height need maximum upward trim range. Riders focused on bow lift and wheelies need hardware stability and consistent trim response. Riders chasing speed between tricks need to balance nozzle pressure against top-end performance.

Use these criteria to match a modification to your riding goals:

  • Rooster tail height. The TrimX Stage 1 delivers double the upward trim range of the OEM nozzle using factory iBR settings. For most riders, this alone produces a dramatic visual improvement without any ECU work.
  • Bow lift and wheelies. The TrimX Spark Trixx kit with billet aluminum bushings provides the hardware stability needed for consistent, repeatable wheelies. Plastic bushings flex under load and introduce inconsistency in trim response.
  • iBR versus traditional setups. Riders on iBR-equipped Sea-Doo models must account for electronic limits in every nozzle decision. Riders on traditional setups like the Yamaha SuperJet or Kawasaki 650 SX have more mechanical freedom but fewer plug-and-play aftermarket options.
  • Budget considerations. Stage 1 bolt-on nozzles represent the best value for most freestyle riders. Stage 1+ upgrades add cost through professional ECU recalibration, which should be factored into the total budget before purchase.
  • Iterative testing. No nozzle mod performs identically across all riders and conditions. Plan for at least two to three test sessions after any modification to assess performance and adjust trim settings before committing to a final configuration.

Riders new to freestyle nozzle tuning should treat Stage 1 as the baseline and evaluate results before spending on Stage 1+ or advanced vane upgrades. The performance gap between stock and Stage 1 is significant enough that many riders stop there permanently.

Key takeaways

Effective freestyle nozzle tuning requires matching the right modification tier to your riding goals, your ski’s electronic architecture, and your willingness to invest in professional ECU recalibration.

Point Details
Stage 1 is the starting point TrimX Stage 1 doubles upward trim range with no ECU work, making it the best first upgrade.
Stage 1+ requires ECU recalibration Filing bump stops without resetting ECU limits causes fault codes, forced neutral, or actuator burnout.
Vane count affects cavitation 14-vane stainless nozzles reduce cavitation and improve throttle response during freestyle maneuvers.
Hardware matters as much as nozzle shape Billet aluminum bushings replace plastic components and deliver more consistent trim response under repeated stress.
Match mod to riding goal Rooster tail height, bow lift, and speed each call for different nozzle tuning priorities.

Why most riders get nozzle mods wrong before they get them right

I have seen riders spend serious money on Stage 1+ installations and then immediately fault their ski because they skipped the ECU step. The mechanical side of nozzle modification is straightforward. The electronic side is where most people underestimate the complexity.

The most overlooked upgrade in freestyle nozzle tuning is the hardware kit. Billet aluminum bushings are not glamorous, but they are the reason a Stage 1 nozzle performs consistently on session 50 the same way it did on session one. Plastic bushings wear, introduce slop into the trim mechanism, and quietly degrade the performance you paid for.

My honest recommendation: if you are on a Sea-Doo with iBR and you have never modified the nozzle, start with Stage 1. Ride it for a full season. Most riders I have spoken with find that the doubled trim range fundamentally changes how they approach tricks, and they never feel the need to go further. Stage 1+ is a real upgrade, but it is a commitment that requires professional tools and a shop you trust.

For riders on traditional platforms like the SuperJet or the 4-stroke Superjet, the tuning path is different. Vane count and nozzle ring sizing become the primary levers. Experiment methodically, document your results, and resist the urge to change multiple variables at once. One change per session is the only way to know what actually moved the needle.

— Casey

Upgrade your freestyle setup with Ipdracing

Ipdracing stocks the full range of freestyle jet ski nozzle modifications, from TrimX Stage 1 bolt-on nozzles to complete hardware kits with billet aluminum components. Whether you ride a Sea-Doo, Yamaha, or Kawasaki platform, the product catalog covers nozzle upgrades, pump components, and performance hardware built for freestyle demands.

https://ipdracing.com

For riders pursuing Stage 1+ modifications, Ipdracing also connects you with professional calibration support through the PWC Doctor service, where technicians handle ECU recalibration with dealer-level diagnostic tools. Browse the complete freestyle parts catalog to find the right nozzle modification for your ski model and riding goals. Fast shipping and expert support are standard, whether you are building your first freestyle setup or dialing in a competition-ready machine.

FAQ

What is a freestyle jet ski nozzle modification?

A freestyle jet ski nozzle modification is any aftermarket change to the jet pump nozzle that increases upward trim range, improves bow lift, or refines thrust for trick-focused riding. The most recognized products are the TrimX Stage 1 and Stage 1+ nozzles designed for Sea-Doo models.

Does TrimX Stage 1 require ECU recalibration?

No. The TrimX Stage 1 installs within factory iBR limits and requires no ECU recalibration, making it a true bolt-on upgrade that most riders can complete in under 30 minutes.

What happens if you skip ECU recalibration after Stage 1+ installation?

Skipping ECU recalibration after filing the iBR bump stops causes the system to detect a position fault, which triggers forced neutral and risks burning out the iBR actuator motor. Professional recalibration with a dealer-level scan tool is mandatory.

How does vane count affect freestyle jet ski performance?

Higher vane counts, such as the 14-vane stainless designs from RIVA Racing and SOLAS, reduce cavitation and improve throttle response consistency. This matters most during freestyle maneuvers where predictable power delivery is critical to completing a trick cleanly.

Can nozzle modifications work on non-iBR jet skis?

Yes. Riders on traditional platforms like the Yamaha SuperJet or Kawasaki models have more mechanical freedom with nozzle tuning. Interchangeable nozzle rings and vane upgrades from brands like Jet Dynamics apply directly without electronic system constraints.

Close-up of jet ski exhaust system under hull

Jet Ski Exhaust System Role: Functions and Performance

The jet ski exhaust system is defined as the integrated assembly responsible for venting combustion gases, reducing engine noise, regulating backpressure, and circulating cooling water through the engine. Unlike automotive exhaust systems, a personal watercraft (PWC) exhaust operates in a wet, corrosive marine environment where gas management and thermal control are inseparable functions. Brands like Sea-Doo and Yamaha engineer their exhaust systems to handle all four roles simultaneously, because failure in any one area directly threatens engine longevity and rider safety. Understanding the jet ski exhaust system role is the foundation for both smart maintenance and informed performance upgrades.

What are the key functions of a jet ski exhaust system?

The jet ski exhaust system performs four primary roles: venting combustion gases, reducing noise through water-cooled chambers, maintaining backpressure, and facilitating engine cooling water circulation. Each function is interdependent. Compromise one, and the others degrade in sequence.

1. Venting combustion gases

Jet ski exhaust gases venting into the air

Hot, toxic exhaust gases produced during combustion must exit the engine quickly and safely. In a PWC, the engine sits in a confined hull with minimal airflow, so the exhaust path is the only reliable route for these gases to escape. Delayed or restricted venting raises cylinder temperatures and increases the risk of detonation.

2. Noise reduction via water injection

Water-cooled marine exhaust systems inject cooling water directly into the exhaust pipe to reduce both temperature and sound. This design is a direct response to the wet, corrosive environment of watercraft and has no equivalent in standard automotive exhaust design. The result is a quieter, cooler exhaust stream that exits safely below the waterline or through a transom port.

3. Backpressure regulation

Backpressure is the resistance the exhaust gas encounters as it moves through the system. Too little backpressure reduces low-end torque; too much restricts high-rpm power. The exhaust system on a jet ski is tuned to maintain a specific pressure range that matches the engine’s power band, whether that engine is a recreational 1.0-liter Yamaha or a race-built supercharged Sea-Doo unit.

4. Cooling water circulation

Jet skis do not use traditional water pumps for engine cooling. Instead, they rely on exhaust gas pressure to push cooling water through the engine block and cylinder head. This makes the exhaust system the primary driver of thermal management, not a secondary component.

Infographic showing key functions of jet ski exhaust system

Pro Tip: If your jet ski runs hotter than normal after a ride, check the exhaust outlet for partial blockage before assuming a thermostat failure. Restricted exhaust flow directly reduces cooling water circulation.

How does the jet ski exhaust system integrate with the engine cooling system?

The integration of exhaust and cooling in PWCs is a unique design that differs significantly from automotive engines. In a car, the cooling system and exhaust system are completely separate. In a jet ski, they share the same pressure source: exhaust gas.

Here is how the process works in sequence:

  • The engine fires and produces exhaust gas under pressure.
  • That pressure pushes raw water drawn from outside the hull through the cooling jacket surrounding the engine block.
  • The now-heated water is injected into the exhaust manifold, where it cools the exhaust gases and reduces noise simultaneously.
  • The combined water and gas mixture exits through the exhaust outlet.

This design means the exhaust system is the primary heat exchanger for the engine. As marine experts note, the exhaust path prevents overheating and water ingestion in a space where no conventional cooling fan could function. The practical implication is significant: if the exhaust system is blocked or degraded, the engine loses both its gas venting path and its cooling circuit at the same time.

“Jet skis rely on exhaust pressure to push cooling water through the engine. No engine running means no exhaust pressure, which means no cooling water movement.” This is why flushing a jet ski with the engine off risks hydrolock, as water can flow backward into the combustion cylinders and destroy the engine.

Proper exhaust hose routing is equally critical. Kinks or sharp bends in the exhaust hose create excessive backpressure and can cause water backflow into the engine, a failure mode that is expensive and entirely preventable with correct installation.

What maintenance practices are essential for jet ski exhaust system longevity?

Most engine failures in jet skis result from owner neglect in post-ride maintenance, not mechanical faults. The exhaust and cooling systems are the most vulnerable to salt damage, and the damage accumulates invisibly until a component fails.

Follow this flushing sequence after every saltwater ride:

  1. Connect a fresh water hose to the flush port with the engine off.
  2. Start the engine before opening the water supply. The engine must be running to generate exhaust pressure before water enters the system.
  3. Open the water supply and flush for 90 seconds to 3 minutes. This duration is the minimum required to clear salt from the exhaust passages and cooling jacket.
  4. Close the water supply before shutting off the engine. Reversing this order allows water to back-flow into the cylinders.
  5. Use an inline salt-neutralizer in the flush line when available.

Salt crystals bake inside cooling jackets and exhaust paths after every saltwater ride. Plain tap water often cannot dissolve hardened salt deposits, which is why inline chemical salt-neutralizers are recommended. These products break down salt at the chemical level, protecting both the exhaust passages and the cooling jacket from corrosion and clogging.

Salt accumulation acts as a thermal insulator inside the cooling jacket. When the jacket walls are coated in salt deposits, heat transfer drops and the engine runs hotter on every subsequent ride. Left unchecked, this leads to rapid cooling jacket failure and exhaust blockage, two repairs that often require a full engine teardown.

Pro Tip: Add a bottle of salt-neutralizing flush concentrate to your post-ride kit. Running it through the system once a week during heavy saltwater use costs less than $10 per session and extends exhaust and cooling component life by years.

How do exhaust system designs and components affect jet ski performance?

The water box is the most performance-critical component in the jet ski exhaust system. It functions as both a resonator and a flow regulator, muffling sound while shaping the exhaust pulse to optimize engine output. The water box acts as a resonator in the exhaust path, and aftermarket versions can reduce backpressure by up to 20%, directly improving acceleration and top speed. That is a measurable performance gain from a single component swap.

The table below compares stock and aftermarket exhaust component characteristics across the key performance variables:

Component Stock configuration Aftermarket performance upgrade
Water box Tuned for noise compliance and durability Reduced backpressure, optimized flow for higher rpm
Exhaust manifold Cast iron or aluminum, general-purpose design Ported and polished for improved gas velocity
Exhaust hose Standard rubber, minimal heat resistance High-temp silicone, reduced restriction
Muffler system Prioritizes noise reduction over flow Straight-through or chambered design for power gain
Cooling water injection point Fixed factory location Repositioned for improved thermal management

For recreational riders on Sea-Doo Spark or Yamaha EX models, the stock system is well-matched to the engine’s output range. For competitive riders running supercharged Sea-Doo RXP-X or Yamaha GP1800R platforms, the stock water box becomes a restriction at high rpm. Aftermarket suppliers design water boxes with larger internal volumes and smoother flow paths to match the increased exhaust gas volume these engines produce at full throttle.

Noise reduction in the muffler system works through a combination of water injection and chamber design. The water absorbs sound energy from the exhaust pulse, and the chamber geometry reflects and cancels specific frequencies. Racing jet skis often run louder systems because the muffler chambers are tuned for flow over noise suppression, a direct trade-off between compliance and performance.

Key takeaways

The jet ski exhaust system controls gas venting, noise, backpressure, and engine cooling simultaneously, making it the single most functionally complex system on a personal watercraft.

Point Details
Four core functions The exhaust system vents gases, reduces noise, regulates backpressure, and drives cooling water circulation.
Cooling system dependency Jet skis use exhaust gas pressure, not a water pump, to circulate engine cooling water.
Flushing sequence matters Always start the engine before opening the flush water supply to prevent hydrolock.
Salt damage is cumulative Salt deposits act as thermal insulators; use inline salt-neutralizers to prevent cooling jacket failure.
Aftermarket water boxes Performance water boxes can reduce backpressure by up to 20%, improving acceleration and top speed.

Why most riders underestimate their exhaust system

I have seen the same pattern repeat across recreational riders and first-time mechanics: the exhaust system gets treated as a passive pipe, something that just moves gas from point A to point B. That assumption leads to skipped flushes, ignored corrosion, and eventually a seized engine that costs three times more to fix than a season of proper maintenance would have.

What surprises most people when they dig into the technical details is how much the exhaust system is doing at any given moment. It is not just venting gas. It is actively cooling the engine, shaping the power curve through backpressure, and suppressing noise through water injection. Remove any one of those functions and the engine either overheats, loses power, or becomes non-compliant with noise regulations.

My practical advice for anyone running a jet ski in saltwater: treat the post-ride flush as non-negotiable, not optional. And if you are building a race setup on a Sea-Doo RXP-X or Yamaha GP1800R, do not overlook the water box as a performance variable. It is one of the highest-value upgrades relative to cost, and most riders leave that gain on the table because they focus on engine internals and ignore the exhaust path. The IPD Racing blog covers component-level performance decisions in detail if you want to go deeper on tuning strategy.

— Casey

Upgrade your jet ski exhaust system with Ipdracing

Ipdracing stocks performance exhaust components and maintenance accessories built specifically for PWC applications, from recreational flushing kits to race-spec water boxes for Sea-Doo and Yamaha platforms.

https://ipdracing.com

Whether you are protecting a stock engine from salt damage or extracting maximum output from a supercharged race build, Ipdracing carries the parts that match your build level. The IPD Racing shop includes exhaust system upgrades, inline salt-neutralizer kits, high-temp exhaust hoses, and performance water boxes sourced from trusted manufacturers in the PWC industry. Ipdracing serves riders across recreation, racing, and freestyle disciplines, so the right component for your specific platform is available without guesswork.

FAQ

What does a jet ski exhaust system do?

The jet ski exhaust system vents combustion gases, reduces engine noise through water injection, regulates backpressure for optimal power output, and drives cooling water circulation through the engine block. All four functions operate simultaneously through a single integrated system.

Why must the engine be running during a jet ski flush?

Jet skis use exhaust pressure to push cooling water through the engine. Flushing with the engine off allows water to flow backward into the combustion cylinders, causing hydrolock and catastrophic engine damage.

How long should you flush a jet ski after saltwater use?

Flush for 90 seconds to 3 minutes with fresh water after every saltwater ride. Using an inline salt-neutralizer during the flush provides additional protection against salt crystal buildup in the exhaust passages and cooling jacket.

What is a jet ski water box?

The water box is the exhaust component that functions as a resonator and flow regulator. It muffles exhaust noise and shapes the exhaust pulse to optimize engine efficiency. Aftermarket water boxes are tuned to reduce backpressure, which improves acceleration and top speed on performance builds.

How does the jet ski exhaust system differ from a car exhaust?

A car exhaust only vents combustion gases. A jet ski exhaust system also injects cooling water to manage engine temperature, making it the primary heat exchanger for the engine. This integration is a design requirement for the confined, wet environment of a personal watercraft hull.

Article generated by BabyLoveGrowth

Technician installing freestyle jet ski handpole outdoors

Freestyle Jet Ski Handpole Install: Step-by-Step Guide

A freestyle jet ski handpole install is the process of replacing or upgrading your stock handlepole to improve steering precision, rider stance, and overall freestyle performance on a stand-up personal watercraft. The handlepole is the single most rider-contact component on a freestyle ski, and swapping it for an aftermarket unit changes how the ski responds to every trick input. This guide covers the required tools, step-by-step installation, common troubleshooting issues, and a comparison of top models. Whether you are setting up a Kawasaki SX-R, a Yamaha SuperJet, or a similar stand-up platform, the process follows the same core principles.

What tools and materials do you need for a freestyle jet ski handpole install?

Tools and materials arranged for jet ski handpole install

Gathering the right parts before you start saves time and prevents mid-job delays. A complete freestyle handpole setup includes more components than most riders expect on first glance.

Required handpole components:

  • Handlepole tube (aftermarket or OEM replacement)
  • Pivot bracket and mounting hardware
  • Chin pad (protects the rider’s chin during aggressive riding)
  • Grips and grip lock rings
  • Steering cable and cable ball joints
  • Steering bushings (upper and lower)

Required tools:

  • Socket set and combination wrenches (10mm, 12mm, 14mm common)
  • Phillips and flathead screwdrivers
  • Needle-nose pliers and snap ring pliers
  • Marine-grade thread locker (Loctite 243 or equivalent)
  • Waterproof grease or marine lubricant
  • Torque wrench for final fastener tightening

Optional upgrades worth considering:

Plug-and-play GPS speedometer modules can modernize older stand-up ski electronics during a handlepole overhaul without complex wiring. These modules cost about $129.99 as of May 2026 and work with traditional speed sensor setups, making them a practical add-on during teardown. Some GPS modules install fully plug-and-play via factory harness without needing separate power or diagnostic taps, which is a clean solution for Kawasaki platforms.

Pro Tip: Replace steering bushings and cable ball joints at the same time as the handpole. These components are difficult to access after the new pole is installed, and replacing worn bushings during installation prevents double labor down the road.

Component Purpose
Pivot bracket Connects handlepole to hull and allows steering rotation
Chin pad Protects rider during nose-down freestyle maneuvers
Steering bushings Reduce play and maintain precise steering feel
Cable ball joints Transfer steering input from pole to nozzle
Grip lock rings Secure grips and prevent rotation under load

Infographic illustrating handpole installation steps

How do you perform a step-by-step handpole installation?

The installation process breaks into four distinct phases: removal, prep, assembly, and adjustment. Rushing any phase creates problems that show up on the water, not in the garage.

Phase 1: Remove the stock handlepole

  1. Place the ski on a stable stand with the hull supported at the tray.
  2. Disconnect the steering cable from the pole’s lower pivot point using snap ring pliers.
  3. Remove the pivot bracket bolts (typically four bolts through the hull deck).
  4. Lift the handlepole assembly straight up and out. Note the cable routing path before full removal.
  5. Inspect the steering cable, bushings, and ball joints for wear. Replace any worn parts now.

Phase 2: Prepare the new handlepole assembly

  • Install grips onto the handlepole tube and secure with lock rings.
  • Attach the chin pad to the lower section of the pole per the manufacturer’s spec.
  • Thread the steering cable ball joint onto the new pole’s steering arm. Do not fully tighten yet.
  • Apply waterproof grease to all bushing seats and pivot points.

Phase 3: Mount and align the new pole

  1. Lower the new handlepole assembly into the pivot bracket seat.
  2. Route the steering cable exactly as the stock cable ran. Incorrect routing causes binding.
  3. Install and hand-tighten the pivot bracket bolts.
  4. Confirm the pole sits centered over the hull centerline before torquing bolts to spec.
  5. Connect the steering cable ball joint and secure with the snap ring.

Phase 4: Adjust steering geometry and cable tension

Proper steering cable routing and tension adjustment are critical for optimal pole performance. Misalignment causes sluggish steering that directly impairs freestyle trick execution. Adjust cable tension so the pole returns to center with light resistance but does not feel stiff. Test full left and right lock before launching.

Pro Tip: The biggest mistake in handpole swaps is underestimating steering geometry complexity. Steering cable length, pole tension, and handlebar leverage all interact. Adjust one variable at a time and test on the water between adjustments.

  • Check that the pole does not contact the hull at full steering lock.
  • Verify the chin pad position clears your riding stance.
  • Confirm all fasteners are torqued and thread locker is applied where specified.

What are the most common handpole installation problems?

Even experienced riders run into fitment and performance issues during a handpole swap. Knowing what to expect prevents frustration and protects your investment.

Steering cable routing errors are the most frequent problem. The cable must follow the original path through any guides or grommets in the hull. A misrouted cable binds under full lock, which creates dangerously heavy steering. Always photograph the stock cable routing before removal.

Fitment mismatches occur frequently with older ski platforms. Aftermarket freestyle handlepoles provide a lower, aggressive stance and reduce weight but often require custom fabrication or adapters on older skis. True plug-and-play setups are rare beyond modern stand-ups. If your pivot bracket bolt pattern does not match, you need a compatible adapter plate or a fabricated bracket. Most riders with pre-2010 platforms should budget for this possibility.

Worn steering bushings cause persistent play in the pole even after a new installation. Signs include lateral wobble at the pivot point and inconsistent steering return. Replace both upper and lower bushings if there is any detectable play. Proper servicing improves steering feel and extends the life of the entire steering assembly.

“Steering geometry is the linchpin of handpole performance, often more impactful than the pole model itself.” — X-H2o community expert

Heavy or sluggish steering after installation usually points to one of three causes: over-tensioned steering cable, insufficient lubrication at the pivot bushing, or a pole geometry mismatch where the steering arm length differs from the stock unit. Adjusting handlebar leverage relative to pole position is a subtle but important customization that determines how the ski flicks during freestyle maneuvers.

Choosing the right pole before you start the install saves significant time. The table below compares key specifications across common aftermarket options for stand-up freestyle platforms.

Model Weight Compatibility Installation Complexity Included Components
Blowsion OVP System Light alloy Modern stand-ups, some adapters needed for older Moderate Pivot bracket, steering arm, grips
Rickter Freestyle Pole Aluminum Rickter-specific, limited crossover Low (Rickter skis) Full assembly with chin pad
Generic aftermarket tube Varies Wide, but often requires fabrication High Tube only, no hardware
OEM replacement Stock weight Direct fit for model year Low Full OEM assembly

Aftermarket poles consistently outperform OEM units in freestyle applications because they are designed for lower rider stance and reduced rotational inertia. Most riders favor aftermarket poles for performance but need to confirm compatibility, sometimes fabricating adapters for older models to fit the pivot bracket properly. This customization requires moderate technical skill and should not be underestimated.

Pro Tip: Before purchasing any aftermarket pole, confirm the steering arm length matches your existing cable travel. A longer steering arm increases leverage but requires a longer cable or a cable adjuster. Mismatched arm length is the leading cause of post-install steering complaints.

OEM components offer the simplest installation path but sacrifice the performance geometry that makes freestyle riding more precise. For riders focused on competition or advanced trick riding, the added complexity of an aftermarket setup is worth the effort. Ipdracing stocks handpole tube wrap sets and compatible accessories that simplify the selection process for common stand-up platforms.

Key takeaways

A successful freestyle jet ski handpole install depends on correct steering geometry, proper component selection, and servicing bushings and cable joints during the same job.

Point Details
Prepare all components first Gather pivot bracket, grips, chin pad, bushings, and cable joints before starting removal.
Service bushings during install Replace steering bushings and ball joints now to avoid disassembling the pole again later.
Steering geometry drives performance Cable tension, pole tension, and handlebar leverage must be calibrated together for freestyle control.
Confirm fitment before buying Older ski platforms often need adapters or custom fabrication for aftermarket poles.
Test on water before riding hard Verify full steering lock clearance and cable tension with a slow-speed water test before aggressive riding.

Why steering geometry matters more than the pole you pick

I have watched riders spend significant money on premium aftermarket poles and then complain that their ski feels worse than stock. Almost every time, the issue is not the pole. It is the geometry setup. The pole is just a tube. What actually determines how a ski responds is the relationship between cable tension, steering arm length, and pivot bracket position. Get those three variables wrong and no pole on the market will fix the feel.

The other thing I see consistently is riders skipping bushing replacement because they want to save time. That decision almost always costs more time in the end. Accessing the lower steering bushing after a new pole is installed is genuinely difficult on most platforms. Spending 20 extra minutes replacing a $15 bushing during the install is one of the highest-return maintenance decisions you can make.

My honest advice: treat the handpole install as a full steering system service, not just a parts swap. Clean every pivot point, replace every wear item, and set the geometry from scratch. Riders who approach it that way consistently report better results than those who bolt on a new pole and expect it to transform the ski without any tuning.

— Casey

Get the right parts for your freestyle build from Ipdracing

Ipdracing supplies performance-focused PWC riders with the parts needed to complete a proper freestyle handpole setup, from tube wrap sets to full steering assemblies.

https://ipdracing.com

Ipdracing carries handle pole tube wrap sets designed for stand-up freestyle applications, along with grips, chin pads, and steering hardware for common platforms. The shop covers everything from recreation builds to full competition setups, so you can source compatible parts in one place. Browse the full Ipdracing shop to find handpole kits, steering components, and jet ski performance upgrades matched to your specific ski model.

FAQ

What is a freestyle jet ski handpole?

A freestyle jet ski handpole is the steering and control assembly on a stand-up personal watercraft, consisting of the handlepole tube, pivot bracket, grips, chin pad, and steering cable connection. Aftermarket versions are designed for a lower, more aggressive rider stance suited to freestyle trick riding.

How long does a handpole install take?

A straightforward handpole installation on a modern stand-up ski takes two to four hours, including steering geometry adjustment. Older platforms requiring adapter fabrication or full steering system service can extend the job to a full day.

Do I need special tools for installing a handpole?

Standard socket sets, wrenches, snap ring pliers, and a torque wrench cover most installations. Marine-grade thread locker and waterproof grease are also required for a durable, corrosion-resistant result.

Why does my steering feel heavy after installing a new handpole?

Heavy steering after a handpole install typically results from over-tensioned steering cable, insufficient pivot bushing lubrication, or a steering arm length mismatch. Calibrating pole tension carefully and verifying arm geometry resolves most cases.

Can I install a freestyle handpole on an older ski model?

Most older stand-up ski platforms require adapters or custom fabrication to fit modern aftermarket handpoles. Confirm pivot bracket bolt pattern compatibility and steering cable travel before purchasing any aftermarket pole for a pre-2010 ski.

Article generated by BabyLoveGrowth

4-Stroke Superjet Testing

Yamaha SuperJet Scoop Grate Shootout – RIVA, Jet Dynamics & WAX Racing Compared

1050 TR-1 Yamaha SuperJet Scoop Grate Shootout

Over the last several months, the IPD Racing team has put serious hours on Yamaha’s new four-stroke SuperJet. Like any new ski, it’s exciting — but it also comes with some frustrating handling issues. The most obvious flaw is cavitation. In rougher conditions, the ski struggles to stay hooked up, both in a straight line and leaned over in turns.

Why Intake Grates Matter

The new SuperJet hull is unlike older models and doesn’t behave like a traditional Deep-V. While hull shape can’t be changed, bolting on the right Jetski Performance Parts can make a huge difference. An aftermarket scoop grate helps keep the pump fed with water, reducing cavitation and improving hookup.

To find the best option, we tested three popular intake grates: RIVA Racing, Jet Dynamics, and WAX Racing Products. Each was ridden in a range of real-world conditions — flat bays, light lake chop, and the notorious rollers of Body Beach in Lake Havasu City. Riders included everyone from casual rec riders to world champion racer Kole Cramer, ensuring feedback across skill levels.

1050 4-Stroke SuperJet Test

RIVA Racing Scoop Grate

The RIVA grate was the first available for the TR-1 SuperJet. It stood out as the fastest in smooth water and impressed with flawless fit and finish. If top speed is your main goal, this is your pick. However, in rougher water and technical buoy courses, it trailed behind Jet Dynamics and WAX in hookup and braking. It’s a solid upgrade over stock, especially for riders focused on speed runs.

Jet Dynamics Scoop Grate

The Jet Dynamics single-bar design comes from a company with decades of race-proven experience. This grate offered the best hookup in rough water, the strongest drive out of corners, and the hardest braking effect into turns. Its aggressive scoop helps riders stay in control when conditions get messy. The only drawback? The fit and finish aren’t quite as refined as RIVA or WAX, but performance-wise, it’s a standout choice for racers.

WAX Racing Scoop Grate

The newest entry, the WAX Racing Products grate, is also a single-bar design. It shined in cornering, taking the top spot for best hookup in turns. It performed nearly on par with Jet Dynamics in rough water and braking, while also offering excellent fit and finish — on par with RIVA. It isn’t the absolute fastest, but it strikes a strong balance of speed, braking, and grip that riders will appreciate across all conditions.

1050 SuperJet Scoop Analysis

Comparison Rankings

  • Speed: 1) RIVA, 2) WAX, 3) Jet Dynamics
  • Rough Water Hookup: 1) Jet Dynamics, 2) WAX, 3) RIVA
  • Hookup in Turns: 1) WAX, 2) Jet Dynamics, 3) RIVA
  • Straight-Line Drive: 1) Jet Dynamics, 2) WAX, 3) RIVA
  • Braking: 1) Jet Dynamics, 2) WAX, 3) RIVA
  • Fit & Finish: 1) RIVA/WAX (tie), 2) Jet Dynamics

Speed Test Data

All testing was done on smooth water at sea level, 72°F air temperature. The SuperJet was equipped with a RIVA ECU tune, RIVA air intake, free-flow exhaust, Blowsion front sponsons, a stock ride plate modified with an IPD Racing fin, and a Solas 12/17 impeller. Average speeds reflect six passes with each grate:

  • RIVA Racing: 60.0 mph best pass, consistently fastest in glass conditions
  • WAX Racing: 59.6 mph peak, balanced performance with excellent corner grip
  • Jet Dynamics: 59.4 mph peak, slightly slower but unmatched in hookup and rough-water control

What This Means for Riders

Each scoop grate offers distinct strengths:

  • Choose RIVA if top-end speed is your priority.
  • Pick Jet Dynamics if you need confidence in chop and tight racecourse conditions.
  • Go with WAX Racing if you want balanced performance with premium finish and strong turning grip.

No matter which you choose, all three are massive improvements over the stock grate — and all are IJSBA race legal. For the best handling gains, pair your grate with complementary Jetski Products like ride plates, sponsons, and pump upgrades.

Final Word

Yamaha’s four-stroke SuperJet is an exciting platform with tons of potential, but like any race craft, it benefits from the right hardware. Intake grates are the first step, and our shootout proves that small changes can mean big differences in speed, stability, and cornering. With more development underway, especially alongside WAX Racing Products, expect even more dialed-in options in the near future.

Explore 1050 SuperJet Handling Products | All 1050 SuperJet Products

Choose wisely, and let your ski hook up the way it was meant to — faster, smoother, and ready for race day.