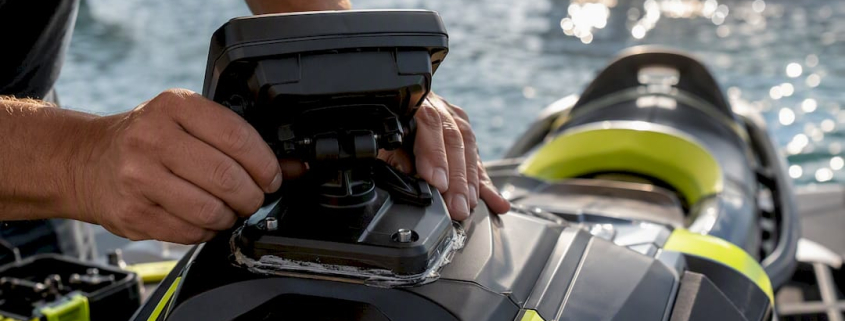
The fastest, safest, and most reliable GPS install on a personal watercraft uses a rigid mount on the upper cowling, forward of the handlebars, secured with RAM-style backing hardware or an OEM mount kit, and powered through a plug-and-play pigtail connection. This location keeps the display in your natural line of sight, and a rigid mount resists the vibration that blurs screens and loosens hardware at speed. Sealing the mount base with marine sealant closes off the one entry point most flush installs get wrong.
Two alternatives work for specific riders. A glovebox bail mount suits smaller GPS units and riders who want minimal drilling, though it forces you to glance down instead of ahead. A waterproof phone mount on the handlebar center clamp works fine for casual riders running Navionics or Wavve Boating instead of a dedicated marine unit.
Whatever you choose, visibility and vibration resistance decide whether the install survives your first season on the water. Here’s the full pwc gps mount setup workflow, broken into every decision point that matters.
- Primary approach: Upper cowling mount, RAM ball or OEM kit, pigtail power, marine sealant.
- Alternative 1: Glovebox bail mount for compact units.
- Alternative 2: Handlebar phone mount for app-based navigation.
- Safety note: Never mount a unit where reaching it or reading it requires taking your eyes off the water for more than a glance.
Key Takeaways
A rigid upper-cowling GPS mount with pigtail power and marine sealant outperforms every other PWC mounting method for visibility, vibration resistance, and long-term reliability.
| Point |
Details |
| Mount location matters most |
Upper cowling forward of the handlebars keeps the display visible without forcing you to look down. |
| RAM ball mounts resist vibration |
The ball-and-socket design absorbs shake that flat brackets transmit straight to the screen. |
| Pigtail power beats splicing |
Plug-and-play connections avoid damaging factory wiring and simplify future troubleshooting. |
| Sealant and gaskets prevent failure |
A tiny clearance error, even 1/16 of an inch, can compromise a seal or block a lid from closing. |
| Test under real riding posture |
Confirm the display is reachable and readable while holding your normal throttle stance, not just at the dock. |
Table of Contents
Best Mounting Locations on a PWC
Where you put the GPS determines whether you actually use it. Riders who mount a unit somewhere awkward tend to stop checking it within a few outings, which defeats the purpose of installing one at all.
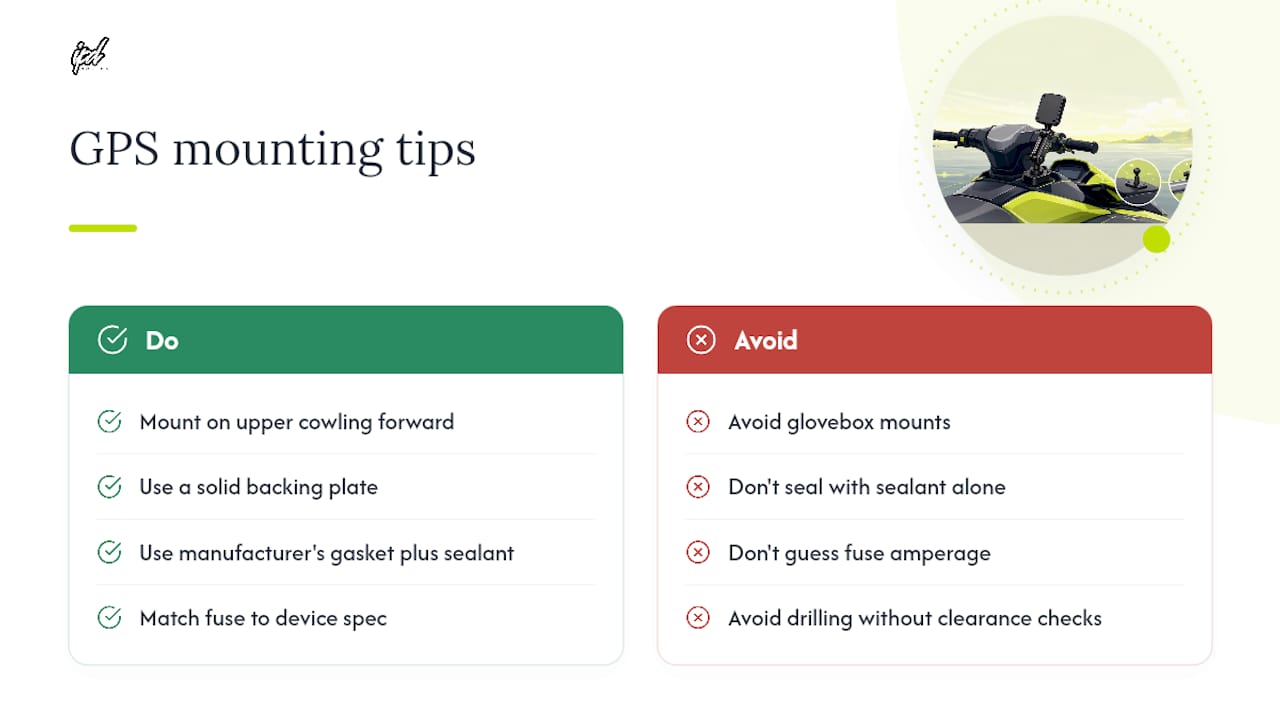
- Upper cowling or top deck, forward of the handlebars. This is the strongest all-around choice. It sits in your natural field of view, the cowling surface is usually flat enough for a solid base, and there’s typically enough clearance underneath for a backing plate. Before drilling anything, check clearance from underneath the cowling; even a small misjudgment on drill depth can hit wiring harnesses or structural ribs you didn’t know were there.
- Glovebox or storage-lid bail mounts. These need minimal drilling since many bail brackets clamp onto the lid’s lip rather than penetrating the surface. The trade-off is size: a bail mount only works with smaller displays, and you have to confirm the lid still closes and seals once the mount is in place. A mount that’s a hair too tall will prop the lid open just enough to let spray in.
- Handlebar mounts and center pad. Center-mounted units get more vibration than cowling mounts because the handlebar assembly moves independently from the hull in some designs. A stiff RAM arm minimizes flex, but expect more screen shake at speed than a top-deck install. Left-side handlebar placement is popular among riders who want the throttle hand free and the display close to their dominant eye line.
- Phone mounts versus dedicated marine units. A rugged waterproof phone mount running Navionics or Wavve Boating is cheaper and faster to install than a marine chartplotter, and it works on any of the best places to put a GPS on a jet ski that a dedicated unit would use. The catch is screen glare and battery drain in direct sun, which a purpose-built marine display largely avoids.
Pro Tip: Sit in your normal riding position before you commit to a location. A mount that looks perfect standing next to the ski often ends up blocked by your hands or torso once you’re actually leaning into a turn.
Mount Hardware: RAM Ball, Bail, Flush, and OEM Kits
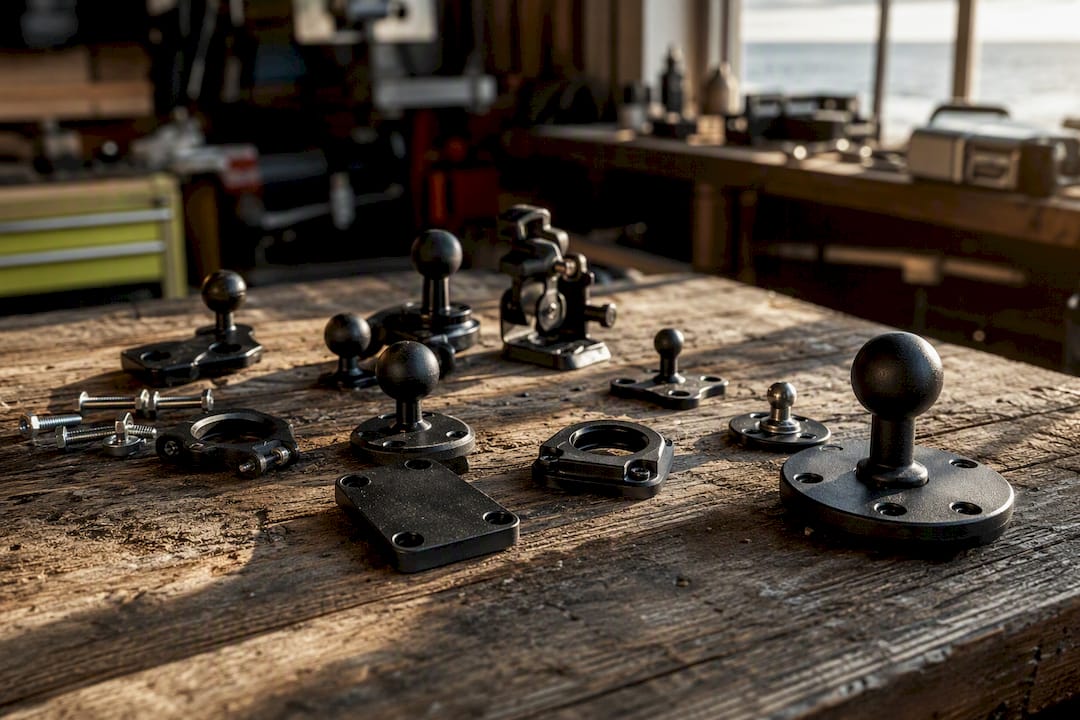
RAM ball mounts remain the go-to hardware for PWC GPS installs because the ball-and-socket design absorbs vibration instead of transmitting it straight into the device, and the socket arm gives you adjustment range you don’t get with a fixed bracket. Riders fitting the backing plate from underneath the cowling often get a tidy, rigid result when the hull structure allows access, according to one detailed Sea-Doo Spark forum install that walks through the process start to finish.
Which method fits depends on your hull and your device:
- RAM ball mounts suit any location where you want adjustability and vibration damping, especially cowling and handlebar installs.
- Bail or bracket mounts work best on glovebox lids and storage compartments where you want to avoid drilling through a sealed surface entirely.
- Flush mounts give the cleanest look for dedicated chartplotters like a Garmin echoMAP, but they demand precise cutouts and full gasket sealing since the device sits recessed into the surface.
- OEM mount kits, like the factory-style kit used on Sea-Doo Fish Pro models, come pre-matched to the hull’s mounting points and usually install in about an hour with basic tools, per a gallery install write-up from Watercraft Journal.
For thin cowlings, back the mount with a nut-plate instead of driving screws straight into gelcoat. Nut-plates spread the load across a wider area and cut down on the cracking that plagues single-screw installs on thin fiberglass. Use stainless steel fasteners throughout, since anything else corrodes fast in a saltwater environment, and apply anti-seize to threads before final torque so future removal doesn’t strip the plate.
Pro Tip: Countersink your screw holes slightly before mounting. A flush screw head sheds water instead of collecting it, which matters more than it sounds like on a surface that gets soaked every ride.
Wiring and Power: Pigtails, Fuses, and Routing
Whenever a plug-and-play pigtail is available for your GPS model, use it instead of splicing into factory wiring. Splicing factory audio or accessory circuits voids some warranty terms and creates a failure point that’s harder to diagnose later, especially once corrosion sets into a hand-taped connection. A factory-style kit for the Sea-Doo Fish Pro includes exactly this kind of pigtail as an add-on option, which keeps the entire wiring job plug-based rather than cut-and-splice.
- Add an inline fuse close to the power source, sized to the device manufacturer’s spec, never to the wire gauge alone.
- Route cable runs away from exhaust components and any moving parts like the steering cable or throttle linkage.
- Secure the harness with zip ties every few inches so vibration doesn’t work it loose against a sharp edge.
- Wrap any exposed connector in dielectric grease or a weatherproof cap before final assembly.
- Leave a small service loop of slack near the connector so future maintenance doesn’t strain the wire.
Chafe is the quiet killer of PWC wiring installs. A harness that looks fine on install day can wear through its insulation after a season of engine vibration rubbing it against a metal bracket. Anchor points and foam sleeving at contact points cost almost nothing and prevent a much bigger repair down the line. IPD Racing’s PWC audio system upgrade guidance covers the same routing discipline for accessory wiring, and the principles carry over directly to GPS installs.
Pro Tip: Disconnect the battery before any wiring work, even for a pigtail plug. A brief short while your hands are near a live circuit is a bad way to learn why that step matters.
Mounting a Transducer for Fish-Finder Setups
PWCs present a real constraint for transducer placement: there’s no through-hull option on most hulls, so rideplate or stern-mount transducers are the practical path for owners adding fish-finding capability alongside GPS. A rideplate mount, bolted to the existing rideplate at the stern, keeps the transducer in clean water flow behind the jet pump rather than in turbulence, which matters for reading accuracy at speed.
- Rideplate mounts give the cleanest signal because water flow across that section stays relatively undisturbed compared to areas closer to the hull’s chines.
- External transom brackets work on some hull shapes but tend to introduce more cavitation noise into the reading at higher speeds, since the bracket itself disturbs flow before it reaches the sensor.
- Cable routing from the transducer to the display has to clear the jet pump intake and any moving steering components entirely, with enough slack to avoid tension when the hull flexes.
Protect the cable run with a sleeve anywhere it passes near an edge or bracket, since the same chafe risk that threatens power wiring applies here, arguably more given how close the run sits to the pump housing. A transducer install that ignores hull flex around the intake area often shows intermittent dropout on the display, which reads as a device fault but is really a mechanical one. Riders focused on race-tuned hulls should weigh transducer drag against the tuning priorities that matter most for their setup, since any stern-mounted hardware adds a small amount of resistance.
Sealing the Install Against Water Ingress
Every flush or through-cowling install lives or dies on the seal. Garmin’s own install documentation for units like the echoMAP series calls for marine sealant between the mounting surface and the device housing, plus nut plates or backing plates on thin fiberglass sections where a screw alone won’t hold securely.
Even a small clearance miscalculation causes outsized problems: shop-level installers note that an error as small as 1/16 of an inch in drill placement can prevent a glovebox lid from closing fully or compromise the gasket seal around a flush-mounted unit, based on Wavve Boating’s install guidance. That’s a tolerance most home installers don’t think to check until the lid won’t shut right.
- Clean and dry the mounting surface completely before applying sealant. Any residual wax or grime keeps the sealant from bonding.
- Use the manufacturer’s gasket where one is supplied rather than sealant alone. The gasket is engineered for that exact cutout.
- Countersink screw holes and use backing plates on thin gelcoat sections to avoid cracking under torque.
- Apply dielectric grease to every connector before final assembly, and cap any unused ports with weatherproof plugs.
- Recheck the seal after the first few rides. Sealant can shrink slightly as it cures fully.
The Complete Install Workflow, Step by Step
Follow this sequence and you avoid the two most common install failures: drilling before checking clearance, and wiring before confirming fuse protection.
- Pre-install verification. Confirm cowling clearance underneath your planned mount location, locate the nearest factory wiring harness, and hold the manufacturer’s mounting template against the surface to check fit before marking anything.
- Gather tools and parts. At minimum you need a drill with the manufacturer-specified bit size, a countersink bit, marine sealant, stainless fasteners, a multimeter, wire crimpers or a proper connector kit, and the mount hardware itself, whether RAM ball, bail bracket, or OEM kit.
- Disconnect the battery. Do this before any drilling or wiring begins, even if you’re only test-fitting.
- Drill and test-fit the backing plate. Start with a pilot hole, confirm alignment against the template, then drill to final size. Test-fit the plate and mount hardware before applying any sealant.
- Route and connect wiring. Use the plug-and-play pigtail where available, add the inline fuse near the power source, and secure the harness away from heat and moving parts.
- Seal the mount base. Apply marine sealant and the manufacturer’s gasket, then torque fasteners to spec, snug but not overtightened, since overtightening can crack thin fiberglass even with a backing plate installed.
- Reassemble and bench test. Reconnect the battery and power on the unit before you close up any covers, confirming the display, backlight, and GPS fix all work.
- Run a short sea test. Take it out at low speed first, then work up to a normal cruising speed to check for vibration blur, water intrusion, or connector issues.
Pro Tip: During your sea test, try reading the display while holding your normal riding posture under throttle, not just standing still at the dock. A unit that’s perfectly readable at idle can become unreadable once your hands, arms, and body shift into an actual riding position.
Testing and Fixing the Most Common Install Problems
A proper pre-ride check takes two minutes and saves you from discovering a problem twenty miles offshore. Confirm the unit powers on, gets a GPS fix within the expected time, and that the chart or map data displays clearly in direct sunlight. If you added a transducer, check for a consistent depth reading rather than intermittent dropout.
- Blurry or shaking screen at speed almost always means the mount isn’t rigid enough. Swap a flexible bracket for a stiffer RAM arm or check that all mount fasteners are torqued to spec.
- Water intrusion around a flush mount usually traces back to a seal that wasn’t fully cured before the first ride, or a gasket that shifted during installation. Reseal and let it cure the full time the manufacturer specifies before running the ski again.
- Loose hardware after a few outings is a sign the backing plate wasn’t sized correctly for the surface, or fasteners weren’t using thread locker on a vibration-heavy mount point.
- Intermittent transducer readings point to cavitation near the mount location or a cable run that’s picking up interference from nearby wiring; reroute the cable further from the harness first.
If you’ve checked all of the above and the issue persists, especially anything involving factory wiring harnesses, hand the job to a professional installer rather than risk damaging electronics you can’t easily replace.
What IPD Racing Sees in Real Shop Installs
Shop-level GPS installs succeed or fail on the same details every time: backing plates sized to spread load instead of concentrating it on one screw, anti-vibration hardware chosen over rigid-but-brittle brackets, and wiring harnesses routed well clear of heat sources and moving parts. These are the same principles behind IPD Racing’s engine mount upgrades and audio system installs, where vibration control determines whether hardware lasts one season or five.
- Skip drilling until you’ve confirmed clearance from underneath the surface.
- Choose nut-plates over direct screws into gelcoat wherever the cowling is thin.
- Route every wire away from the exhaust and steering assembly before you zip-tie anything down.
Manuals, Tutorials, and Apps Worth Reviewing First
Before you pick up a drill, review the source material that matches your exact hardware. Manufacturer manuals carry the drill sizes and torque specs that generic advice can’t replace.
Why Most GPS Installs Fail Before They Start
The biggest obstacle to a good PWC GPS setup isn’t hardware. It’s hesitation. Riders buy a solid unit, then let it sit in a box because they’re unsure where to drill or how to wire it in without voiding a warranty. Forum threads on boards like Greenhulk back this up: mount uncertainty, not device quality, is what stalls most installs before they ever happen.
The conventional advice treats mounting as an afterthought to picking a GPS unit. That’s backward. Hardware choice matters far less than committing to one rigid, well-sealed location and executing it correctly the first time. A mid-range chartplotter on a bulletproof RAM mount beats a premium unit wobbling on a flimsy bracket every time you hit a wake at speed.
If you take one thing from this workflow, prioritize the mount’s rigidity and the seal’s integrity before you obsess over device features. Screen resolution won’t matter if the unit is unreadable at 40 miles per hour or dead from water intrusion by August. Get the mechanical foundation right first, then let the electronics do their job.
Frequently Asked Questions
What’s the best GPS mounting location on a jet ski?
The upper cowling forward of the handlebars is the strongest choice for most riders. It keeps the display in your natural line of sight and typically offers enough clearance underneath for a solid backing plate, unlike glovebox locations that force you to look down.
Do I need to drill into my PWC to install a GPS mount?
Not always. Bail or bracket mounts on a glovebox lid often require minimal or no drilling. A flush-mounted chartplotter or a cowling-mounted RAM ball system does require drilling, along with careful clearance checks beforehand.
Can I use a smartphone instead of a dedicated marine GPS?
Yes. A rugged waterproof phone mount paired with an app like Navionics or Wavve Boating is a cheaper, faster setup than a marine chartplotter, though screen glare and battery drain in direct sun are trade-offs worth considering.
How do I prevent water from getting into a flush-mounted GPS?
Use marine sealant along with the manufacturer’s gasket, never sealant alone, and confirm the mounting surface is completely clean and dry before applying either. Recheck the seal after your first few rides since sealant can shrink slightly as it cures.
What size fuse does a PWC GPS installation need?
Fuse size should match the device manufacturer’s power specification, not just the wire gauge you’re using. Check your GPS unit’s install documentation for the exact amperage rating before wiring in the inline fuse.
Ready to upgrade your mounting hardware or source backing plates built for high-vibration installs? IPD Racing’s shop carries mounting accessories and fasteners designed for PWC-specific installs, and the ProWatercraft handling parts relaunch covers additional hardware worth pairing with your GPS setup.
Sources
- Best GPS for Jet Ski | Top Devices & Smart Navigation Options – Wavve Boating
Recommended