

Jet Ski Bearing Carrier Explained: Owner’s Guide
What is a jet ski bearing carrier and why does it matter?
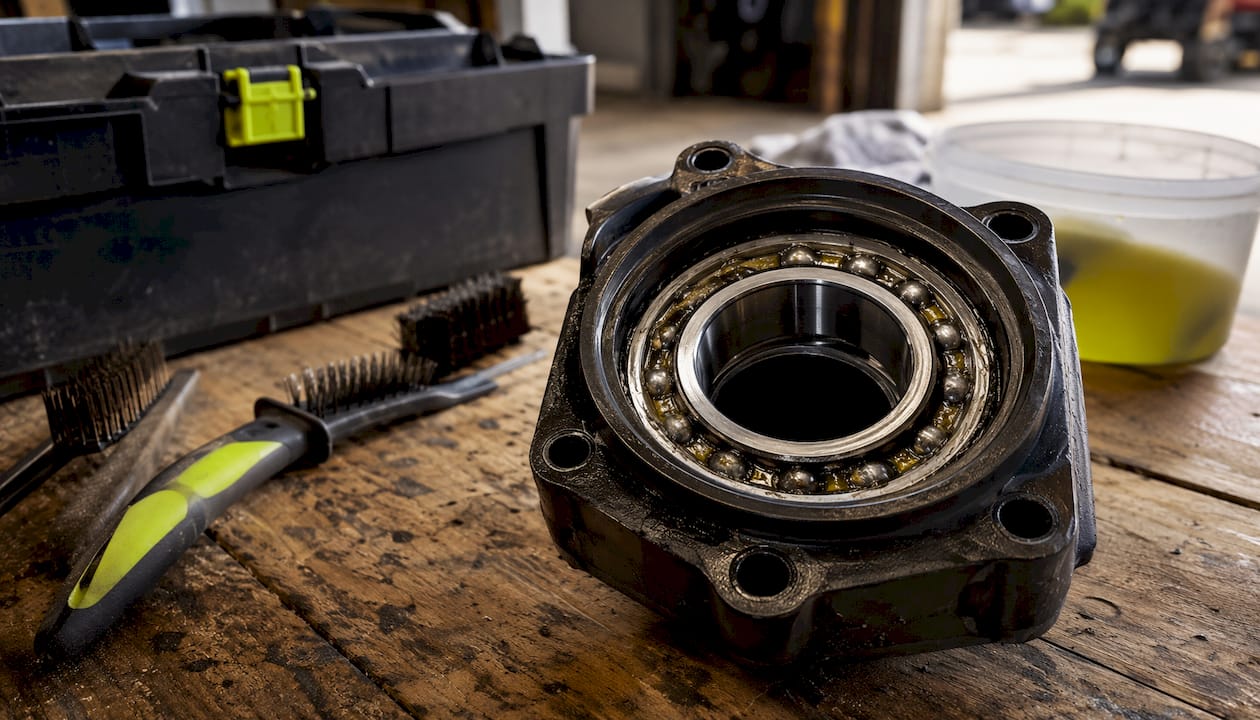
The bearing carrier is the through-hull assembly that houses the driveshaft bearings and seals, supporting the shaft as it exits the hull and enters the jet pump. Its job is twofold: keep the driveshaft spinning true and prevent water from entering the hull through that opening. Without a functioning carrier, water intrusion is a matter of when, not if.
Every time you throttle up, the driveshaft transfers engine power to the impeller through this assembly. The carrier absorbs radial loads, reduces shaft flex, and maintains the alignment needed for efficient propulsion. A failed carrier doesn’t just cause noise. It can flood the bilge, destroy the impeller, and damage the pump housing, turning a $75 inspection into a repair bill measured in hundreds of dollars.
Key functions the bearing carrier performs:
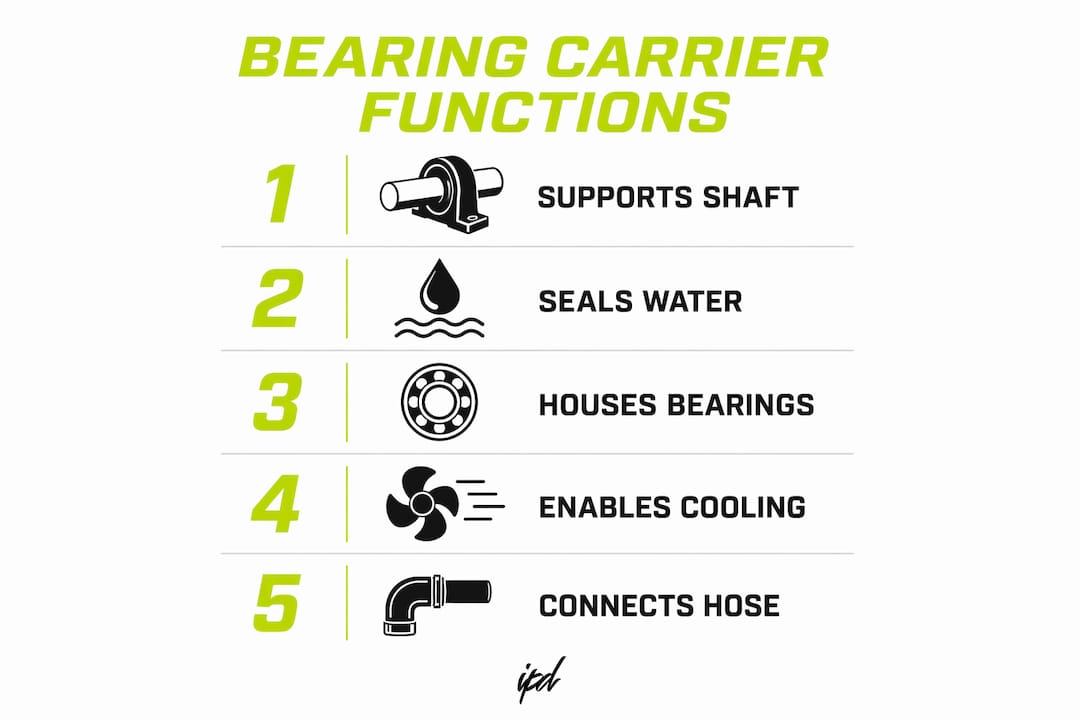
- Supports the driveshaft at the hull exit point to prevent flex and vibration
- Houses the bearings that allow the shaft to spin freely under load
- Seals the through-hull opening to block water intrusion into the engine compartment
- Maintains driveshaft alignment with the impeller for efficient power transfer
- Connects via a rubber hose to the through-hull fitting, forming the watertight interface
How the bearing carrier works inside your jet ski
The carrier sits at the rear of the hull where the driveshaft passes through to the pump. It clamps onto a rubber hose, which in turn connects to the through-hull fitting epoxied into the hull. That rubber hose is the critical link. It creates a flexible, watertight seal between the rigid hull fitting and the carrier body, absorbing minor shaft movement without cracking.
Inside the carrier body, one or more bearings support the shaft radially. These bearings are packed with marine-grade grease and surrounded by rubber seals that keep water out and grease in. On older two-stroke Sea-Doo models, the carrier used a traditional ball bearing design that required periodic greasing. Sea-Doo later redesigned the system to a carbon seal configuration because most owners never greased the bearings, leading to premature failures.
Pro Tip: If your ski has a carbon seal system rather than a traditional bearing carrier, the service protocol is different. Carbon seals wear down and need replacement, but they don’t require greasing. Confirm your system type before ordering any parts.
The carrier also plays a role in cooling water circulation. Water drawn into the pump passes through channels near the carrier assembly on its way to cool the engine. A compromised carrier seal can disrupt that flow, contributing to engine overheating even when the engine itself is mechanically sound.
| Component | Material | Function |
|---|---|---|
| Carrier body | Aluminum or reinforced polymer | Houses bearings and seals; mounts to through-hull fitting |
| Bearings | Steel ball bearings, marine-grade | Support driveshaft radially under load |
| Rubber seals | Nitrile or EPDM rubber | Block water ingress and retain grease |
| Rubber hose | Marine-grade rubber | Flexible watertight connection to hull fitting |
| Through-hull fitting | Aluminum | Fixed hull penetration point for driveshaft |
Kawasaki jet skis use sealed ball bearings in the driveline that cannot be greased. Once water gets into a Kawasaki pump housing, the bearings fail quickly, and the pump housing itself may need replacement since there is no replaceable wear ring in those designs.
Recognizing the warning signs of a failing bearing carrier
The most reliable indicator of bearing carrier trouble is water inside the hull near the pump housing during a seasonal inspection. By the time you hear abnormal noise, bearing failure has likely already caused collateral damage to the impeller shaft, the impeller, or the pump housing. Waiting for an audible signal is the most expensive mistake a jet ski owner can make.
Common symptoms to watch for:
- Grinding, rumbling, or whining noise from the rear of the ski under load
- Vibration felt through the hull or handlebars during acceleration
- Cavitation under hard throttle that clears when you back off
- Water pooling inside the hull near the pump area after a ride
- Reduced top speed or sluggish acceleration without an obvious engine cause
- Rough or uneven driveshaft rotation when the ski is out of the water
Cavitation is frequently misdiagnosed as an engine or fuel problem. Failing through-hull seals and bearing carriers letting air into the pump cavity are a leading cause. Neglected seals can also cause catastrophic engine overheating by cutting off cooling water circulation. Always check the carrier and seals before chasing engine-side causes.
Misdiagnosed cavitation is a real pattern in the PWC community. Owners replace fuel components, clean carburetors, and adjust timing before anyone looks at the carrier. If your ski cavitates under acceleration but runs cleanly at idle, the through-hull assembly deserves a close look before anything else. You can read more about racing jet ski cavitation causes and fixes for a deeper breakdown.
How to inspect and maintain your bearing carrier properly
Manufacturers recommend inspecting bearings and seals annually or every 50–100 engine hours, whichever comes first. Kawasaki’s owner documentation specifically calls for an initial inspection after the first 25 hours or one year, then every 50 hours or annually going forward. Racers and owners who tow tubes or skiers frequently should inspect more often, since prop imbalance from impact damage accelerates bearing wear.
Inspection checklist:
- Open the hull and look for water or grease near the pump housing
- Check the rubber hose connecting the carrier to the through-hull fitting for cracks, tears, or loose clamps
- Spin the driveshaft by hand and feel for roughness, binding, or play
- Inspect the carrier body for corrosion or physical damage
- On greasable designs, check the grease fitting for blockage or contamination
For greasable carrier designs, Yamaha recommends one grease shot per season through the driveline fitting. Over-greasing a Yamaha driveline fitting will blow out the rubber hose, creating an expensive mess. One shot is the limit. On sealed Kawasaki bearings, greasing is not possible. If water has entered the pump, replacement is the only path forward.
Pro Tip: Inspect the rubber hose clamps every season, not just the bearings. A loose clamp is one of the most overlooked failure points. Tighten or replace clamps before they allow water intrusion that destroys an otherwise healthy bearing.
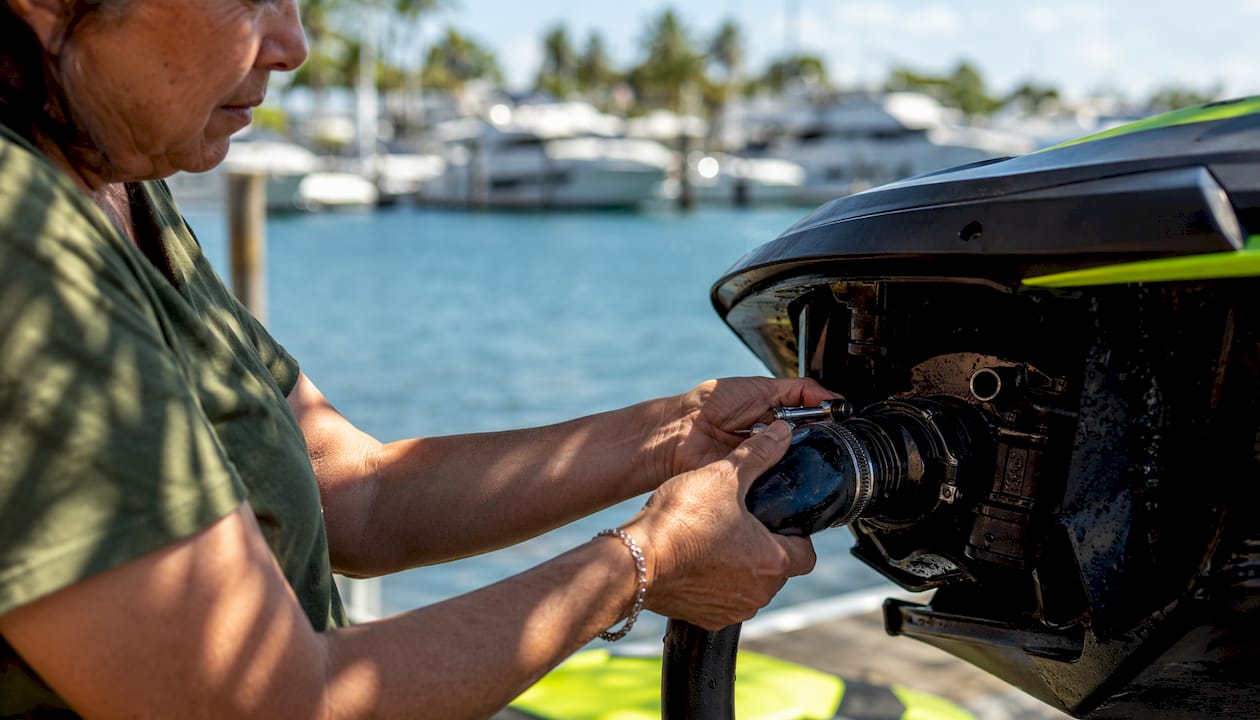
Pump bearing checks typically start at a modest cost at a qualified shop, with repairs billed against that initial cost. For guidance on carefully replacing jet ski bearing carriers and assemblies, see how to replace an ATV battery the right way. Catching a worn seal at that price point beats replacing a pump housing at several hundred dollars.
Step-by-step guide to removing and replacing the bearing carrier
Tools and preparation
Gather these before starting:
- Socket set and wrenches (metric and standard)
- Flathead and Phillips screwdrivers
- Rubber mallet
- Hose clamp pliers or flathead screwdriver
- Marine-grade silicone sealant
- Lithium-based waterproof bearing grease
- Replacement bearing carrier assembly (pre-assembled with bearings and seals pressed in)
- Clean rags and a drain pan
Pre-assembled carrier assemblies are the right choice for replacements. Buying bearings and seals separately and pressing them yourself risks misalignment and seal damage during assembly. A pre-assembled unit arrives ready to install with components already seated correctly.
Removal steps
- Remove the jet pump. Disconnect the pump from the hull by removing the mounting bolts. Slide the pump rearward to separate it from the driveshaft.
- Loosen the hose clamps. Locate the rubber hose connecting the carrier to the through-hull fitting. Loosen both clamps with hose clamp pliers.
- Slide the carrier off the hose. Pull the carrier rearward off the rubber hose. If it’s stuck, twist gently while pulling. Do not pry against the driveshaft.
- Inspect the rubber hose. With the carrier removed, examine the hose for cracks, hardening, or deformation. Replace it if there is any doubt about its condition.
- Clean the through-hull fitting. Remove old silicone or debris from the fitting surface before installing the new carrier.
Stuck bolts and silicone buildup are the most common removal headaches. Soak corroded fasteners with penetrating oil for 15 minutes before applying torque. Never use heat near the hull or rubber components.
Installation steps
- Slide the new carrier onto the rubber hose. Push it fully onto the hose until it seats against the through-hull fitting.
- Position and tighten the clamps. Place clamps at both ends of the hose and tighten firmly. Clamps should be snug but not so tight they cut into the hose.
- Apply silicone sealant if required. Some installations call for a thin bead of marine silicone at the carrier-to-fitting interface. Follow the specific model’s service documentation.
- Reinstall the jet pump. Slide the pump back onto the driveshaft and torque the mounting bolts to spec.
- Grease the driveshaft splines. Apply marine-grade grease to the splines where the shaft enters the impeller before final assembly.
- Test for leaks. Run the ski in a test tank or on the water briefly, then open the hull and check for any water near the carrier or pump housing.
Pro Tip: Replace the rubber hose any time you replace the carrier. The hose is inexpensive, and installing a new carrier on an old, hardened hose defeats the purpose of the repair.
Replacement bearing carrier assemblies for common Sea-Doo models, such as the WSM Complete Seal Carrier Assembly, typically cover 580cc and 650cc engines from the 1990s through the early 2000s. For Kawasaki 750 SX and SXI models, model-specific assemblies are available through performance parts suppliers. Sourcing from a trusted supplier with verified fitment data prevents compatibility problems that can arise from generic aftermarket parts.
For replacement parts and performance components, IPD Racing carries race-proven PWC parts suited for everything from recreational maintenance to competitive builds. Knowing your model year and engine displacement before ordering saves time and avoids returns.
Key Takeaways
The bearing carrier is the single through-hull component most responsible for keeping water out of your hull and your driveshaft spinning true. Inspect it annually, replace the rubber hose when in doubt, and never wait for noise before acting.
| Point | Details |
|---|---|
| Annual inspection is the standard | Manufacturers recommend bearing and seal inspection every 50–100 engine hours or once per year. |
| Water in the hull is the clearest warning sign | Finding water near the pump housing during a seasonal check indicates carrier or seal failure. |
| Cavitation is often misdiagnosed | Failing through-hull seals and bearing carriers are a leading cause of cavitation, not engine issues. |
| Pre-assembled carriers are the right replacement choice | Units with bearings and seals already pressed in reduce installation error and assembly risk. |
| Rubber hose condition is critical | Loose clamps or cracked hoses cause water intrusion that destroys bearings and can flood the engine compartment. |

