
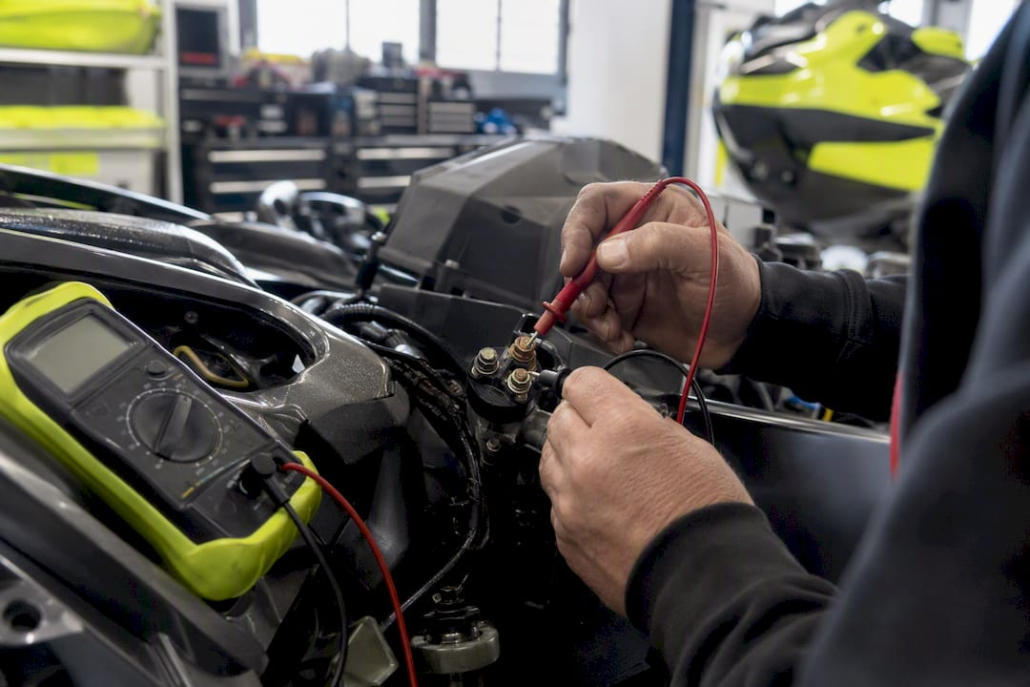
How PWC Electric Start Works: A Diagnostic Guide
A PWC electric start is a two-stage electrical system. A low-current start switch energizes a starter solenoid, which then closes a high-current path so a 12-volt battery can send full amperage to the starter motor and crank the flywheel.
Three parts do almost all the work: the battery, the starter solenoid (a relay that acts as a heavy-duty switch), and the starter motor itself. If you press the button and hear one click but nothing turns over, that click tells you the solenoid coil energized but the high-current side failed to deliver power. Reputable aftermarket suppliers like IPD Racing and Protorque build replacement starters and solenoids specifically because these two parts fail more often than the wiring around them.
- Battery: stores and supplies the 12-volt charge that cranks the engine.
- Starter solenoid: switches high current on command from a low-current signal.
- Starter motor: converts that current into mechanical force on the flywheel.
Key Takeaways
A PWC electric start relies on a low-current control circuit triggering a solenoid, which then delivers full battery current to the starter motor to crank the engine.
| Point | Details |
|---|---|
| Two-stage system | A low-current switch energizes the solenoid, which closes a high-current path to the starter motor. |
| One click, no crank | Usually means the solenoid coil worked but the high-current side failed or the battery sagged. |
| Check voltage first | Resting voltage near 12.6 volts and under-load readings above 9 to 10 volts confirm battery health. |
| Pull codes before parts | ECU lockouts often stem from a bad sensor or connector, not a failed component. |
| Upgrade path | Protorque starters from IPD Racing offer a direct-fit replacement when bench tests confirm starter failure. |
Table of Contents
- Key Components in a PWC Electric-Start System
- What Happens Electrically When You Press Start?
- Why Won’t It Start Even When the Battery and Starter Look Fine?
- How Do You Test a PWC Starter System Step by Step?
- When Should You Replace the Starter, Solenoid, or Battery?
- Routine Maintenance That Prevents Starting Problems
- Get the Right Starter Parts Without the Guesswork
- Frequently Asked Questions
- Sources
Key Components in a PWC Electric-Start System
Every electric start system on a jet ski runs through the same basic chain of parts, whether it’s a Sea-Doo, a Yamaha, or a Kawasaki. Knowing what each piece does makes troubleshooting a lot less guesswork and a lot more process.
- Battery: usually a sealed 12-volt unit; weak cells cause slow or no cranking.
- Main battery terminals: corrosion or loose clamps here mimic a dead battery.
- Starter motor: spins the flywheel; seizes internally after water intrusion or age.
- Starter solenoid/relay: the switch between low-current control and high-current power; contacts pit and stick over time.
- Start/stop switch and lanyard kill switch: the rider-facing controls that open or close the control circuit.
- Safety interlocks (neutral, hood, or seat sensors): block start signals when a condition isn’t met.
- Fuses/circuit breaker: protect the low-current side; a blown fuse looks identical to a dead switch.
- Wiring and main power cables: carry both signal and heavy current; chafe points and connectors corrode.
- Ground points: often overlooked, and a poor ground can produce symptoms that look like a failed ECU.
- ECU interlocks: software-side logic that can block starting even when every mechanical part is fine.
When a starter finally gives out for good, a Protorque Jet Ski starter motor is a straightforward drop-in path back to reliable starts, and we’ll cover fitment specifics further down.
What Happens Electrically When You Press Start?
The sequence from button press to flywheel rotation happens in well under a second, but each link in the chain has its own failure signature.
- You press the start switch. This closes a low-current control circuit. No click at all usually points to a dead switch, blown fuse, or an open safety interlock.
- The solenoid coil energizes. You should hear a distinct click. If you don’t, test for voltage at the solenoid’s small control terminal.
- The solenoid closes its heavy-duty contact. This is the moment the two-stage design does its job: the solenoid acts as a high-current switch so the start button itself never has to carry starter amperage.
- The battery sends full current to the starter motor. A click followed by silence commonly points to solenoid contact wear or the battery sagging under load.
- The starter engages its bendix or pinion gear and physically turns the flywheel. Slow, labored cranking usually means high resistance somewhere in the circuit rather than a dead battery outright.
- The engine fires, and the starter disengages automatically once the flywheel is spinning under its own power.
Statistic Callout: A weak battery is one of the most common root causes owners overlook. Many PWCs need resting voltage around 12.6 volts or higher just to crank reliably, even when the battery has enough charge left to run the gauges and lights.
Why Won’t It Start Even When the Battery and Starter Look Fine?
Sometimes every component tests good in isolation, and the craft still won’t crank. That’s almost always a safety interlock or an ECU protective lockout, not a mechanical failure.
- Lanyard kill switch: if it’s not seated, the control circuit stays open regardless of battery or starter condition.
- Neutral or park switch: some models won’t allow cranking unless this switch confirms the right position; corrosion or a stuck contact breaks the signal.
- Hood or seat sensor: a common source of no-start after heavy wave exposure, since water intrusion corrodes these connectors first.
Beyond the switches, the ECU itself can block starting as a protective measure when a sensor reads out of range or the rectifier/regulator shows a fault. Owners often assume a stored code means a catastrophic failure, when it’s frequently a corroded connector or a marginal sensor reading triggering a conservative shutdown.
Pro Tip: Always pull stored fault codes, or at minimum check for a warning light, before you replace any electrical component to follow best practices in diagnostics and solutions for service engine lights." Chasing a phantom starter problem when the real issue is a $12 sensor wastes both time and money.
How Do You Test a PWC Starter System Step by Step?
Before touching anything, disconnect the battery, put on eye protection, remove jewelry, and make sure the craft can’t accidentally fire while you’re working near the flywheel.
- Check resting battery voltage. A healthy battery reads around 12.6 volts at rest, climbing to roughly 13.5 to 14.5 volts while charging.
- Check voltage at the starter power stud while someone presses start. A voltage check under load is the single most informative quick test because it separates a battery problem from a starter or wiring problem in one reading.
- Listen for the solenoid click, then test for coil voltage at its small control terminal to confirm the low-current side is doing its job.
- Run a voltage-drop test across the battery positive cable to the starter stud, and across the ground path to the starter body. Excess resistance here shows up as heat and a slow crank long before it shows up as a dead short.
- Bench test the starter and solenoid separately. Shorting the two heavy studs on the solenoid with caution will bypass the control circuit entirely; if the starter cranks when shorted, the motor itself is fine and the fault sits upstream in the solenoid, switch module, or wiring.
- Inspect and clean ground points, then check the fuse or circuit breaker for corrosion or a hairline break that a visual glance can miss.
Statistic Callout: Under-load voltage significantly below normal during cranking points to a weak battery or serious resistance in the circuit, not a bad starter motor.
- Stop and let a shop handle it if you find internal starter mechanical failure, a hydrolocked engine, or high-current harness damage that needs proper crimping and heat-shrink work.
- Use insulated tools and full eye protection any time you’re bench testing or shorting solenoid studs; sparks and high current are normal parts of the process, not a sign something’s wrong.
When Should You Replace the Starter, Solenoid, or Battery?
Testing tells you which part failed. These thresholds tell you when repair stops making sense and replacement takes over.
- Replace the battery if resting voltage sits below 12.4 volts, or if voltage sags below 9 to 10 volts the moment you hit start.
- Replace the solenoid if it clicks reliably but never passes power, or if it sticks closed intermittently, a known issue on older solenoids with metal backing plates that corrode internally.
- Replace the starter if a bench test shows no torque at all, or if it spins freely without engaging the flywheel, a classic sign of a worn bendix or pinion.
When you’re shopping for a replacement, check three things: fitment by make, model, and year; the starter’s current rating against your engine’s cranking demands; and whether it’s an OEM-style unit or an aftermarket bolt-on. A Protorque starter is built as a direct-fit aftermarket option for a wide list of platforms, with a fully molded housing that avoids the corrosion issues older metal-backed solenoids are prone to. If you’re not certain about compatibility, confirm fitment before ordering rather than guessing from a parts number alone.
Routine Maintenance That Prevents Starting Problems
Most starting failures trace back to neglect rather than a defective part. A short seasonal routine catches nearly all of it before it strands you on the water.
- Clean battery terminals, then torque and protect main battery cables against corrosion.
- Remove, clean, and re-torque ground points; corroded grounds are one of the most overlooked failure points on marine electrical systems and often get misdiagnosed as sensor or ECU faults.
- Check the fuse box for water intrusion, and test the lanyard and start button for clean, reliable contact.
- Confirm charging voltage runs 13.5 to 14.5 volts while the engine is running.
- Keep the battery on a smart maintainer during storage, run the craft periodically, and drain or replace old fuel so a fuel issue doesn’t get mistaken for an electrical no-start.
- Seal exposed connectors with dielectric grease and re-check booted connections after any heavy spray session.
Essential Tools and Diagnostic Readers You’ll Need
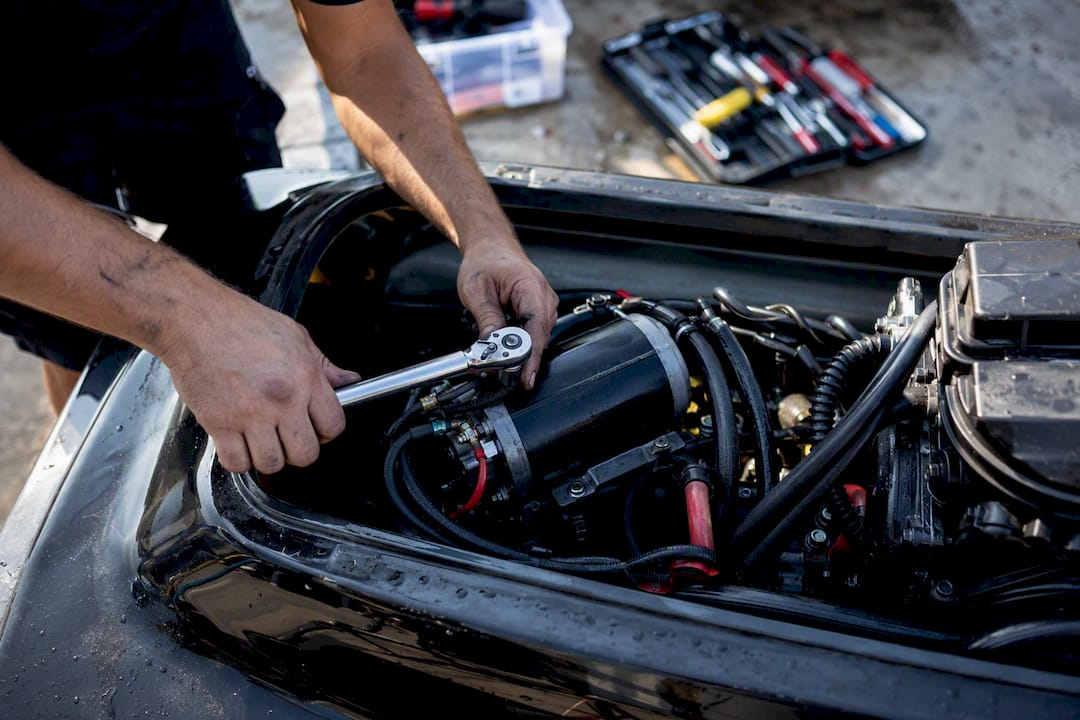
A basic kit covers nearly every test above: a quality multimeter with DC voltage and continuity settings, a 12-volt jump pack (used cautiously), insulated hand tools, a battery terminal cleaner, dielectric grease, and a torque wrench for terminal hardware. Many modern PWCs need dealer-level tools to pull ECU diagnostic trouble codes, so check for a model-specific code reader before assuming you need one. Pull codes first, always, before you buy replacement parts. When you do need hardware, Protorque starters and related parts cover most of what a season of wear and tear will throw at you.
What Racers Learn About Starter Failure at the Track
At race events, starter failures cluster around heat cycling and high-frequency restarts, not age alone. That pattern is exactly why racers often move to higher-current Protorque units before a stock starter gives out mid-heat. If you’re upgrading wiring or harness capacity alongside the starter, get a shop to handle the high-current connections.
Get the Right Starter Parts Without the Guesswork
Diagnosing a no-start is only half the job. Once you’ve isolated the failure, IPD Racing carries the parts to fix it right the first time, rather than swapping components on a hunch.

IPD Racing stocks Protorque starter motors built as direct-fit replacements across a wide range of Sea-Doo, Yamaha, Kawasaki, and Polaris platforms, so you’re not stuck hunting for a discontinued OEM part. Before you order, check fitment by make, model, and year, and reach out to tech support if anything about your setup looks non-standard. Beyond starters, the full performance parts catalog covers solenoids, battery hardware, and the wiring accessories that keep an electric start system reliable season after season.
Frequently Asked Questions
How does a PWC electric start work if the battery seems fine but nothing happens?
A charged battery doesn’t guarantee a good start signal. Check the lanyard kill switch, neutral interlock, and fuses first, since any open safety circuit stops the sequence before it reaches the solenoid.

What does a single click from the solenoid mean?
It means the low-current control circuit worked and the coil engaged, but the high-current path failed to deliver power to the starter. That points to a worn solenoid contact, a corroded cable connection, or a battery sagging under load.
Can a bad ground really stop a PWC from starting?
Yes. A corroded or loose ground point adds resistance that can mimic a failed sensor or a weak battery, and it’s one of the most commonly overlooked fixes during routine maintenance.
Should I replace the starter or the solenoid first?
Bench test both separately. Shorting the solenoid’s heavy studs isolates whether the starter motor itself works; if it cranks fine that way, the solenoid or its control wiring is the actual problem.
When does an upgrade to a Protorque starter make sense?
Consider it once a bench test shows a worn or seized starter, or if you’re racing and cycling starts frequently enough that heat buildup is shortening the stock unit’s life.
Sources
- MDB2 Draft Extract – Starters (Marine Diesel Basics)
- PWC electrical systems: what every rider should know about the ECU, sensors, and keeping it all running — BoatBlurb
- How to Diagnose a Jet Ski That Won’t Start — Jettek Watersports
- Help needed to diagnose ’99 genesis 1200 – Greenhulk Personal Watercraft Performance Forums

